Jewelry making can be a wonderfully rewarding hobby, allowing for creative expression and the crafting of unique, personalized pieces. Today, we’re diving into a particularly accessible project: creating a stunning copper wire ring. This simple yet elegant design is perfect for beginners, requiring minimal tools and materials, making it an ideal introduction to the world of wire wrapping. The warm, malleable nature of copper lends itself beautifully to this technique, resulting in a piece of jewelry that’s both stylish and surprisingly easy to create.
Forget expensive jewelry stores and embrace your inner artisan! This tutorial provides a clear, concise, and easy-to-follow seven-step guide to crafting your own beautiful copper wire ring. Get ready to learn the techniques and discover the satisfaction of making something truly special with your own two hands, so let's get started with the step-by-step process!
Safety Guidelines
- Always use insulated copper wire to avoid electric shock. Bare copper wire should never be used for jewelry making.
- Wear safety glasses to protect your eyes from flying wire ends or debris during shaping.
- Copper wire can be sharp. Handle with care to avoid cuts. Use pliers to manipulate the wire and avoid handling it directly as much as possible.
Methods: Elegant Copper Wire Ring
Tools Needed
- 18 gauge copper wire
- flat nose pliers
- cylindrical object (e.g., mascara bottle)
- wire cutters
- file (optional)
Step-by-Step Instructions
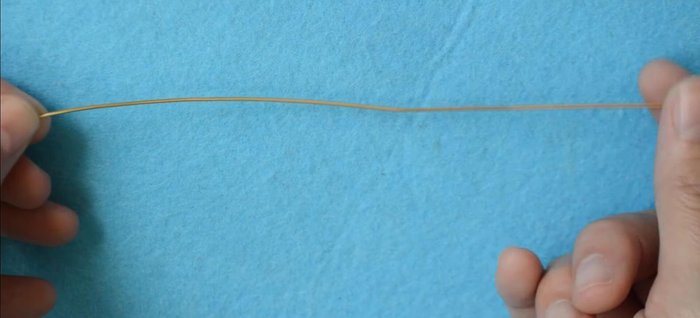
Prepare the Wire
- Cut a 30cm piece of copper wire (adjust based on finger size).

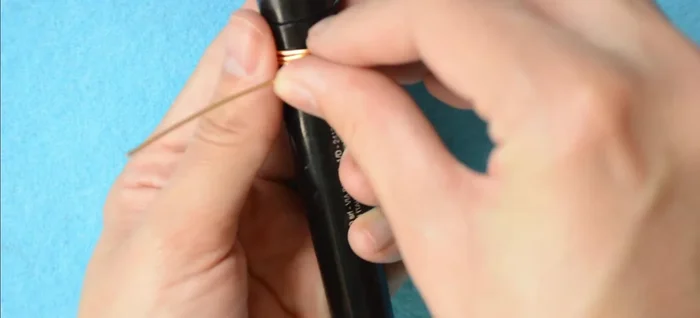
Prepare the Wire Initial Wrap and Positioning
- Wrap the wire twice around a cylindrical object, ensuring the tails face opposite directions.
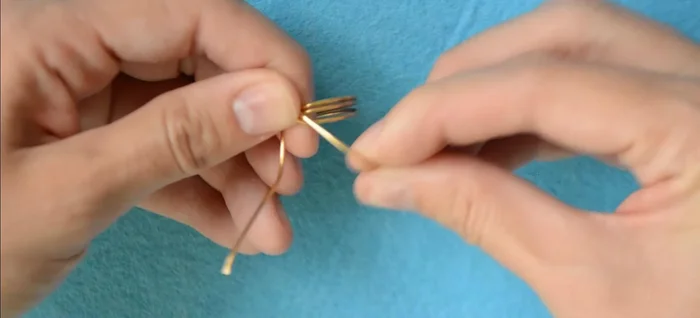
Initial Wrap and Positioning Twist the Tails
- Twist both tails slightly.
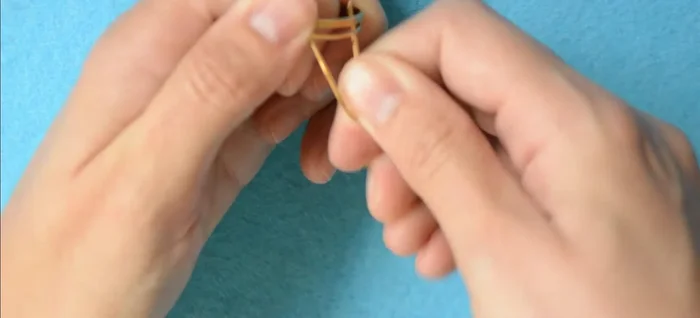
Twist the Tails Wrap and Secure One Side
- Hold the center tightly and wrap one side around it, using flat nose pliers for better fastening.
Wrap and Secure One Side Wrap and Secure the Other Side
- Repeat step 4 on the other side.
Wrap and Secure the Other Side Refine the Shape
- Wrap the tails again to create a neat shape.
Refine the Shape Finish and Polish
- Cut the excess wire, hide the ends, and optionally file them smooth to prevent scratches.
Finish and Polish


Tips
- Copper wire is easier to work with than brass.
- Filing the ends creates a more professional finish and prevents sharp edges.
Read more: DIY Dainty Gemstone Rings: Two Easy Techniques for Beginners