Twisted wire jewelry is a captivating craft, allowing for the creation of unique and elegant pieces with relatively simple techniques. Imagine transforming humble wire and beads into stunning pendants that catch the light and showcase your personal style. This isn't about intricate metalwork; instead, we'll explore easy-to-master methods that yield impressive results, perfect for beginners and seasoned crafters alike. You'll learn how to manipulate wire to create intriguing textures and settings, perfectly complementing the beauty of your chosen beads and stones.
This tutorial provides a detailed, step-by-step guide to crafting beautiful pendants using twisted wire. We'll cover everything from choosing the right materials to securing your beads, ensuring you achieve professional-looking results with minimal effort. Get ready to unleash your creativity and discover the joy of creating exquisite, personalized jewelry!
Safety Guidelines
- Always wear safety glasses to protect your eyes from flying wire pieces.
- Use wire cutters specifically designed for jewelry making to avoid bending or breaking the wire, and ensure a clean cut.
- Be mindful of sharp wire ends. Keep them pointed away from you and use pliers to carefully bend them flat before wearing your finished piece.
Methods: Twisted Wire Pendant with Beads
Tools Needed
- 8mm bead
- 22 gauge copper wire (0.6mm, ~10 inches)
- 28 gauge weaving wire
- Round nose pliers
- Wire cutters
Step-by-Step Instructions
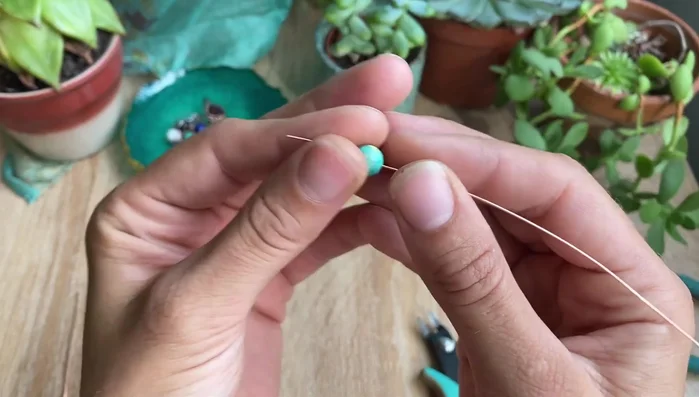
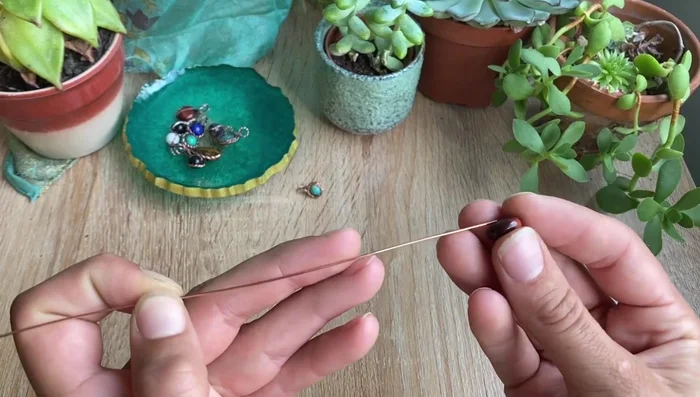
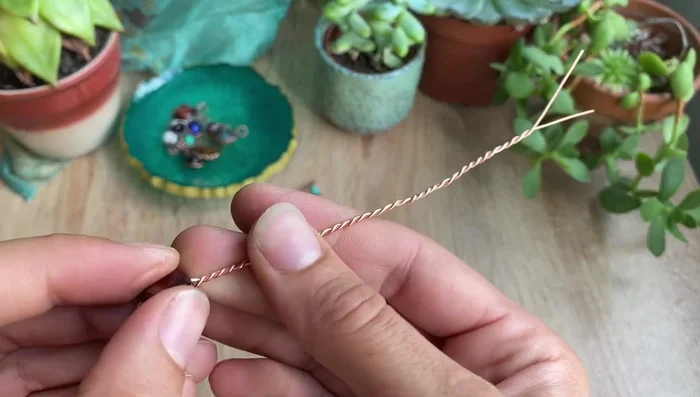
Prepare the Wire and Bead
- Put the bead onto the middle of the wire.
- Fold one wire towards the top.

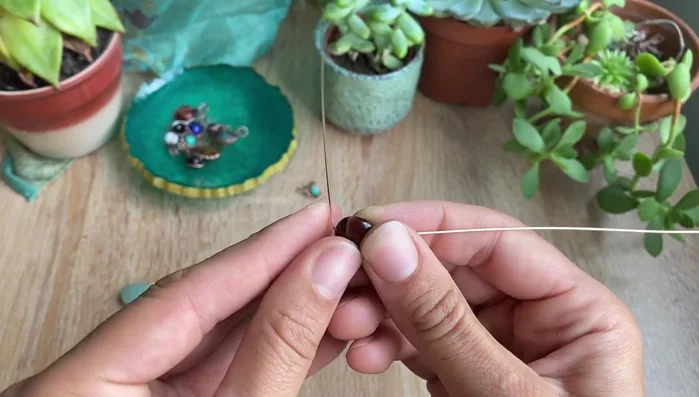
Prepare the Wire and Bead Twist the Wire
- Twist the two wires together, keeping them at a similar angle to prevent uneven twisting.
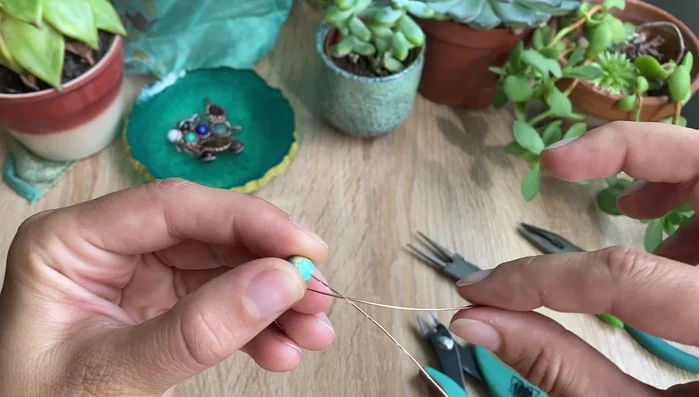
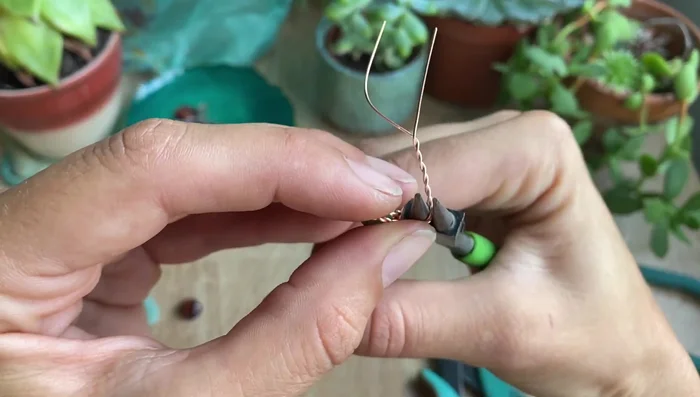
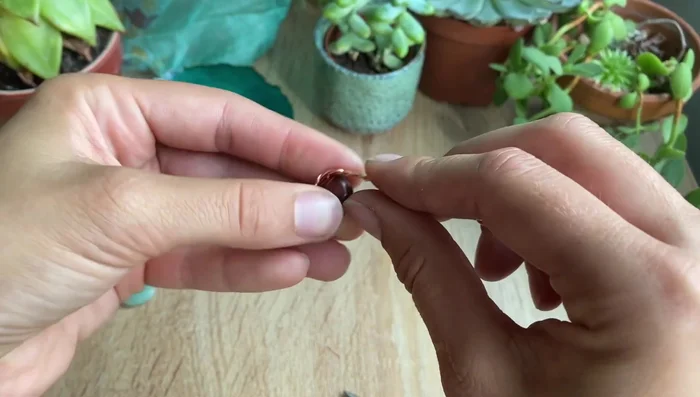
Twist the Wire Wrap and Shape the Wire
- Twist almost to the end, then wrap the wire around the bead.
- Gently curve the wire around the bead to shape it.
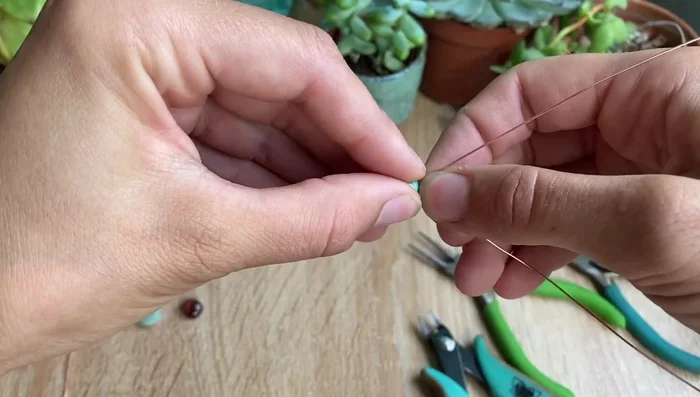
Wrap and Shape the Wire Form the Bell
- Use round nose pliers to curve the top wire to create a bell shape.
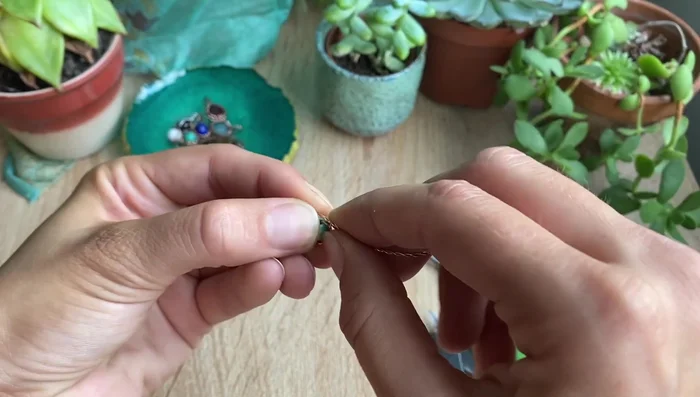
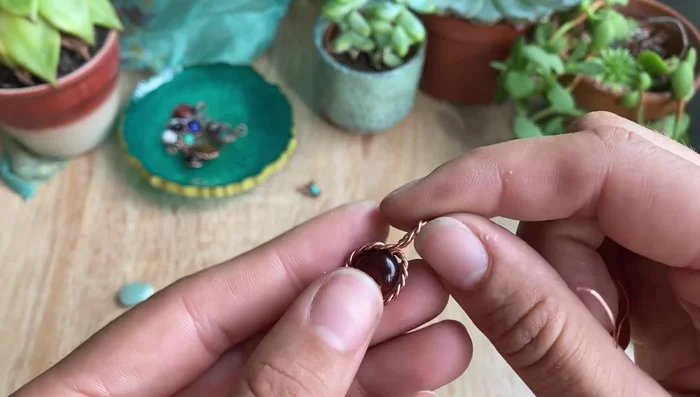
Form the Bell Secure the Pendant
- Secure the twisted wire with 28 gauge weaving wire, wrapping it around both wires at the top several times to prevent unraveling.
Secure the Pendant

Tips
- Use 22 gauge wire to start, as it's easier on the fingers.
- Keep the wires at a similar angle while twisting.
- Only twist one end to prevent an uneven look.
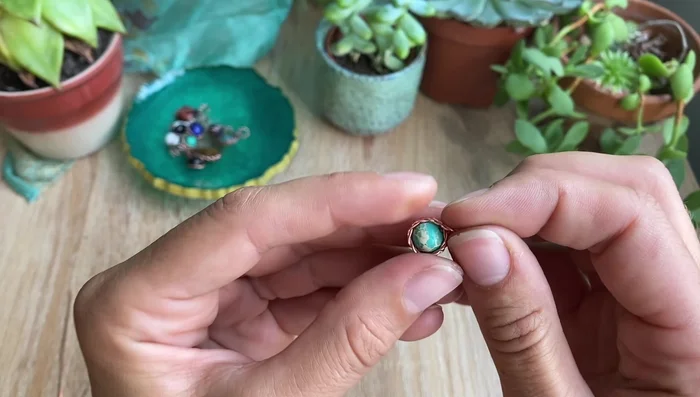
Methods: Twisted Wire Pendant with Flat Stones (Tiger's Eye Example)
Tools Needed
- Flat stone (Tiger's Eye example)
- 20 gauge copper wire (~12 inches)
- 28 gauge weaving wire
- Round nose pliers
- Wire cutters
Step-by-Step Instructions
Prepare the Wire and Stone
- Slide the stone onto the middle of the wire.
- Fold one end of the wire up.
Prepare the Wire and Stone Twist the Wire
- Twist the wires together.
Twist the Wire Shape the Pendant
- Shape the wire around the stone.
Shape the Pendant Form the Top Loop
- Use round nose pliers to create a bell shape at the top.
Form the Top Loop Secure the Pendant
- Secure the twisted wire with 28 gauge weaving wire.
Secure the Pendant

Tips
- You can use 22 gauge wire if 20 gauge is too difficult.
- Tightly pinch the wires before twisting.
Read more: DIY Maple Burl Bead Necklace: A Step-by-Step Guide