Embark on a creative journey with this easy-to-follow tutorial, where we'll craft a stunning Stargate-inspired bracelet using the delightful technique of "Easy Sailing." This beautiful bracelet, with its intricate, almost mystical pattern, is surprisingly simple to make, perfect for both beginners and experienced crafters seeking a new challenge. The "Easy Sailing" method utilizes a straightforward knotting technique, making it accessible to anyone eager to learn a new skill and add a unique handmade piece to their jewelry collection. Imagine the satisfaction of creating this eye-catching accessory!
This Stargate bracelet is a testament to the power of simple techniques producing complex results. The mesmerizing pattern, reminiscent of ancient cosmic portals, is achieved through a repetitive yet rewarding knotting process. Ready to unlock the secrets of this captivating design and add a touch of celestial charm to your wrist? Let's dive into the step-by-step instructions that will guide you through creating your very own Stargate bracelet.
Preparation and Safety Guidelines
- 2 feet of paracord (main color)
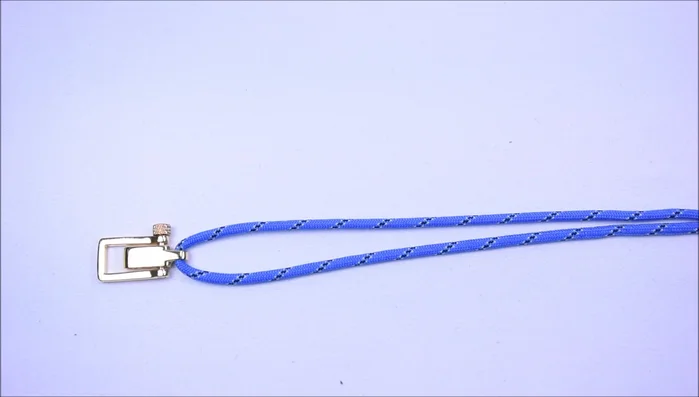
- Mini Shackle
- Lighter
- Micro cord (optional, black or dark gray)
- Always use sharp, high-quality scissors to prevent fraying and ensure clean cuts. Dull scissors can cause the thread to snag and break.
- Maintain consistent tension on your threads throughout the braiding process. Inconsistent tension will result in an uneven and potentially weak bracelet.
- If using a knotting tool, be mindful of the force applied. Excessive force can break the thread or damage the tool. Use a gentle, steady pressure.
Step-by-Step Instructions
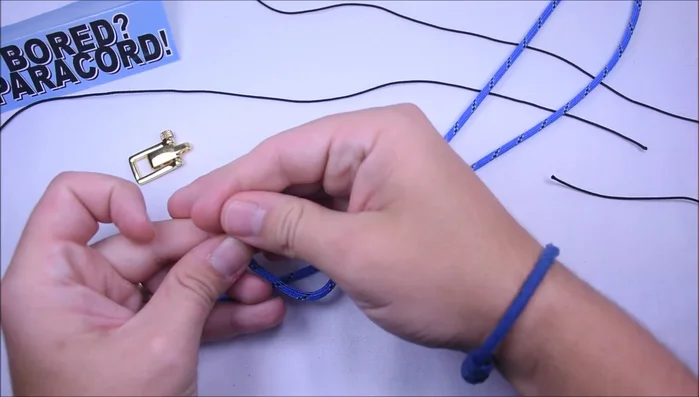
Prepare Materials
- Measure approximately 2 feet of your main paracord color. Wrap it twice around your wrist and add a half inch. This is your bracelet length.
- Cut small pieces of micro cord (or use inner strands of paracord) and seal the ends with heat.

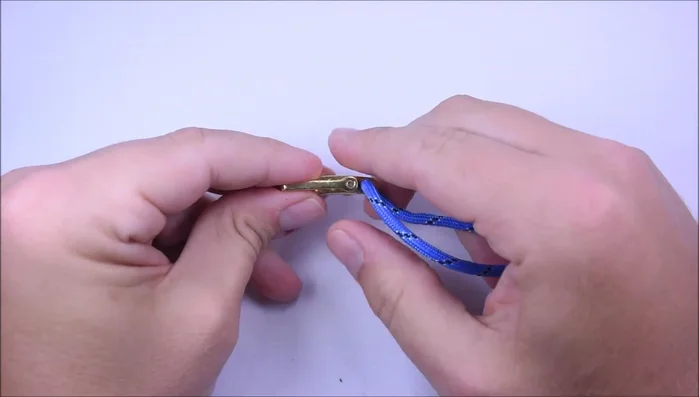
Prepare Materials Secure the Shackle
- Melt and seal one end of the paracord, using a lighter. Insert the other end through the mini shackle.
- Insert both ends of the paracord through the mini shackle, making sure it's on its smallest setting. Pull it tight to secure it.
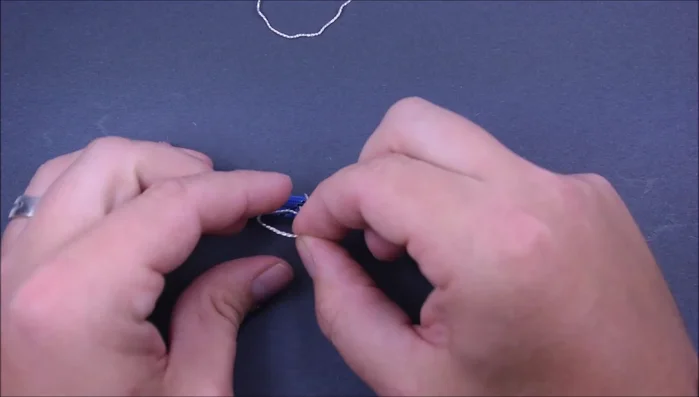
Secure the Shackle Create First Stargate Side
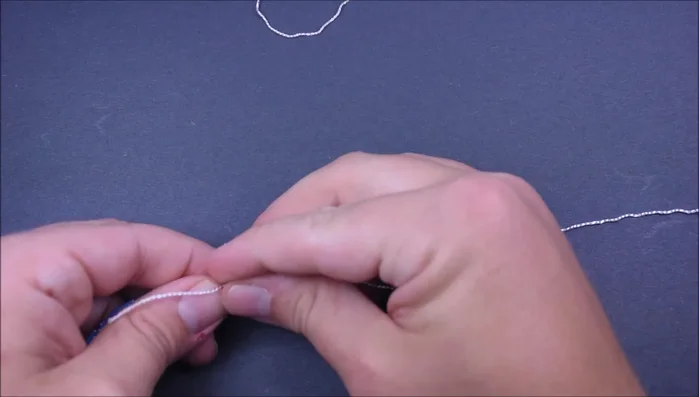
- Wrap one accent cord around the paracord near the shackle seven times, creating a spiral tunnel. Thread the end under the last wrap.
- Pull the accent cord tight. The right cord goes under to the left, and the left cord goes under to the right. Repeat until the ends are snug against the bracelet.
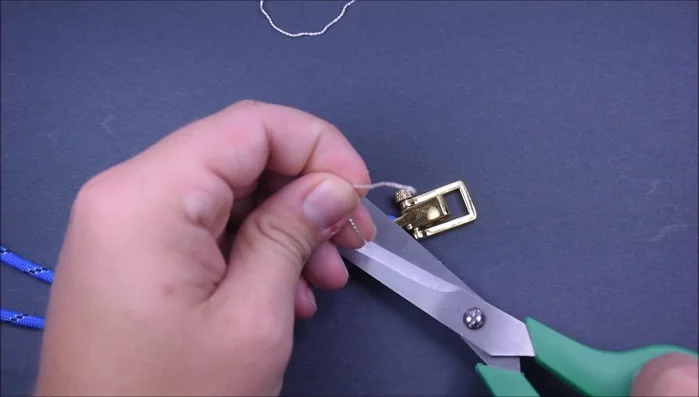
- Cut the ends of the accent cord close to the bracelet and seal them with heat.
Create First Stargate Side Create Second Stargate Side
- Repeat steps 5-7 for the opposite side of the bracelet.
Finishing and Clean Up
- Pull the ends snug and adjust if necessary. Trim and seal any excess paracord.
Read more: DIY Crystal Bracelet: Easy Square Knot Tutorial
Tips
- When measuring paracord, wrap it twice around your wrist and add ½ inch.
- Use the mini shackle on its smallest setting for the best fit and look. You can always adjust it bigger.
- When wrapping the accent cord, make sure the ends stay within the spiral tunnel.
- To easily thread the accent cord through, create a small gap in the bracelet’s wraps to form a tunnel.
- Use a dab of super glue as an alternative to heat-sealing the ends of the paracord.