Friendship bracelets are a timeless symbol of connection and shared experiences, and the chevron pattern, with its bold, geometric design, is a particularly popular choice. This classic design might seem intimidating to the beginner, but fear not! Creating a stunning chevron friendship bracelet is surprisingly achievable, even if you're new to macrame knotting. This tutorial will guide you through the process, step-by-step, using simple techniques that are easy to master, regardless of your skill level.
Forget complicated instructions and confusing diagrams; we'll break down the process into manageable chunks, using clear explanations and helpful visuals to ensure you're confident in each step. You'll soon be crafting your own beautiful chevron friendship bracelet to share with a friend, or perhaps even to keep as a reminder of your newfound macrame abilities. Let's dive into the detailed instructions and start knotting!
Preparation and Safety Guidelines
- Embroidery floss (or similar cord)
- Scissors
- Clipboard (or flat surface)
- Tape (optional)
- Fabric glue (Aleene's Tacky Glue or similar)
- Q-tip
- Nippers (optional)
- Always keep your fingers and hands out of the way of the tightening knots to avoid pinching or injury.
- Use sharp scissors to cut the embroidery floss to prevent frayed ends and ensure clean knotting.
- If working with small children, adult supervision is crucial to prevent choking hazards from small pieces of string or accidental ingestion.
Step-by-Step Instructions
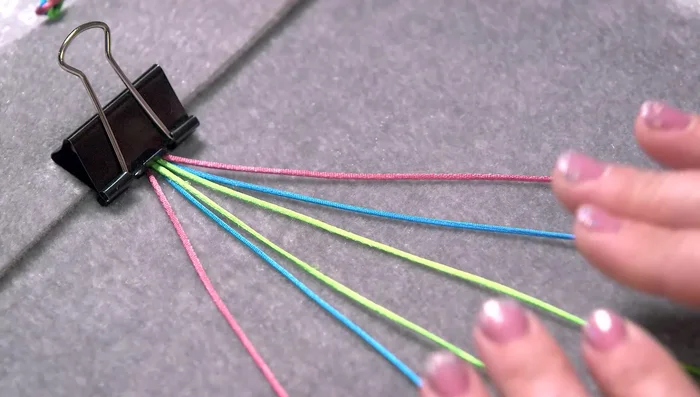
Prepare the Cords
- Cut cord to the appropriate length (approximately 82 inches for thicker cords, adjust based on wrist size and cord thickness).
- Loop all cords around a finger, ensuring even ends, then tie a simple knot at the top.
- Attach the knot to a clipboard or other flat surface.

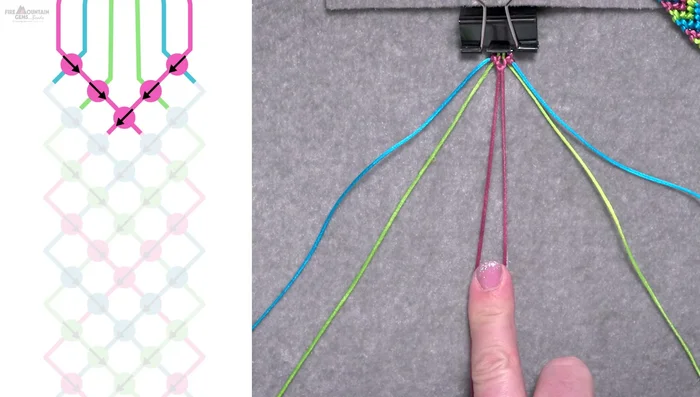
Prepare the Cords Establish the Chevron Pattern
- Determine knot pattern (e.g., 2 forward knots on the left, 3 backward knots on the right).
Establish the Chevron Pattern Create the First Chevron Row
- Create the first row of knots using the specified pattern, identifying an anchor strand and a working strand for each knot.
- Connect the center strands to form the chevron apex using a backward knot.
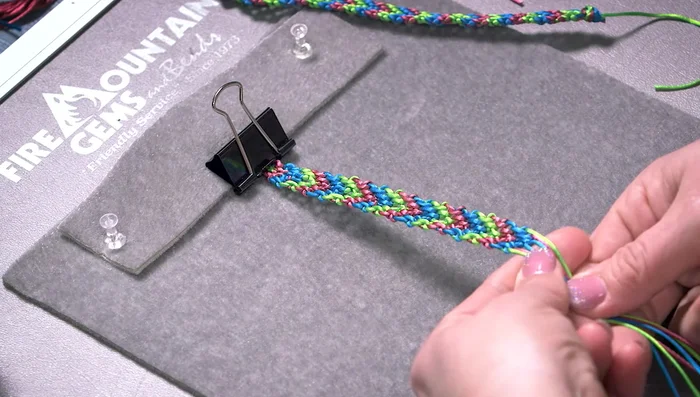
Create the First Chevron Row Repeat Chevron Rows
- Repeat steps 5 and 6 for subsequent rows, ensuring the outside strands become the working strands for the next row.
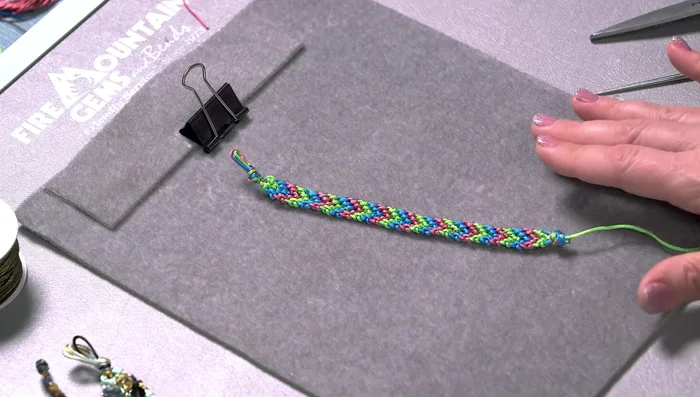
- Continue creating rows until desired bracelet length is achieved.
Repeat Chevron Rows Secure the Bracelet Ends
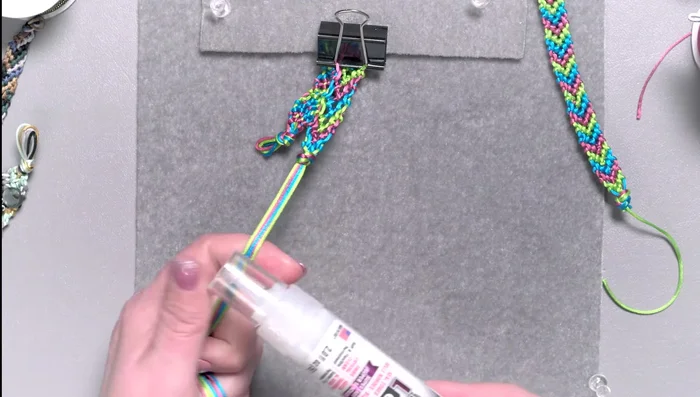
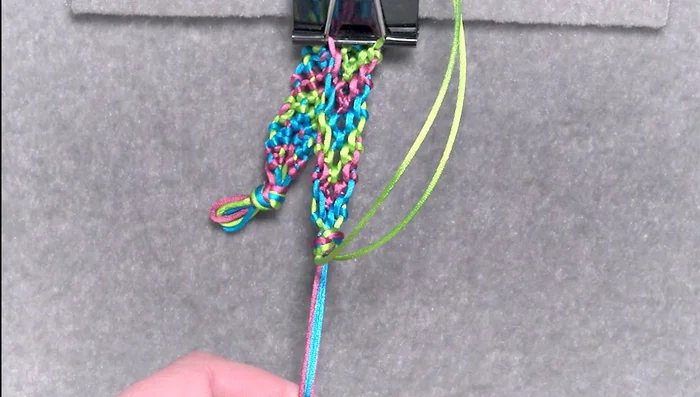
- Tie a final knot at the end of the bracelet, securing it tightly.
- Apply fabric glue to the edges of the knots to secure them, allowing to dry.
- Trim excess cords close to the knot, leaving several inches for tying.
- Thread one or two cords through the loops at the other end and tie to secure the bracelet.
Secure the Bracelet Ends


Read more: DIY Crystal Bracelet: Easy Square Knot Tutorial
Tips
- Cut extra cord to avoid running short during the project.
- Use a clipboard or flat surface to keep the bracelet taut and organized.
- Pull individual strands to tighten knots for a neat finish.
- Correct any accidental color flips by pulling the incorrect strand tight to reposition.