Memory wire bracelets offer a unique and sentimental way to express yourself, and adding personalized alphabet charms elevates them to a truly special keepsake. These delicate yet durable bracelets are surprisingly easy to create, allowing you to craft a beautiful and meaningful piece of jewelry tailored precisely to your taste or to gift someone special. Imagine the possibilities: a bracelet commemorating a loved one's initials, a fun piece showcasing your favorite word, or a stylish accessory reflecting your personality – all made by your own hands!
This step-by-step guide will walk you through the entire process of making your own personalized memory wire bracelet with alphabet charms, from selecting the perfect materials to securing the final charm. Get ready to unleash your creativity and learn how to craft a cherished piece of jewelry that will be treasured for years to come, a perfect blend of style and sentimental value.
Preparation and Safety Guidelines
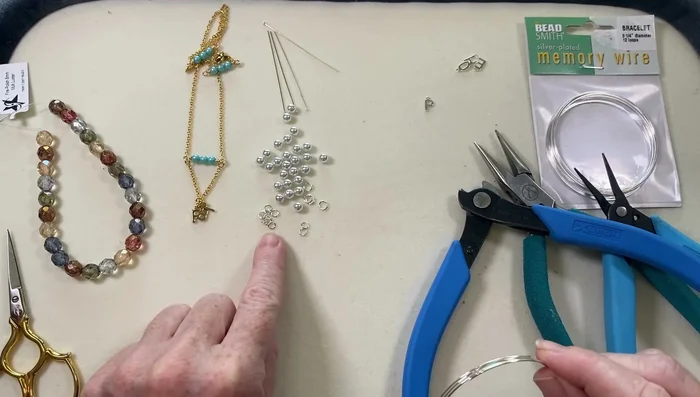
- Memory wire
- Alphabet charms
- Jump rings
- Check glass beads
- Prestige Crystal Pearls
- Memory wire cutter
- Chain nose pliers
- Beading mat
- Always use pliers specifically designed for jewelry making to avoid damaging the memory wire or injuring yourself. Avoid using excessive force.
- Be mindful of the sharp ends of the memory wire. Keep the wire closed and away from children. Handle carefully.
- If you experience any skin irritation from the materials, discontinue use and consult a doctor. Always prioritize your safety
Step-by-Step Instructions
Prepare Materials
- memory wire, alphabet charm, jump ring, beads (check glass beads and pearls), memory wire cutter, chain nose pliers.

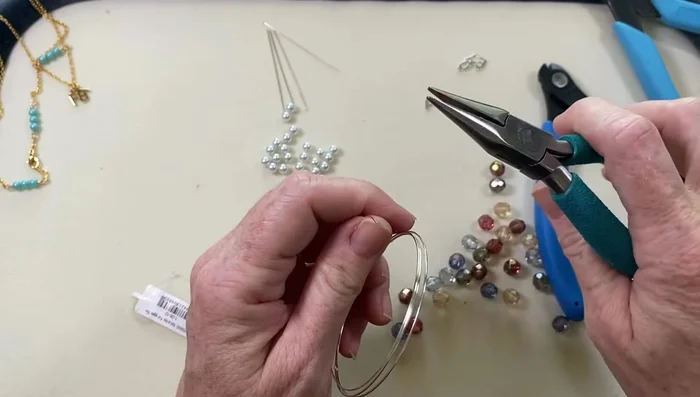
Prepare Materials Create Initial Loop
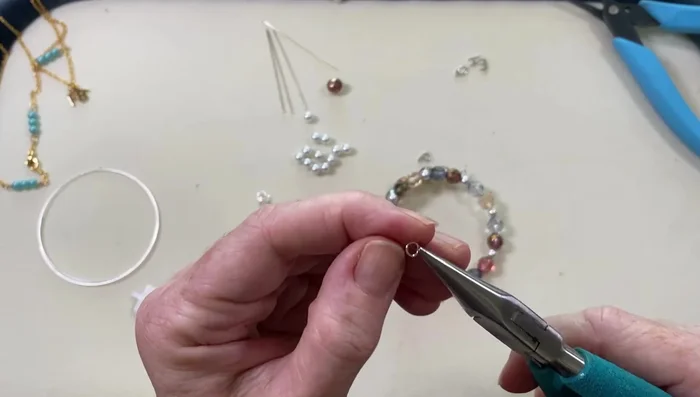
- Create a loop at one end of the memory wire using chain nose pliers to act as a bead stopper.
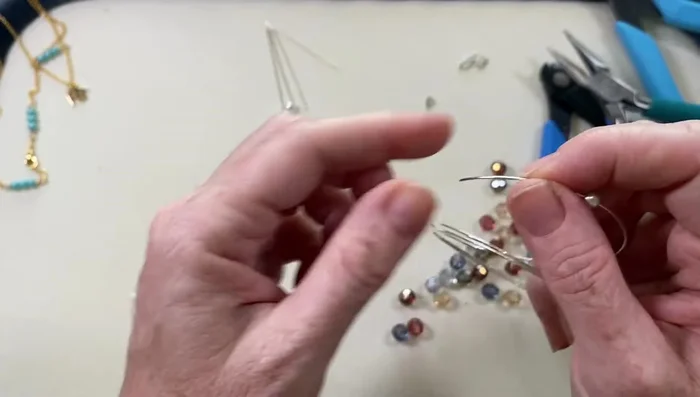
Create Initial Loop Add Beads
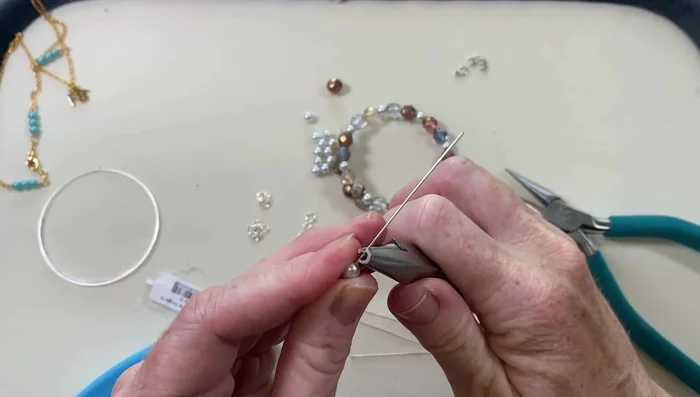
- Add beads to the wire, following a desired pattern. The video uses a pattern of two check glass beads and one pearl.
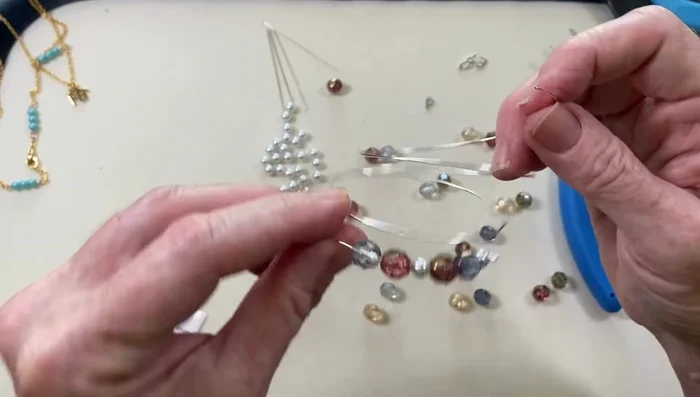
Add Beads Complete Bracelet Length
- Continue adding beads until the desired bracelet length is reached.
Complete Bracelet Length Cut and Create Final Loop
- Cut the memory wire, leaving a short length to create a loop at the other end, securing the beads.
- Close the loop at the other end of the wire using chain nose pliers.
Attach Charm
- Attach the alphabet charm to the bracelet using a jump ring.
Attach Charm Add Optional Decorations
- (Optional) Add extra decorative elements, such as small wire loops, for added personalization.
Add Optional Decorations
Read more: DIY Crystal Bracelet: Easy Square Knot Tutorial
Tips
- Don't pre-cut memory wire; you can adjust the length as you go.
- Keep leftover memory wire scraps for future projects.
- Chain nose pliers provide better grip on memory wire than round nose pliers.
- Organize bead colors before starting to avoid an uneven color distribution in the finished bracelet.