Looking for a thoughtful and stylish gift for the man in your life? Forget the generic tie or socks; this year, surprise him with a handcrafted, personalized braided leather bracelet! This simple yet sophisticated accessory is perfect for adding a touch of rugged charm to any outfit, from casual weekend wear to a more dressed-up occasion. Making your own offers a rewarding experience, allowing you to choose the leather color and style that best suits his taste, adding a special personal touch that a store-bought gift just can't replicate. It's a project that's both surprisingly easy and incredibly satisfying.
Forget expensive workshops and complicated instructions; creating this braided leather bracelet is easier than you think! This guide will walk you through each step of the process, from selecting your materials to securing the perfect finish. Ready to impress with your craftsmanship and create a unique gift he'll truly cherish? Let's get started!
Preparation and Safety Guidelines
- 1.5mm brown leather cord (8 feet)
- Faceted beads
- Flush cutter
- Awl (optional)
- Ruler (optional)
- Always use sharp scissors or a rotary cutter when working with leather to prevent frayed edges and ensure clean cuts. Blunt tools can lead to injury.
- If using any adhesives, ensure proper ventilation and follow the manufacturer's instructions carefully. Some adhesives can be flammable or release harmful fumes.
- Be mindful of the leather's thickness. Too thin and it may fray easily, too thick and it may be difficult to braid. Choose a suitable thickness for your skill level.
Step-by-Step Instructions
Prepare the Leather
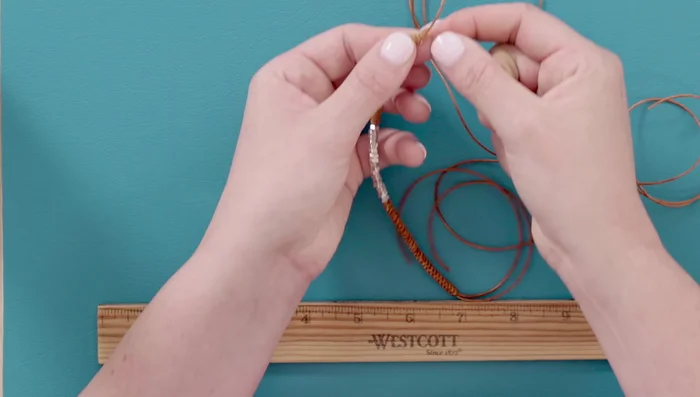
- Cut 8 feet of leather and split it in half to get two 4-foot sections. Leave a 4-inch tail on one end for the clasp.
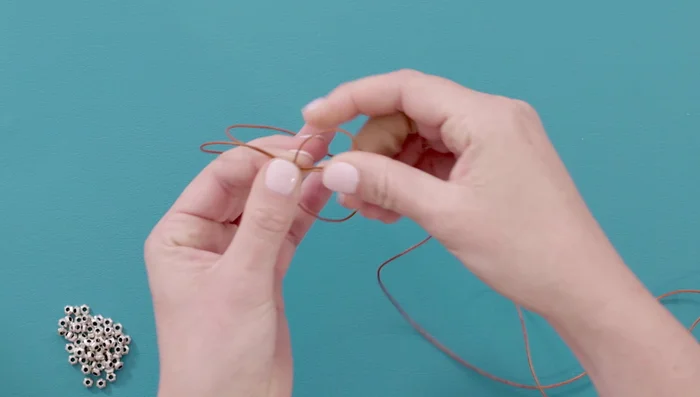
Start the Braid
- Loop the bottom leather strand over the top strand and around the back. Wrap the back strand around your finger, bring it up through the back, and then through the loop. Pull the loop closed and slide it off your finger.

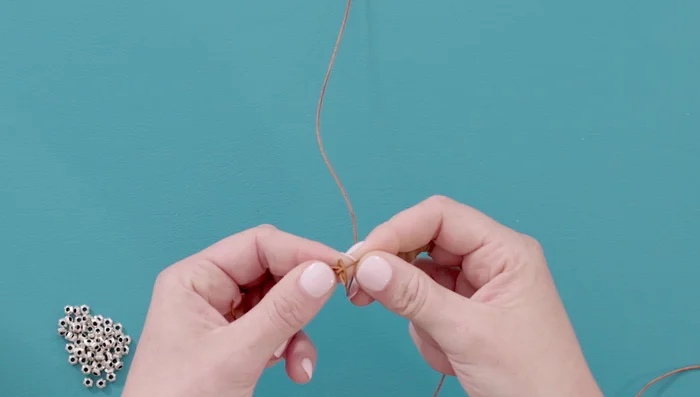
Start the Braid Braid the First Section
- Continue the braiding pattern, consistently wrapping the top leather strand around your finger and through the loop, placing it to the right of the previous loop, and pulling tight. The pattern should resemble a snake braid or herringbone.
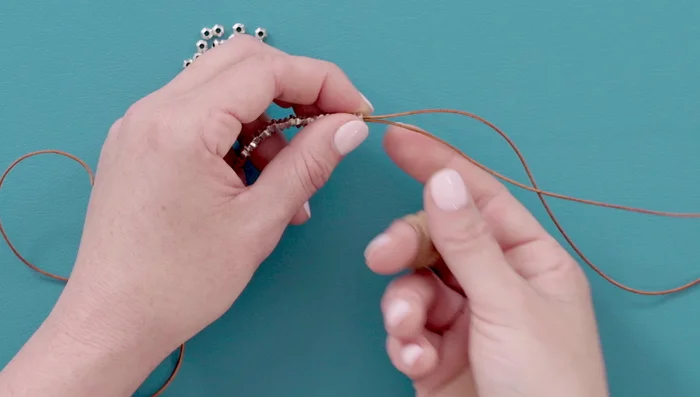
Braid the First Section Add Beads
- Once you have about 3 inches of braid, string beads onto both leather strands for about 2 inches.
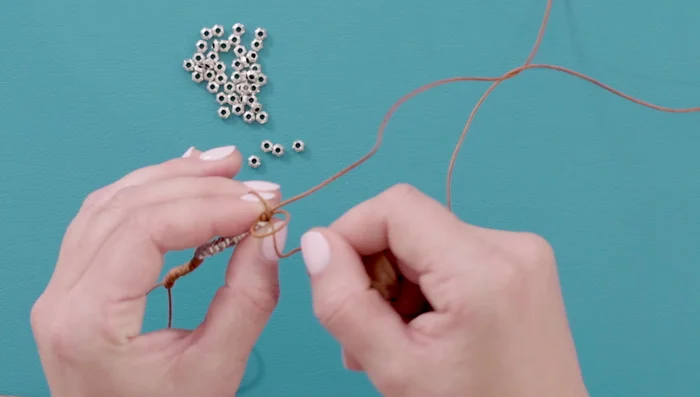
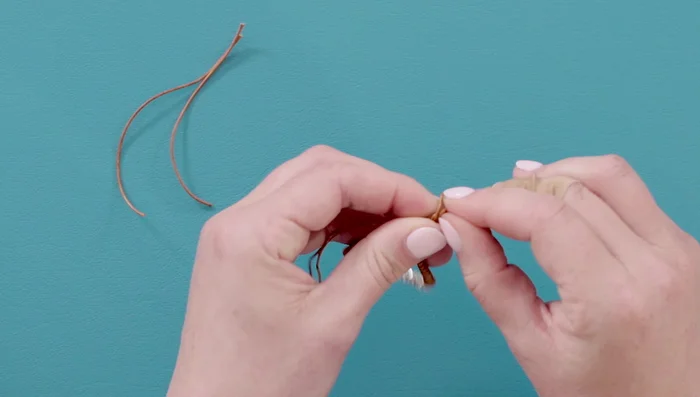
Restart and Braid the Second Section
- Repeat step 2 to create the initial knot after the beads, making sure to keep the knot snug against the beads.
- Repeat step 3 until you have another 3 inches of braid.
Restart and Braid the Second Section Create the Clasp
- Cut the tails to about 4 inches. Make a loop with the bracelet, overlapping the ends. Take an extra foot of leather, and wrap it several times (5-6) around the overlapping tails, then pass the end through the loop. Pull tight and trim the excess.
Create the Clasp Finish the Bracelet
- Tie the remaining tails together with an overhand knot and trim the ends close to the knot. Adjust the length of the clasp tails to your preference.
Finish the Bracelet
Read more: DIY Crystal Bracelet: Easy Square Knot Tutorial
Tips
- Work the leather gently to ensure the knots nestle into each other for a clean herringbone pattern.
- Don't pull the knots too tight, as this could break the leather.
- When creating the clasp, be careful to pull on the correct leather strand to avoid tightening it unintentionally.