Czech glass beads, renowned for their vibrant colors and intricate craftsmanship, offer endless possibilities for crafting stunning jewelry. This tutorial will guide you through creating a beautiful and surprisingly simple DIY leather bracelet featuring these exquisite beads, using the easy barrel knot technique. Forget expensive designer pieces; with just a few basic supplies and a little patience, you can create a unique and personalized accessory to complement any outfit. The rich texture of the leather combined with the sparkling Czech glass beads results in a bracelet that's both elegant and eye-catching.
Prepare to be amazed by how quickly and easily you can master the barrel knot! This technique, surprisingly straightforward, allows you to securely and aesthetically incorporate the Czech glass beads onto your leather cord. Ready to transform your crafting skills and add a handmade touch to your wardrobe? Let's dive into the step-by-step instructions below to create your own dazzling Czech glass beaded leather bracelet.
Preparation and Safety Guidelines
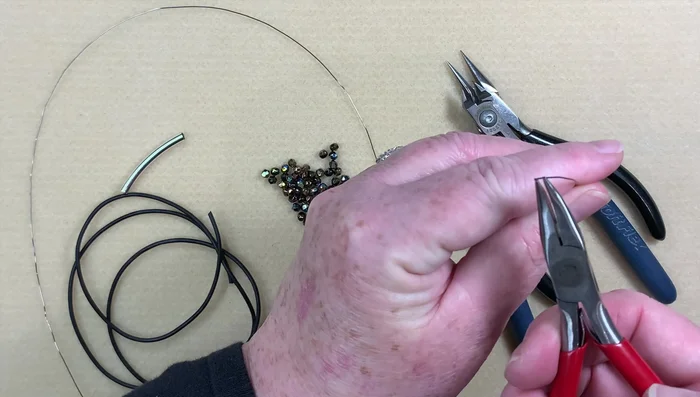
- 32 inches of 2 millimeter leather cord
- 64 two-millimeter fire polish beads
- barrel knot tube
- super glue
- 24 gauge craft wire
- small jump rings
- toggle clasp
- glue-in ends
- wire cutters
- chain nose pliers
- bent chain nose pliers
- Always use sharp scissors or wire cutters specifically designed for beading wire to prevent accidental injury. Dull tools can cause slipping and potential cuts.
- Avoid pulling too hard on the beading wire while knotting, as this could damage the wire, break the beads, or snap the leather cord.
- If using small beads, supervise children during the crafting process to prevent choking hazards.
Step-by-Step Instructions
Prepare Materials
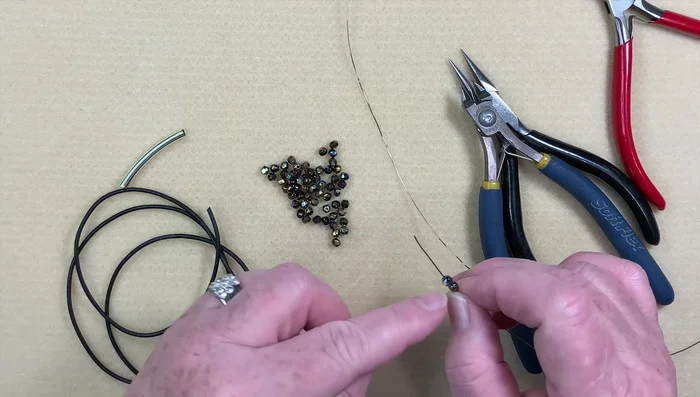
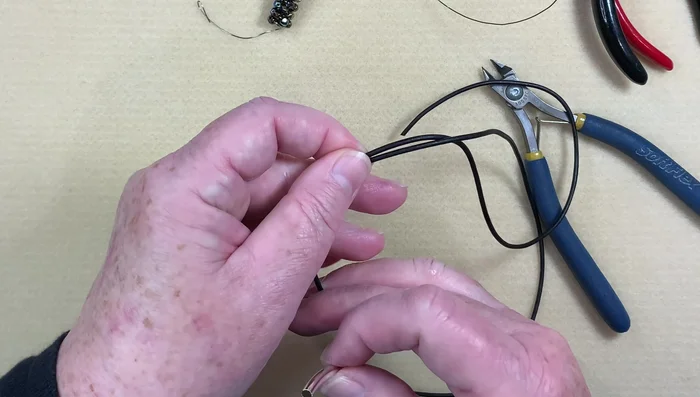
- Create a small loop at one end of the wire to prevent beads from falling off.
- Cut and fold the leather cord in half.

Prepare Materials String the Beads
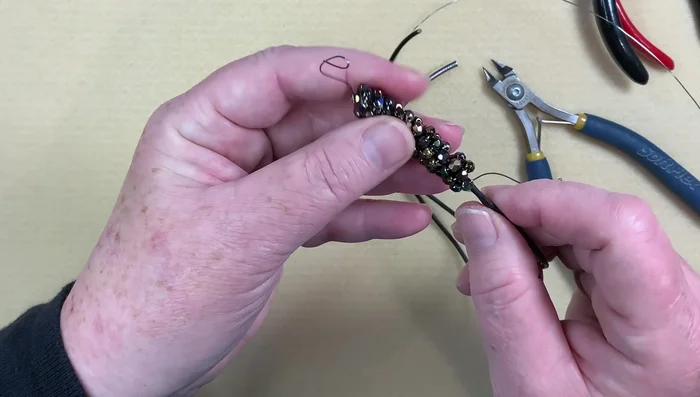
- Follow the chosen color pattern (two beads of one color, one of another, repeated).
- Using your thumb for grip, wrap the wire around the tube, pushing the beads down to keep them snug.
- Continue wrapping the wire around the tube, pushing down beads as you go until all beads are on the wire.
String the Beads Prepare Leather Cords
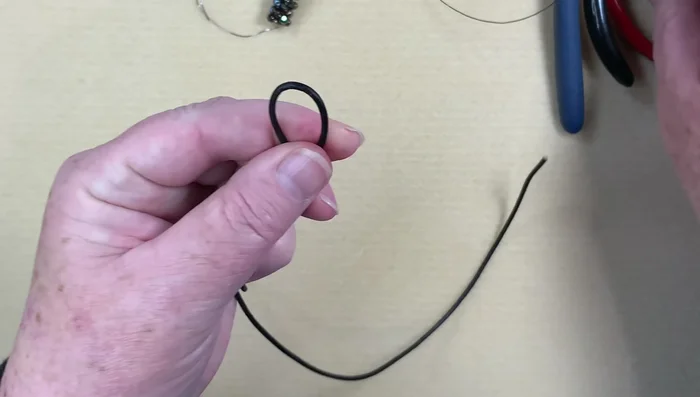
- Make a barrel knot on each end of the leather cord by wrapping the cord around the tube three times and threading the end through the back of the tube.
Prepare Leather Cords Attach Beads to Leather
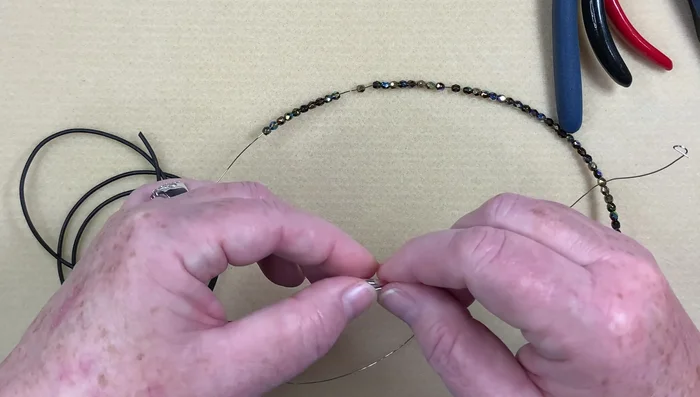
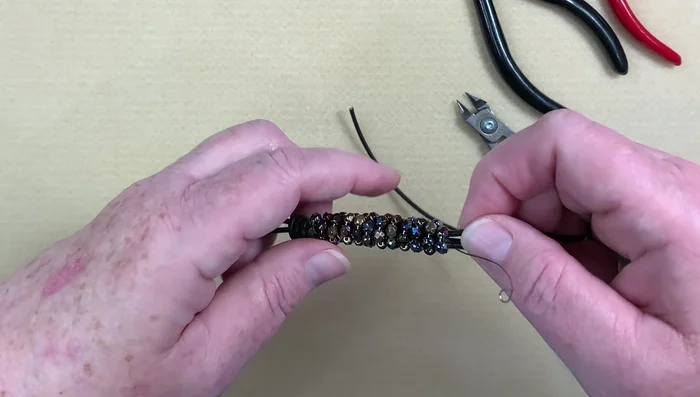
- Thread both ends of the leather cord through the beaded wire, leaving one end slightly longer.
Attach Beads to Leather Secure and Tighten
- Wrap the wire around the leather and cut off the excess. Push down any protruding wire ends.
- Push and pull the leather and beads to snugly tighten the barrel knots, covering any exposed wire.
Secure and Tighten Finish the Bracelet
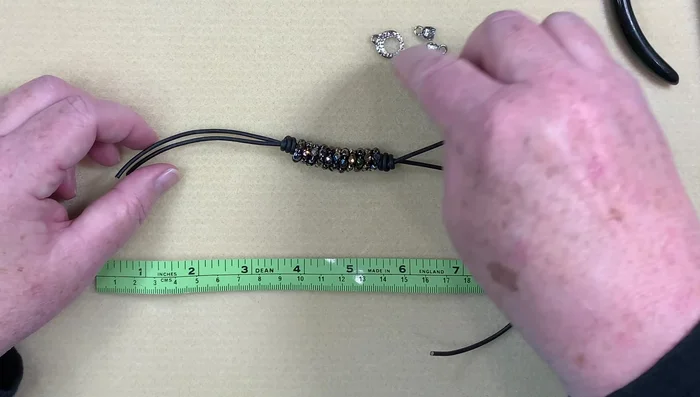
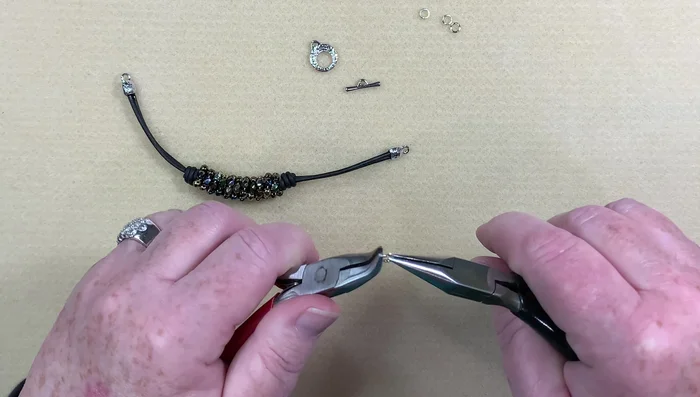
- Measure and cut the leather cord to your desired bracelet length, keeping in mind the extra length needed for the clasp.
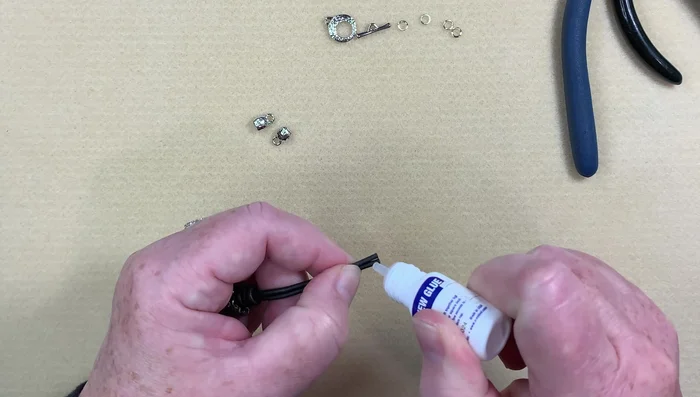
- Apply super glue to the end of the leather and attach the end caps. Be quick to prevent swelling.
- Attach the toggle clasp using jump rings; using three jump rings on one side to provide extra stability.
Finish the Bracelet


Read more: DIY Crystal Bracelet: Easy Square Knot Tutorial
Tips
- Add extra wire to account for kinks.
- Use a knitting needle if you don't have a barrel knot tube.
- Adjust bead quantity for smaller wrists.
- Dry fit end caps before gluing.
- Work quickly with super glue to prevent leather swelling.