Crochet is a wonderfully versatile craft, allowing you to create everything from cozy blankets to intricate garments. But did you know it's also perfect for making stylish and unique accessories? This tutorial will guide you through the simple process of crocheting a beautiful bracelet, perfect for beginners looking to dip their toes into the world of yarn crafts. No prior experience is needed – just a hook, some yarn, and a willingness to learn! We'll cover all the basic stitches you'll need, ensuring a relaxing and rewarding crafting experience.
This easy-to-follow tutorial will walk you through each step, from choosing your materials to finishing your stunning new bracelet. Get ready to create a personalized piece of jewelry that reflects your style and showcases your newly acquired crochet skills. Let's get started on this exciting journey and discover how easy it is to make your first crocheted bracelet by following the detailed, step-by-step instructions below.
Preparation and Safety Guidelines
- Cotton yarn
- 3.5 mm hook
- Needle
- Thread
- Button
- Always use sharp scissors to cut your yarn. Dull scissors can snag the yarn and cause uneven edges or fraying.
- Be mindful of your tension. Consistent tension throughout your crochet will ensure a neat and even bracelet. Practice your tension on scrap yarn before starting your project.
- If using metal hooks, be careful to avoid scratching yourself. Keep the hook pointed away from your body while crocheting.
Step-by-Step Instructions
Create the First End
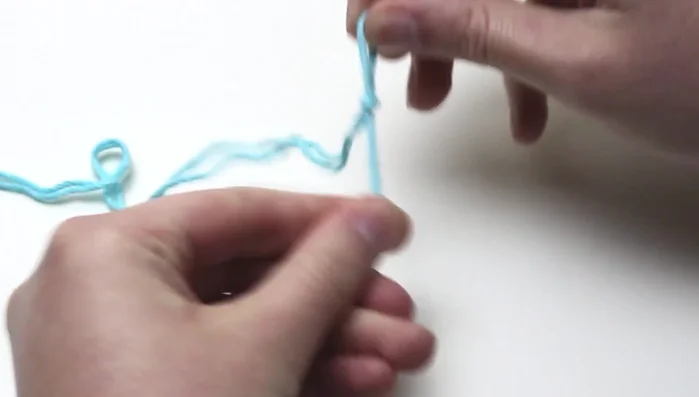
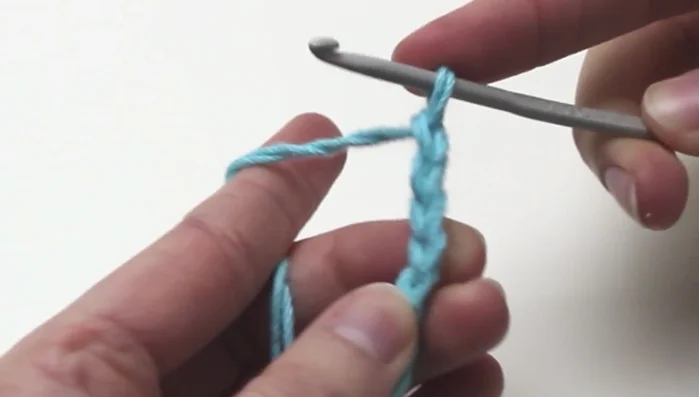
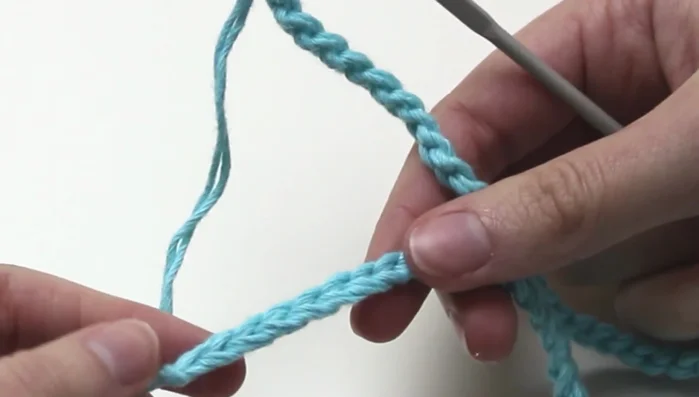
- Make a slip knot and chain 7 (this will be the size of one end of the bracelet).
- Chain 1 (turning chain).
- Single crochet 1 into the second chain from the hook, then single crochet 1 into each of the next 6 chains.

Create the First End Create the Main Chain
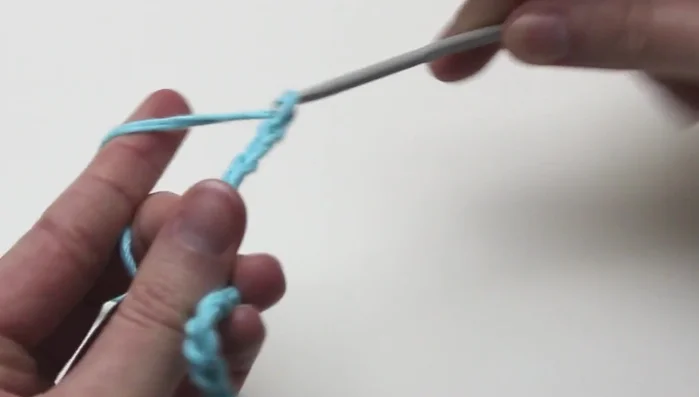
- Chain 25 (or the amount needed to fit your wrist).
Create the Second End
- Chain another 7.
- Chain the same amount as your wrist chain (25 for this example).
- Count 7 chains inwards from the last chain and single crochet 1 into the seventh chain. Ensure your chains are not twisted.
- Single crochet 1 into the next 6 chains.
Create the Second End First Row of Single Crochet
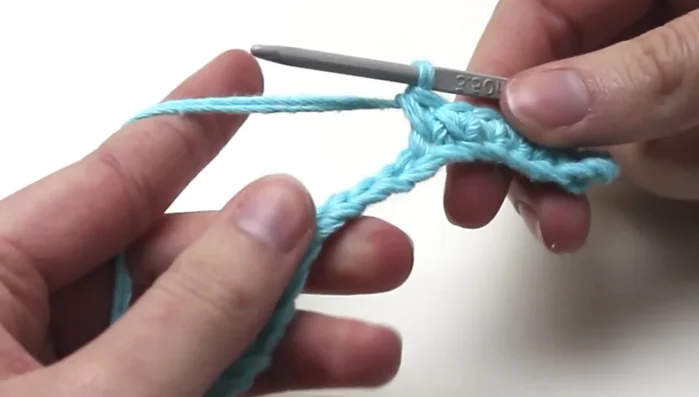
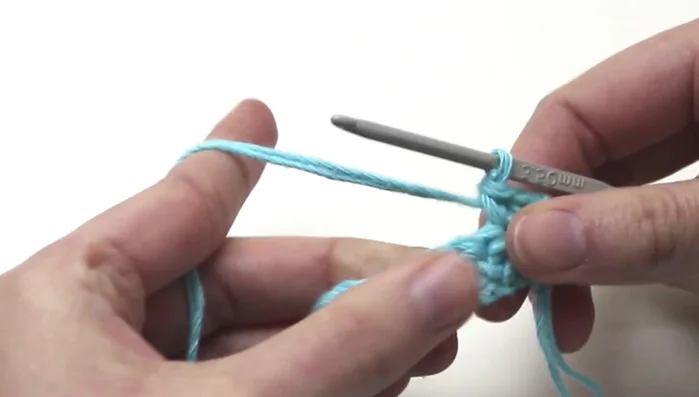
- Chain 1, turn, single crochet 1 into the first stitch, then single crochet 1 into the next stitch.
- Chain 3, skip 3 stitches, single crochet 1 into the fourth stitch, single crochet 1 into the last stitch.
First Row of Single Crochet Second Row and Buttonhole
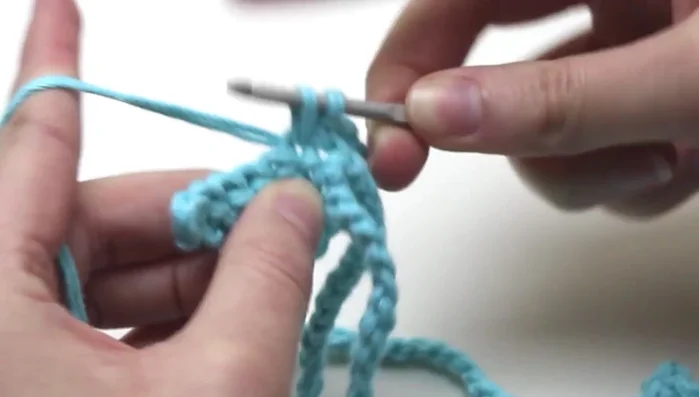
- Chain 25 (or the amount needed to fit your wrist).
- Single crochet 1 into the first stitch to join the chain.
- Single crochet 1 into each of the next 6 stitches.
Second Row and Buttonhole Repeat for Desired Thickness
- Repeat steps 9-13 for desired bracelet thickness (example shows repeating 4 more times).
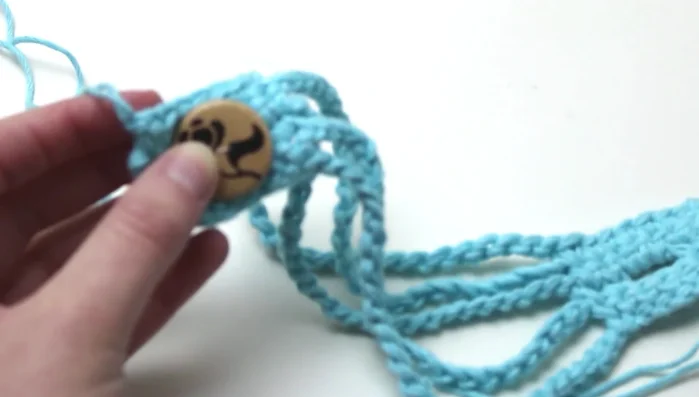
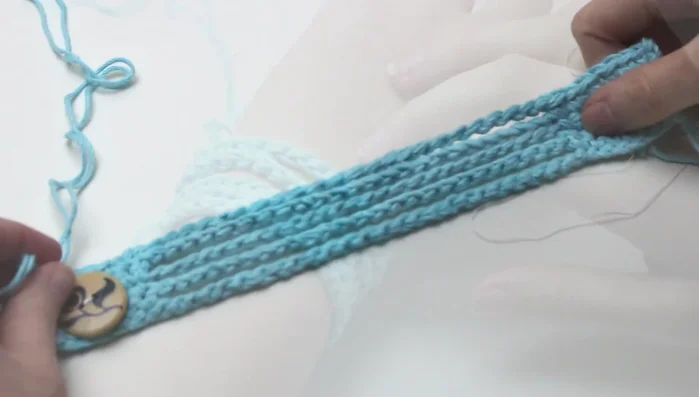
Attach Button
- Sew on the button to the side without the buttonhole.
Attach Button Finishing Touches
- Weave in the ends.
Finishing Touches


Read more: DIY Crystal Bracelet: Easy Square Knot Tutorial
Tips
- You can use one or two strands of yarn.
- Adjust the chain length (25 in this example) to fit your wrist.
- Make sure your chains are not twisted and are facing the same way.
- Add more rows to make a thicker bracelet.