Black ceramic, with its sleek, modern aesthetic, offers a striking canvas for jewelry design. The deep, rich hue provides a captivating backdrop for vibrant accents, and when paired with the luminous turquoise and the warmth of gold, the result is truly breathtaking. Imagine a ring, subtly sophisticated yet undeniably bold, commanding attention without being ostentatious. This unique combination of materials creates a piece that transcends mere adornment, becoming a statement of individual style. The contrast between the matte black ceramic and the shimmering turquoise and gold inlay is simply mesmerizing.
This guide will walk you through the process of crafting this stunning piece of jewelry yourself. Prepare to be amazed as we delve into a detailed, step-by-step tutorial on creating your own stunning black ceramic ring with turquoise and gold inlay, transforming a simple concept into a wearable work of art.
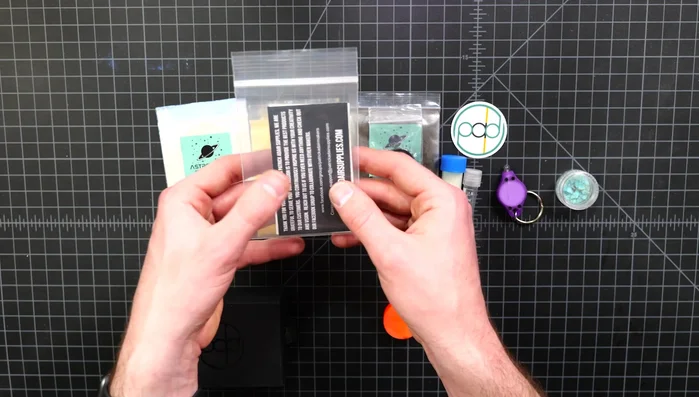
Preparation and Safety Guidelines
- Ring blank (black ceramic)
- Expanding ring mandrel
- Electric tape
- Tweezers (2 pairs)
- Inlay materials (turquoise, 24k gold leaf)
- Glow powder (green)
- Color pigments (gunmetal gray, gold, iridescent blue)
- Mixing vial
- UV flashlight
- Medium CA glue
- Super thin CA glue
- CA accelerator
- Sandpaper (various grits)
- Polishing compound
- Face shield
- Dust mask
- Lathe
- Avoid harsh chemicals and abrasive cleaners. Use a soft cloth and mild soap to clean your ring, rinsing thoroughly with water afterwards.
- To prevent scratches, store your ring separately from other jewelry in a soft pouch or lined jewelry box.
- Handle your ring with care, especially the inlaid turquoise and gold, as these materials can be more delicate than the ceramic.
Step-by-Step Instructions
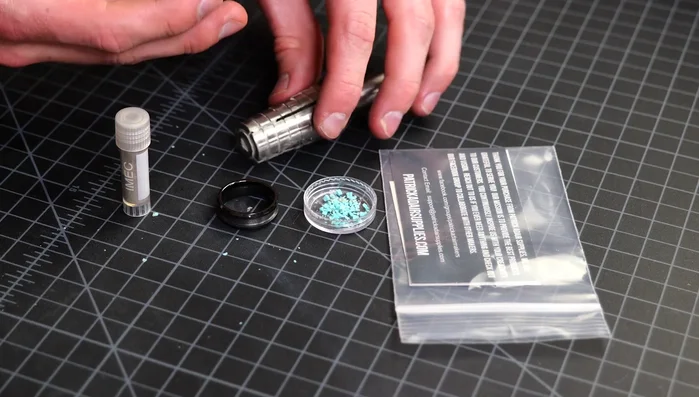
Prepare the Workspace and Materials
- Crush larger turquoise pieces into smaller ones if needed.

Prepare the Workspace and Materials Prepare the Ring Mandrel
- Wrap electric tape around the mandrel to cushion the ceramic ring blank.
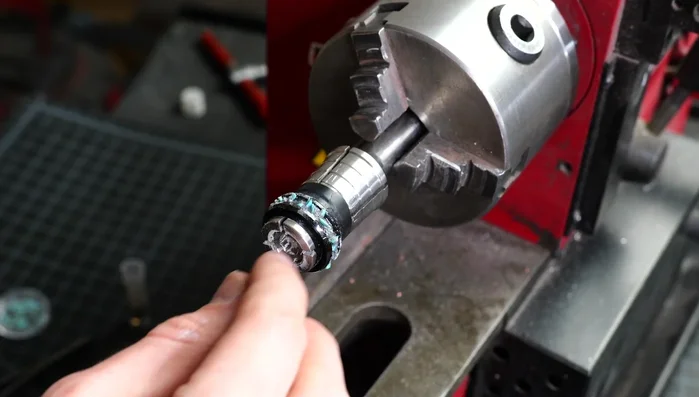
Prepare the Ring Mandrel Secure the Ring Blank
- Place the ring blank onto the prepared mandrel.
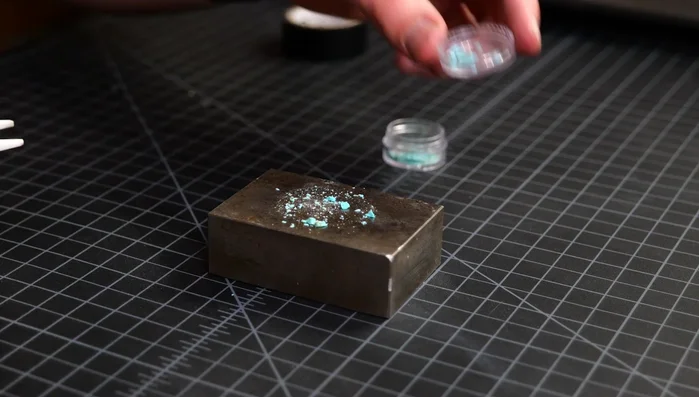
Secure the Ring Blank Initial Inlay: Turquoise
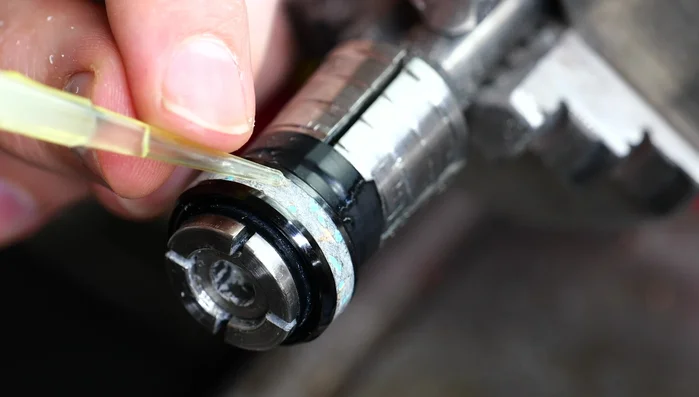
- Apply medium CA glue and carefully place turquoise pieces in the ring inlay area, positioning them as desired.
- Use medium CA glue to secure the turquoise, and super thin CA glue to absorb into the glow powder.
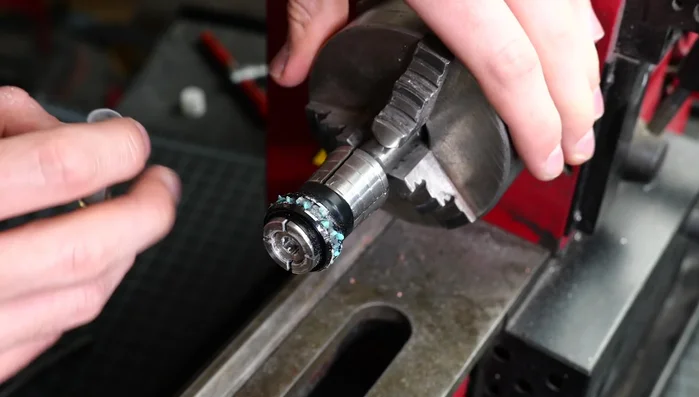
Initial Inlay: Turquoise Build Up Inlay: Glow Powder
- Apply several layers of glow powder interspersed with thin CA glue to build up the inlay and fill in gaps.
Build Up Inlay: Glow Powder Add Gold Leaf Accents
- Carefully use tweezers to place small pieces of gold leaf amongst the turquoise to create a 'gold vein' effect.
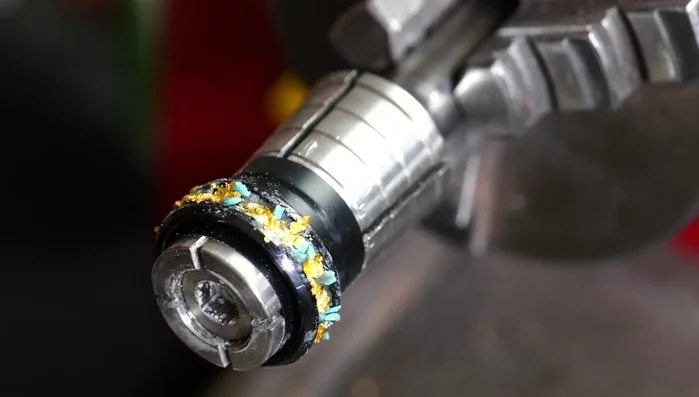
Final Inlay Layer
- Apply another layer of glow powder and thin CA glue to cover the inlay and create a smooth surface.
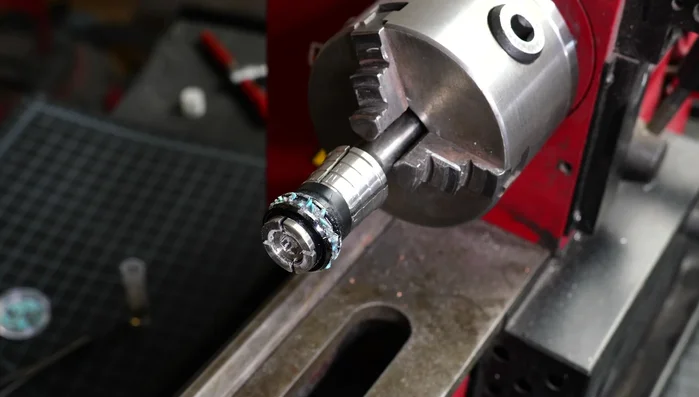
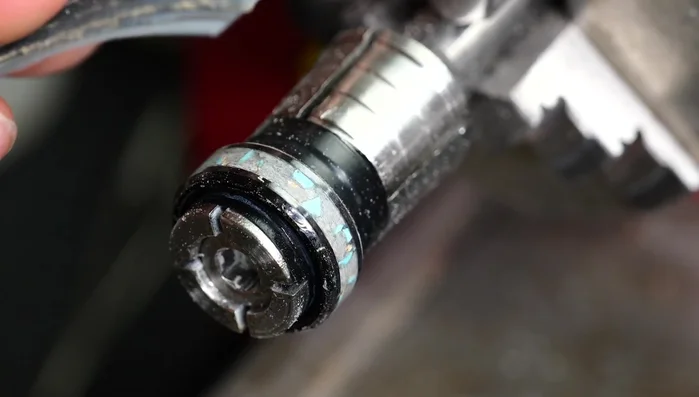
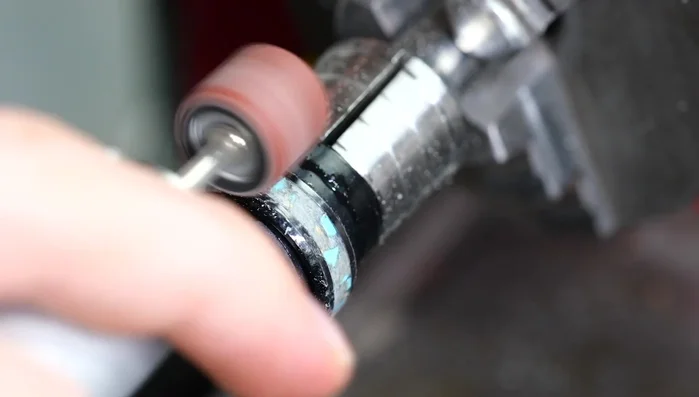
Final Inlay Layer Sanding and Shaping
- Using sandpaper (starting with 180 grit and working up to 2500 grit), carefully sand the ring until the inlay is flush with the surface.
Sanding and Shaping Final Inspection and Void Repair
- check for voids, fill with super thin CA glue and sand smooth.
Final Inspection and Void Repair Polishing
- Use polishing compound (astrotech steps 1-3) to achieve a high-gloss finish.
Polishing
Read more: Ultimate Guide to Making Inlay Rings with Bentwood Ring Supplies
Tips
- Use tweezers for gold leaf to avoid sticking to your hands.
- Use a minimal amount of color pigment to preserve glow intensity.
- Use two pairs of tweezers for precise gold leaf placement.
- Don't overfill the inlay; leave some space for the gold leaf.
- Use super thin CA glue for better absorption into the glow powder and to fill in small voids.