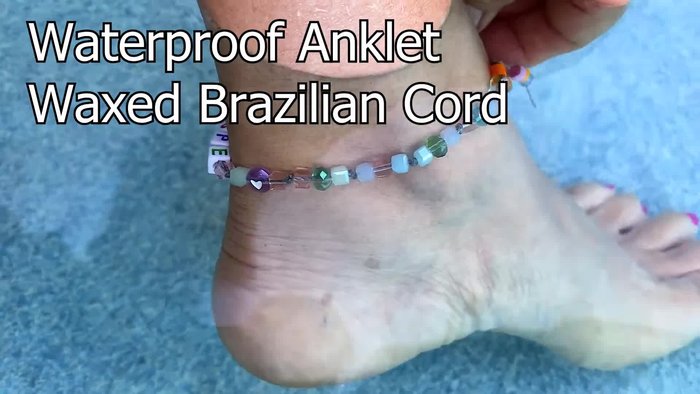
Feeling down? Need a little pick-me-up that's both beautiful and easy to make? Then look no further! This DIY Hope ankle bracelet tutorial is perfect for crafting a cheerful accessory that reflects positivity and personal style. Forget expensive jewelry stores; you can create a stunning piece at home with minimal materials and effort. This project is perfect for beginners, requiring only basic beading skills and a touch of creativity. The delicate design is surprisingly simple to assemble, offering a satisfying sense of accomplishment once complete.
This charming beaded bracelet is not just a pretty accessory, it's a tangible symbol of hope, a little reminder to wear your optimism on your wrist. We’ll be guiding you through each step of the process, from gathering supplies to tying off the final knot. Ready to craft your own personalized beacon of hope? Let's dive into the easy-to-follow instructions below!
Preparation and Safety Guidelines
- Brazilian waxed cord (0.5mm, 24 inches)
- beads
- crystal bead
- plastic star button
- scissors
- straw
- Avoid using small beads with young children due to choking hazards. Adult supervision is required.
- Ensure the elastic cord is strong enough to hold the beads securely and won't break easily. Test the bracelet's strength before wearing.
- If you have sensitive skin, choose hypoallergenic beads and cord to prevent irritation or allergic reactions.
Step-by-Step Instructions
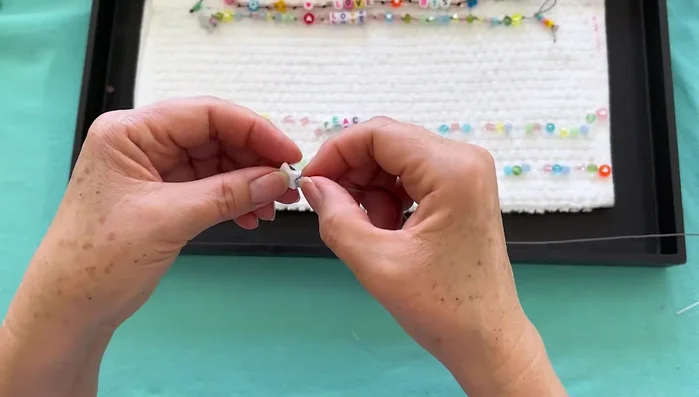
Prepare the Cord
- Thread the waxed cord onto a plastic star button and tie an overhand knot, cutting the ends at an angle for easier bead threading.

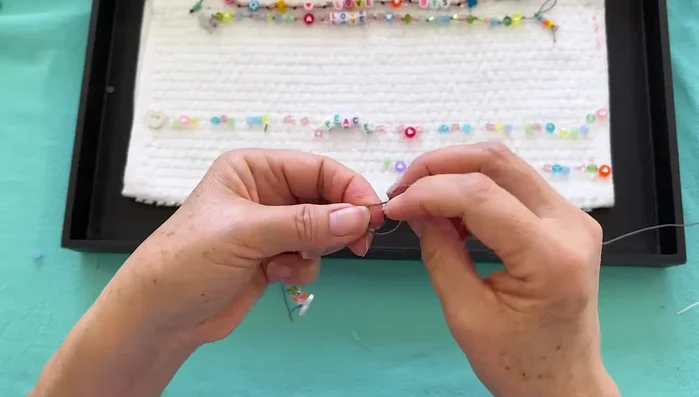
Prepare the Cord String the Beads
- Create sets of three beads and tie a knot after each set. Remember to flip the 'HOPE' beads upside down before stringing to ensure correct orientation on the ankle.
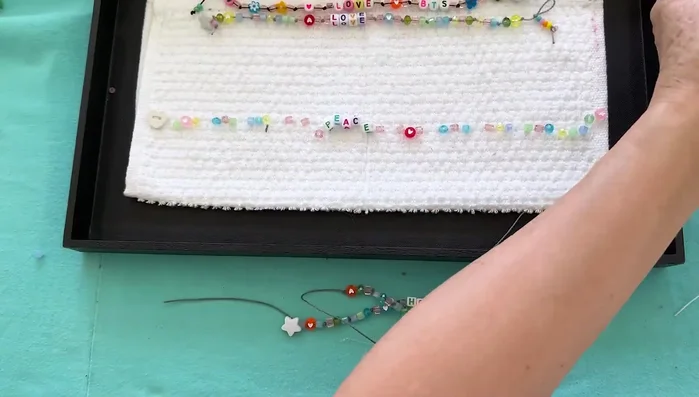
String the Beads Add the Crystal
- Thread on a crystal bead, tie an overhand knot, and continue stringing beads until finished.
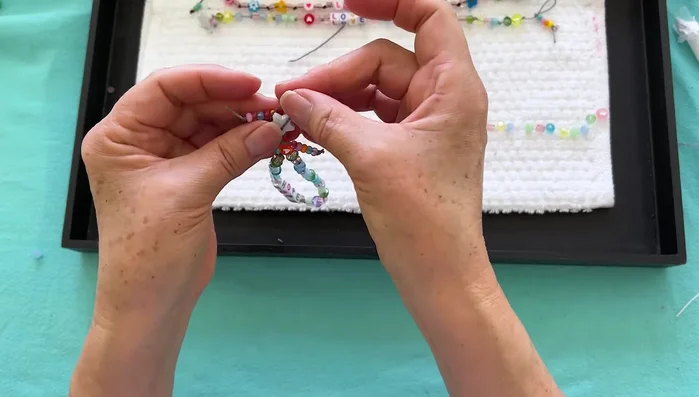
Add the Crystal Create the Loop
- Use a straw to create a barrel knot at the end of the bracelet for easy closure.
Create the Loop Add Seed Beads (Dangles)
- String on seed beads and tie a knot to create dangles on both ends of the bracelet.
Add Seed Beads (Dangles) Finish and Wear
- Tie off the ends, trim the excess cord, and loop the bracelet around your ankle.
Finish and Wear

Read more: Summer Bunting Anklet: Easy Beaded Anklet Tutorial
Tips
- Cut the cord ends at an angle for smoother bead threading.
- Use a straw to help create a clean and visible barrel knot for the loop closure.
- Flip the 'HOPE' beads upside down before stringing to have them right-side up on your ankle.