This Christmas, ditch the mass-produced decorations and embrace the charm of a truly unique festive centerpiece: a DIY vintage jewelry Christmas tree! Transform your collection of forgotten necklaces, earrings, and brooches into a dazzling, shimmering tree that reflects your personal style and adds a touch of nostalgic elegance to your holiday décor. Imagine the sparkle of old rhinestone earrings catching the light, the intricate details of antique pendants twinkling amidst the branches, and the satisfying feeling of upcycling treasured heirlooms into something beautifully new. It's a project that's as fun as it is rewarding, a perfect blend of creativity and sustainable crafting.
Forget expensive ornaments and embrace the beauty of repurposing. This year, your Christmas tree will tell a story, a story woven from the memories embedded within each piece of jewelry. Ready to turn your old jewelry into a stunning, one-of-a-kind Christmas tree? Let's dive into the step-by-step instructions below and create a truly unforgettable festive decoration.
Preparation and Safety Guidelines
- Old picture frame
- Foam core
- Velvet fabric
- Spray mount (or Elmer's glue)
- Hot glue gun
- Wire cutters
- Old jewelry
- Always work with clean, dry hands to avoid damaging or tarnishing the jewelry pieces. Wash your hands thoroughly before handling any vintage jewelry.
- Be mindful of sharp edges or broken pieces. Use pliers or gloves to handle any potentially hazardous components, and dispose of broken fragments safely.
- If you are unsure about the materials of any vintage jewelry (e.g., identifying lead or other toxic metals), avoid using them in your tree or handle them with extra care and gloves. Consider researching vintage jewelry identification before starting your project.
Step-by-Step Instructions
Prepare the Tree Base
- Remove glass and backing from an old picture frame. Trace the cardboard backing onto foam core and cut to the same shape. Cover the foam core with velvet fabric using spray mount or glue. Secure the fabric-covered foam core to the frame using tape.
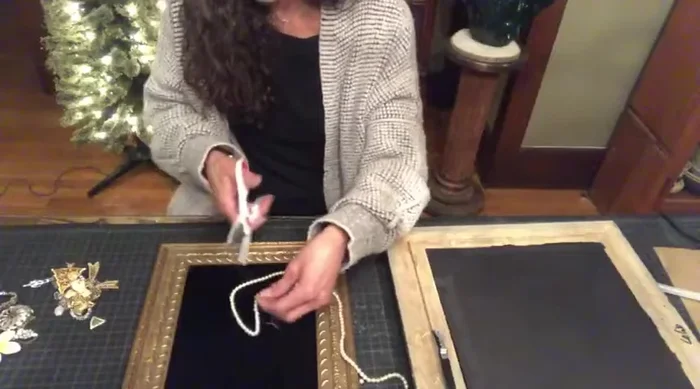
Prepare the Jewelry Components
- Remove clasps and earring backs from old jewelry pieces using wire cutters. Lay out your jewelry pieces on the fabric-covered foam core to design your Christmas tree shape. Take a photo of the layout if possible for reference.

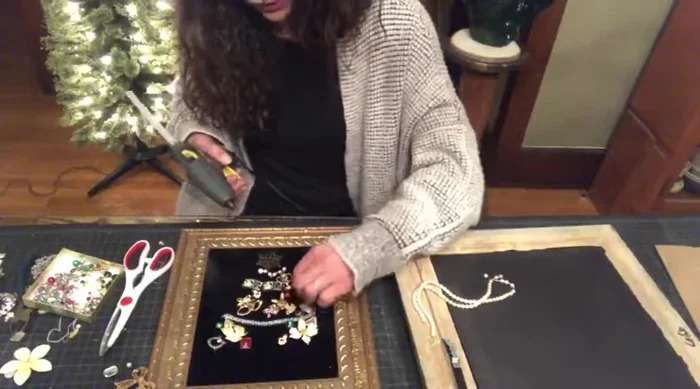
Prepare the Jewelry Components Assemble the Tree Structure
- Start gluing the largest and most important pieces to the foam core using hot glue, focusing on creating the basic tree shape.
Assemble the Tree Structure Fill and Refine the Tree
- Add smaller jewelry pieces, beads, and other embellishments to fill the gaps and create a fuller tree shape.
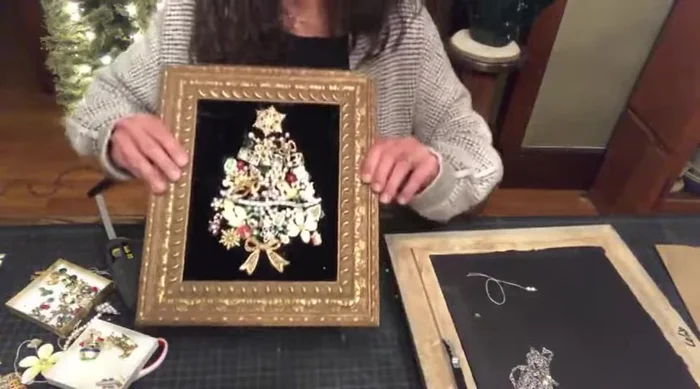
Fill and Refine the Tree Clean Up and Finishing Touches
- Use a hairdryer to melt away any hot glue strings.
- Add finishing touches such as pearls or sequins to enhance the design. Remove any excess strings or jewelry pieces.
Clean Up and Finishing Touches


Read more: DIY Wonky House Brooches: The Fastest & Easiest Method
Tips
- Lay out your jewelry pieces before gluing to plan your design. A photograph can be helpful.
- Use a hairdryer to melt away hot glue strings and seamlessly integrate them into the fabric.
- Balance out the size of jewelry pieces for a visually appealing tree.
- Consider using different colors and textures of jewelry to create a more interesting and visually appealing Christmas tree.
- Shop for jewelry after Christmas for better deals on clearance items.