Ever wished you could wear a miniature, mischievous Rufus the Fox? This tutorial will guide you through creating your very own charming cameo brooch featuring the adorable woodland creature, using the versatile and surprisingly easy-to-work-with medium of shrink plastic. Forget expensive jewelry – this craft project allows you to unleash your creativity and craft a unique, personalized accessory that reflects your own artistic flair. You'll be amazed at how a simple sheet of plastic can transform into a detailed and captivating piece of wearable art.
Prepare to be charmed as we embark on a creative journey! This project is perfect for crafters of all skill levels, from beginners to seasoned artisans. We'll cover everything from design and preparation to baking and finishing, ensuring you achieve a polished, professional-looking Rufus cameo brooch. Ready to get started? Let's dive into the step-by-step instructions below.
Preparation and Safety Guidelines
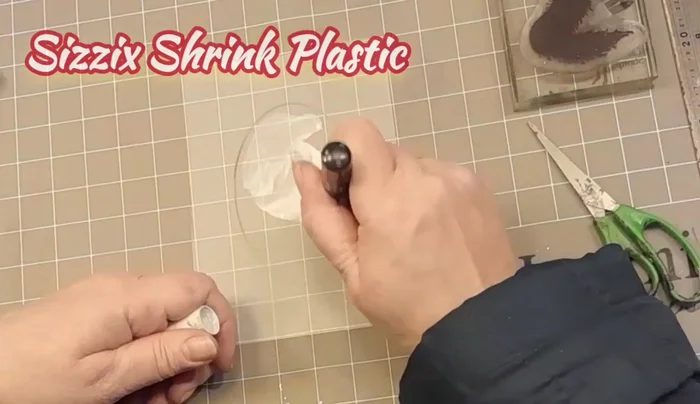
- Sizzix shrink plastic
- Elements ink pad
- BCA pen (white)
- Yellow Posca pen
- Rufus stamp
- Archival ink
- Cogs
- Handheld punch
- Gold Posca pen
- Aqua green Posca pen
- Red Posca pen
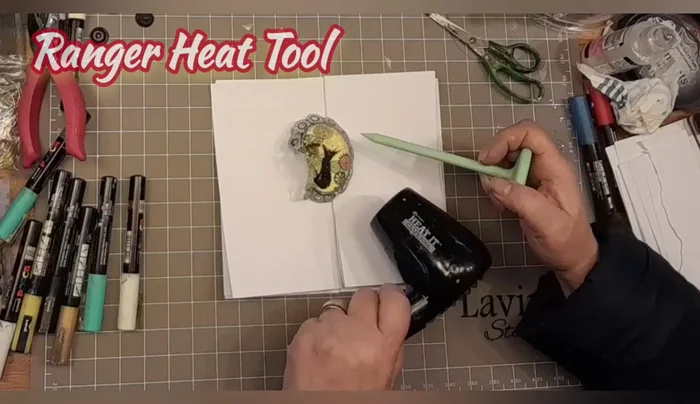
- Ranger heat tool
- Glossy accents
- Brooch pin
- White Posca pen
- Always supervise children when using an oven or heat gun for shrinking plastic. High temperatures can cause burns.
- Use adequate ventilation when shrinking plastic; fumes can be harmful if inhaled.
- Handle the hot, shrunk plastic with care using tweezers or tongs to avoid burns. Allow it to cool completely before handling directly.
Step-by-Step Instructions
Prepare and Sketch Rufus
- Place the white side up and use an Elements ink pad to draw the brooch shape.
- Use a white BCA pen to create a reservoir of ink and rub it into the shrink plastic, extending slightly beyond the line.
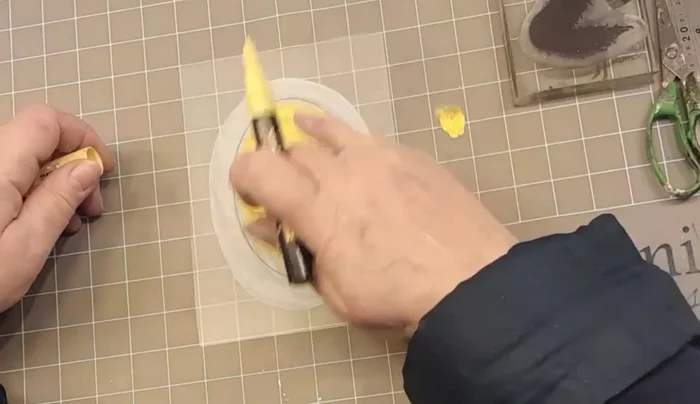
- Dab yellow Posca pen inside the drawn line to create a base for the image.

Prepare and Sketch Rufus Color and Detail Rufus
- Stamp Rufus onto the shrink plastic, using archival ink.
- Color within the fox's shape using a black Posca pen, adding lines or cross-hatches.
- Use gold Posca pen for highlights on Rufus's chest and tail.
Color and Detail Rufus Add Cogs and Accents
- Arrange and adhere the cogs around Rufus, leaving space to see him.
- Fill in the gaps between the cogs with gold Posca pen.
- Use aqua green and red Posca pens to add dots and circles, filling in gaps and creating visual interest.
Prepare for Shrinking
- Cut out the brooch shape, leaving a scalloped edge around the cogs.
- Add black and gold details to the edges and fill in any gaps.
Prepare for Shrinking Shrink and Finish
- Use a heat tool to shrink the plastic. Use a flat surface to ensure even shrinking.
- Apply glossy accents to seal the design and add a brooch pin to the back.
Shrink and Finish


Read more: DIY Wonky House Brooches: The Fastest & Easiest Method
Tips
- Using a white BCA pen creates a nice base for the colors.
- Don't overdo the gold Posca pen, but use enough to get a metallic lift.
- Adding dots and circles with different colors fills in gaps and makes the design more magical.
- When cutting, be gentle to avoid damaging the design.
- Use a flat surface and heat tool carefully for even shrinking.