Seashells, with their inherent beauty and varied textures, offer a wealth of potential for crafting unique and personalized jewelry. From delicate strands of pearly white to vibrant, intricately patterned specimens, the ocean's bounty provides a stunning base for creative expression. This natural artistry, combined with the simple yet elegant technique of wire wrapping, opens up a world of possibilities for even the most novice jewelry maker. Forget expensive kits and complicated techniques; this tutorial will guide you through creating beautiful, lasting pieces using readily available materials.
Transforming simple seashells into exquisite necklaces, earrings, or keychains is easier than you might think. This easy-to-follow wire wrapping tutorial will take you step-by-step through the process, providing clear instructions and helpful tips to ensure you achieve professional-looking results, no prior experience necessary. Let's dive in and unleash your inner artisan!
Preparation and Safety Guidelines
- Seashells with holes
- Antique brass wire (or other wire)
- Round nose pliers
- Flat nose pliers
- Always use sharp wire cutters to prevent bending or injuring yourself. Dull cutters require more force, increasing the risk of accidents.
- Wash your seashells thoroughly before handling to remove any potential irritants or bacteria. Some shells may be fragile; handle with care.
- If using wire that requires soldering, ensure adequate ventilation and follow all safety precautions outlined on the soldering equipment and materials.
Step-by-Step Instructions
Prepare the Wire
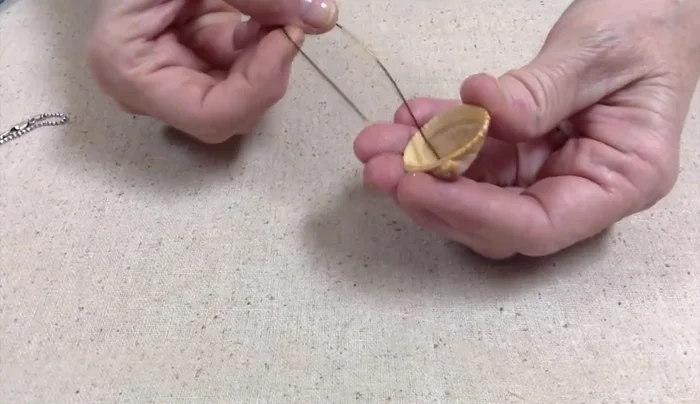
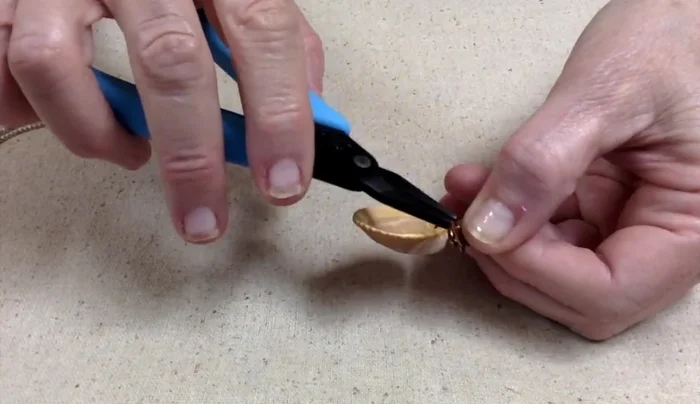
- Cut approximately 8 inches of wire and fold it in half.

Prepare the Wire Attach the Wire to the Seashell
- Thread the wire through the hole in the seashell.
- Cross the wires and twist them together tightly to join them as one piece. Neatness isn't crucial at this stage.
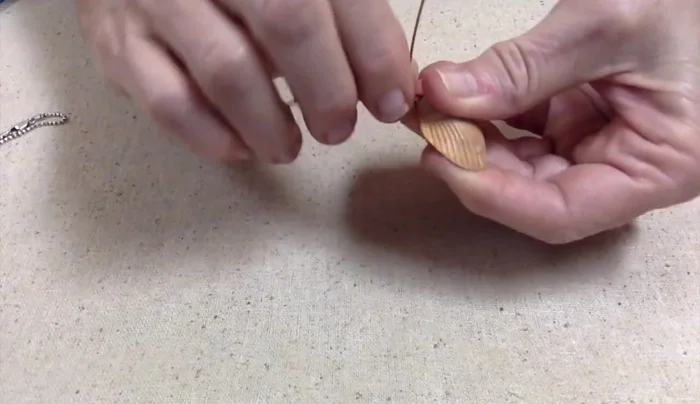
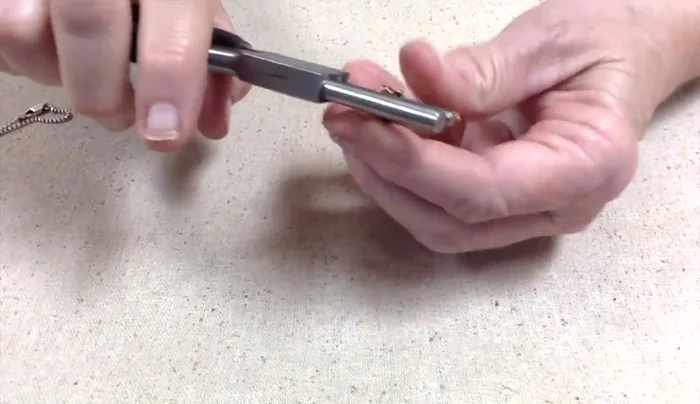
Attach the Wire to the Seashell Create the Bail Loop
- Use round nose pliers (or similar) to create a loop at the end of the twisted wires.
- Wrap the wire around the loop, creating the bail. Wrap it multiple times for a more secure and organic look.
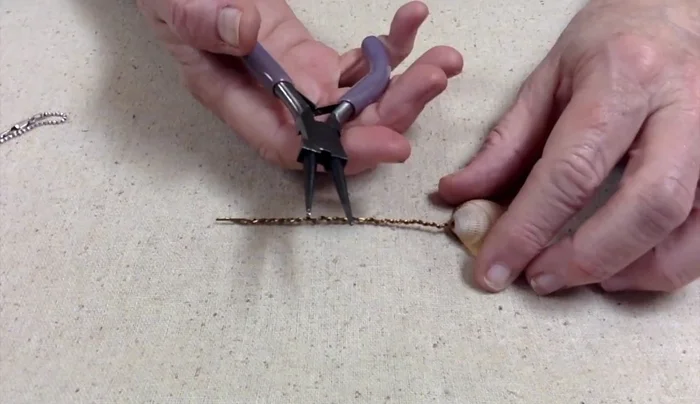
Create the Bail Loop Finish and Adjust
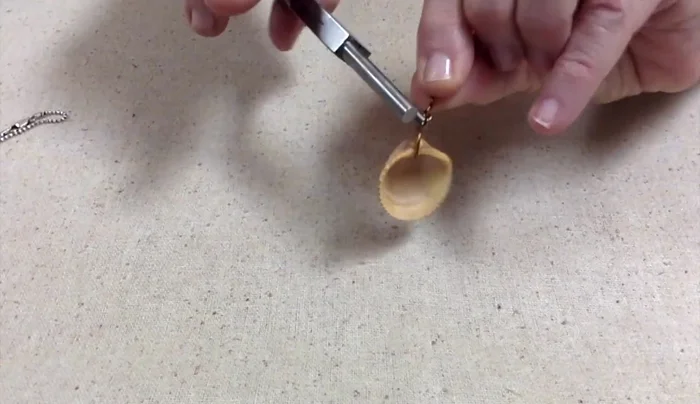
- Tuck in the ends of the wire using flat nose pliers to ensure a smooth, comfortable finish. Make sure the wires are not poking out.
- Adjust the bail to ensure the seashell hangs correctly when placed on a chain or earring finding. It should hang straight, not sideways.
Finish and Adjust

Read more: Elegant Russian Spiral Necklace Tutorial: A Step-by-Step Guide
Tips
- Seashells with pre-existing holes make the wrapping process much easier.
- Experiment with different wire colors to find the best match for your seashells.
- Don't worry about making the twists perfectly neat; it won't be visible once the bail is completed.
- Use different pliers as needed to make the process easier and more efficient.
- For earrings, use jump rings to attach the wrapped seashells to ear wires for a simple design.