Are you a cat lover with a penchant for crafting? Do you secretly yearn to express your geeky side through unique, handmade accessories? Then look no further! This tutorial will guide you through the delightful process of creating adorable cat and yarn dangle earrings using polymer clay. Combine the charm of feline friends with the cozy texture of yarn, resulting in quirky and stylish earrings perfect for adding a touch of personality to any outfit. Forget mass-produced jewelry; embrace the satisfaction of crafting something truly unique and representative of your personal style.
This project blends the satisfying tactile experience of working with polymer clay with the simple yet effective addition of yarn, creating an unexpectedly charming outcome. From shaping the miniature feline companions to carefully assembling the components, we’ll walk you through each step, ensuring even beginners can confidently create these delightful dangle earrings. Let's dive into the step-by-step process and bring your whimsical earring design to life!
Preparation and Safety Guidelines
- Polymer clay
- Rolling pin
- Dotting tool
- Xacto blade
- Eye pins
- Head pins
- Wire cutters
- Glue
- Chain
- Pliers
- Jump rings (optional)
- Cotton swab
- Rubbing alcohol
- Oven
- Polymer clay needs to be baked according to the manufacturer's instructions to harden properly. Improper baking can result in fragile earrings.
- Always use a well-ventilated area when baking polymer clay to avoid inhaling fumes.
- Ensure the earring findings (ear wires, jump rings) are nickel-free or made of hypoallergenic materials if you have sensitive skin.
Step-by-Step Instructions
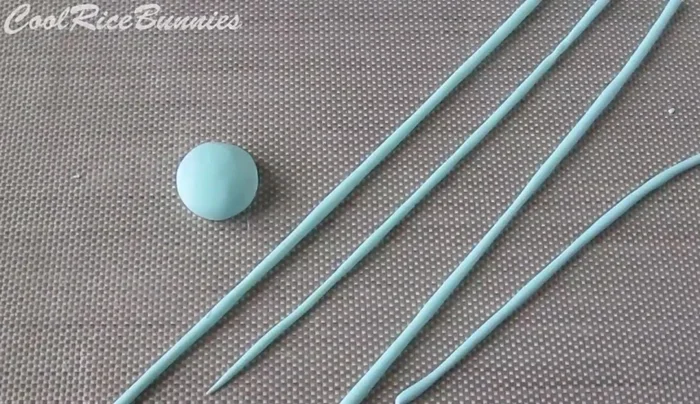
Prepare Yarn Balls
- Make two dome shapes of your chosen color. Roll out thin coils of the same clay and layer them onto the domes to create a stringy pattern. Attach a small coil to the back, blending it in with a tool or fingers. Optionally, insert head pins to mimic knitting needles.

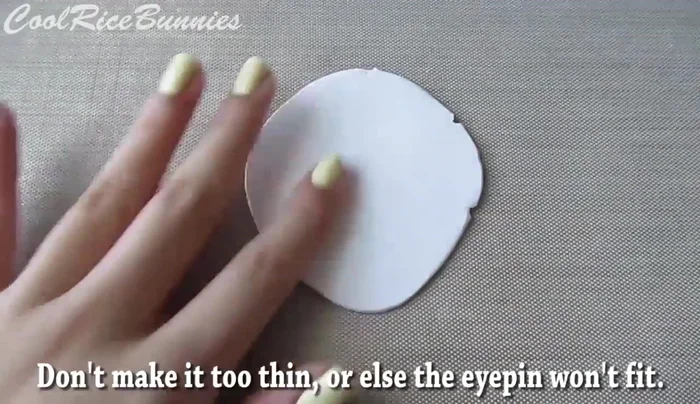
Prepare Yarn Balls Prepare Cat Shapes
- Flatten clay into a sheet. Cut out a cat silhouette (you can freehand or use a template). Use a dotting tool to add details. Smooth out the edges.
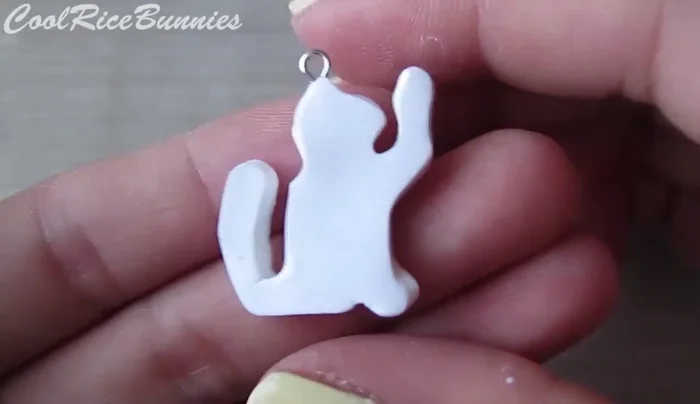
Prepare Cat Shapes Attach Eye Pins
- Insert an eye pin into the top of the cat and the bottom of the yarn balls.
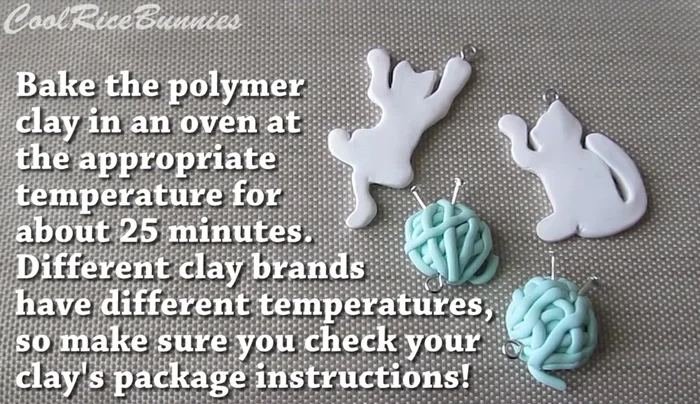
Attach Eye Pins Bake Polymer Clay
- Bake the pieces according to your clay's instructions (usually around 25 minutes).
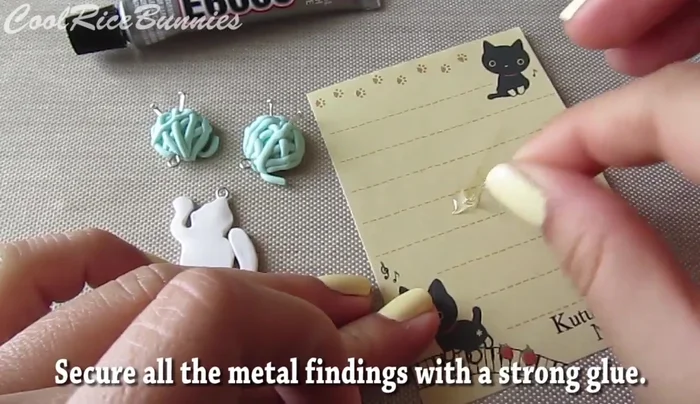
Bake Polymer Clay Secure Metal Findings
- After baking, use strong glue to secure all metal pieces (eye pins, head pins).
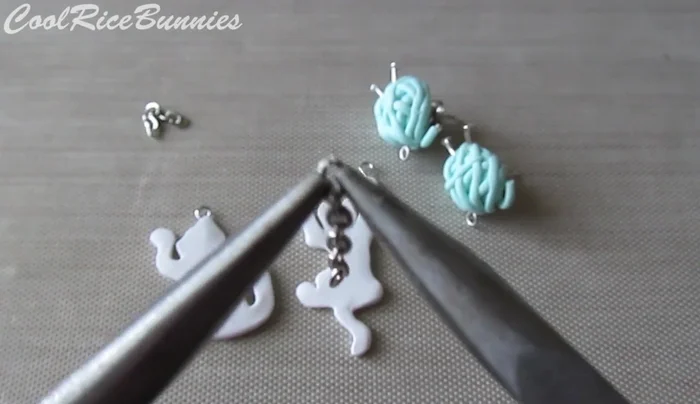
Secure Metal Findings Assemble Earrings
- Attach chains to the eye pins using pliers and jump rings (optional). Add stud earrings to the back of the yarn balls if desired.
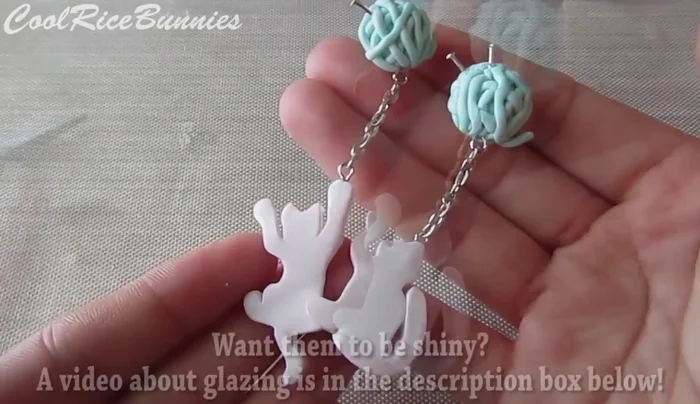
Assemble Earrings Optional: Glaze Earrings
- Glaze for shine.
Optional: Glaze Earrings
Read more: Twisted Wire Spiral Earrings: A Step-by-Step Guide
Tips
- Clean your clay with a cotton swab and rubbing alcohol to remove fingerprints and dust before baking.
- Use a printed cat silhouette as a guide if you can't freehand one.