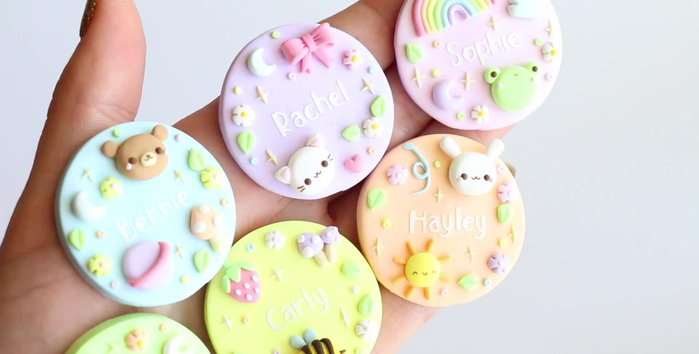
Add a pop of personality to your next event or simply brighten your everyday life with these adorable, colorful pastel name badge pins! This tutorial will guide you through creating uniquely charming pins using the versatile combination of polymer clay and Cricut vinyl. Forget boring, generic name tags; we'll craft personalized pins that are as fun and expressive as you are. Think soft, dreamy colors, intricate designs, and a touch of handmade magic – all achievable with readily available materials and a bit of crafting know-how.
Prepare to unleash your inner artist as we delve into the simple yet effective techniques needed to shape, bake, and decorate these delightful pins. From preparing your polymer clay to precisely applying the Cricut vinyl details, we'll walk you through every step of the process with clear instructions and helpful tips. Ready to get started and make your own set of stylish and personalized pastel name badge pins? Let's dive into the step-by-step tutorial!
Preparation and Safety Guidelines
- Polymer clay
- Baking paper/Parchment paper
- Popsicle sticks
- Round cookie cutter
- Gold backings
- Glue
- Needle tool
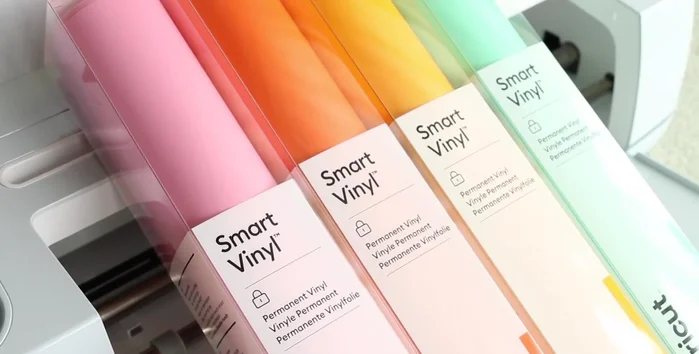
- Cricut Maker 3
- Smart vinyl (permanent)
- Smart paper sticker card stock
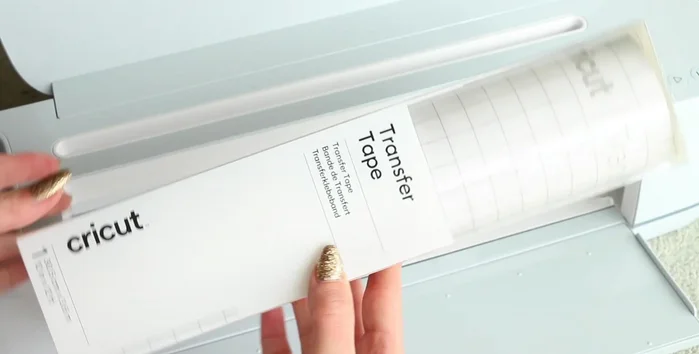
- Cricut transfer tape
- Cricut tool
- Super glue
- Thicker cardboard
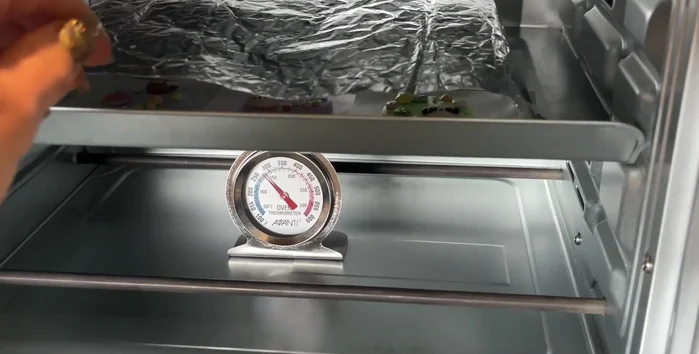
- Always work in a well-ventilated area when baking polymer clay. The fumes can be harmful if inhaled.
- Use oven mitts or gloves when handling hot baked clay to avoid burns.
- Supervise children closely if they are participating in any part of this project, especially around the oven and sharp tools.
Step-by-Step Instructions
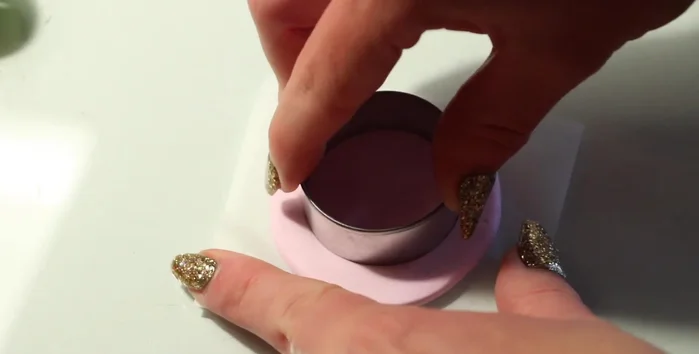
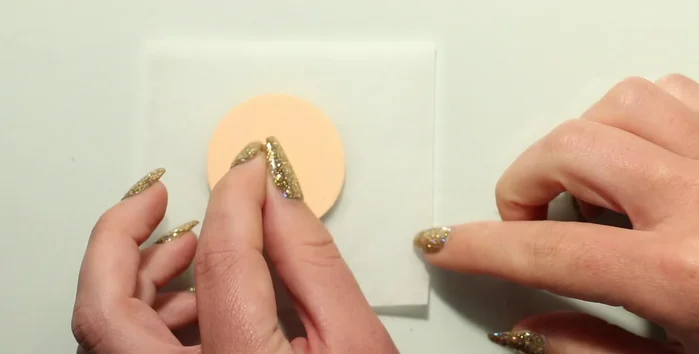
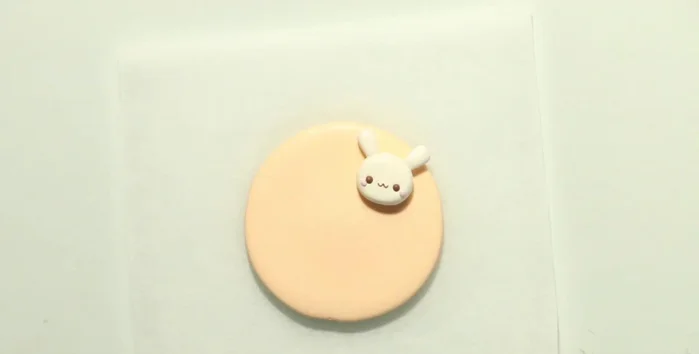
Prepare Polymer Clay Backings
- condition and roll to even thickness using popsicle sticks.
- Cut out circular clay backings using a cookie cutter.
- Create indentations for gold backings and remove excess clay.

Prepare Polymer Clay Backings Create Polymer Clay Decorations
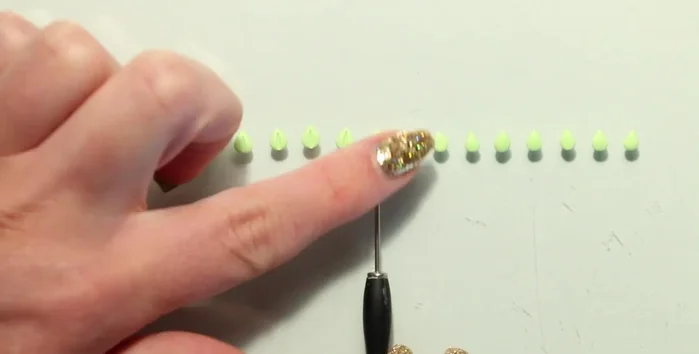
- Create small clay decorations (leaves, flowers, animals).
Create Polymer Clay Decorations Assemble Polymer Clay Badges
- Assemble decorations onto clay backings, leaving space for names.
Assemble Polymer Clay Badges Bake Polymer Clay Badges
- Bake polymer clay according to package instructions.
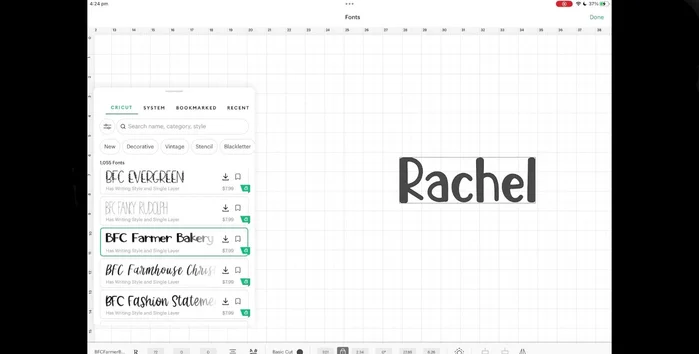
Bake Polymer Clay Badges Design Name Labels
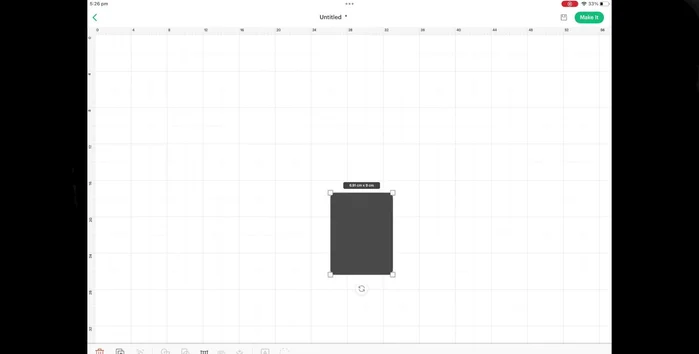
- Design name labels using Cricut Design Space software.
Design Name Labels Cut Vinyl Names and Card Stock Backings
- Cut vinyl names using Cricut Maker 3.
- Design and cut card stock backing using Cricut Maker 3.
Cut Vinyl Names and Card Stock Backings Apply Vinyl Names to Badges
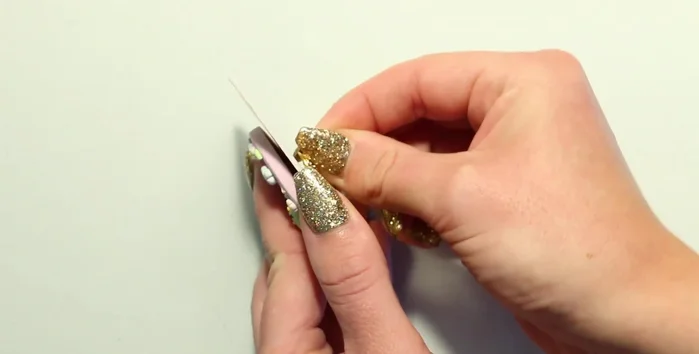
- Apply vinyl names to clay backings using transfer tape.
Apply Vinyl Names to Badges Attach Pins and Final Assembly
- Glue pins to the back of the clay designs.
- Attach finished badges to card stock backings mounted on thicker cardboard for sturdiness.
Attach Pins and Final Assembly

Read more: DIY Wonky House Brooches: The Fastest & Easiest Method
Tips
- Use a mockup to plan out the design and colors beforehand.
- Use a foil tent while baking to ensure even baking.
- The Cricut Maker 3 can cut smart materials without a mat, but using a mat can reduce waste.