Layered necklaces are a timeless and effortlessly chic accessory, adding instant personality and style to any outfit. But the thought of creating your own layered beaded necklace might seem daunting – intricate patterns and complex techniques often spring to mind. Fear not! This tutorial will guide you through the easiest method for crafting a stunning, multi-layered necklace, perfect for beginners and experienced crafters alike. We’ll use readily available materials and simple techniques to achieve a professional-looking result in minimal time.
Forget fiddly knots and complicated designs; this method focuses on simplicity and elegance. We'll be focusing on a streamlined approach that allows you to customize the length, bead colors, and overall aesthetic to perfectly match your personal style. Ready to transform simple beads into a beautiful layered necklace? Let's dive into the step-by-step process now!
Preparation and Safety Guidelines
- 16 inches of 3mm faceted round aqua crystal beads (fire polished finish)
- 16 inches of 2x3mm faceted crystal rondelles (light topaz with AB finish)
- 16 inches of 3-5mm freshwater pearls
- Teardrop bezel set pendant (blue chalcedony and gold)
- 19-strand bead stringing wire (gold)
- 4 gold clamshell bead tips
- 6 size 0 crimp beads
- 2 6mm jump rings
- Gold lobster clasp
- Chain nose pliers
- Wire cutters
- Jump ring opener
- Ruler
- Masking tape
- Scissors
- Bead scoop (optional)
- Always use sharp, high-quality beading wire or thread to prevent breakage and ensure a secure hold. Dull tools can damage beads and cause frustration.
- Before starting, plan your bead layout on a flat surface. This helps visualize the finished necklace and avoid mistakes during the layering process.
- Securely fasten all knots and clasps to prevent beads from falling off. Double-knotting is recommended, especially with heavier beads or delicate materials.
Step-by-Step Instructions
Prepare the Beading Wire
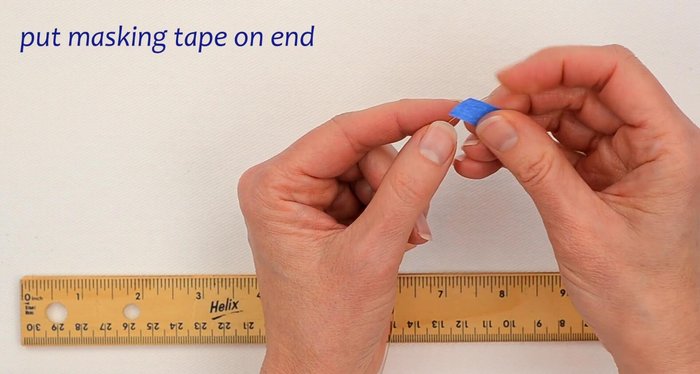
- Cut an 18-inch piece of bead stringing wire and tape one end to prevent beads from sliding off.

Prepare the Beading Wire Create the Pearl Strand
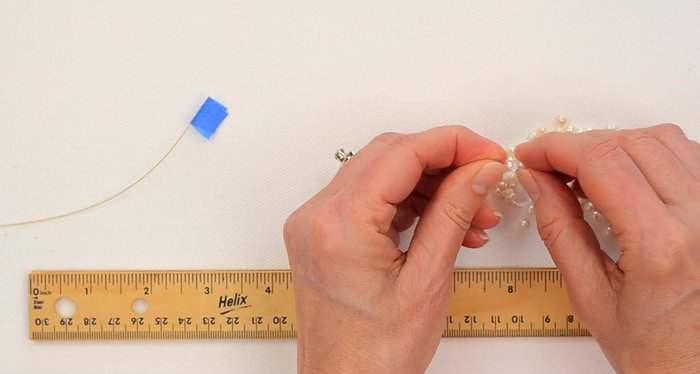
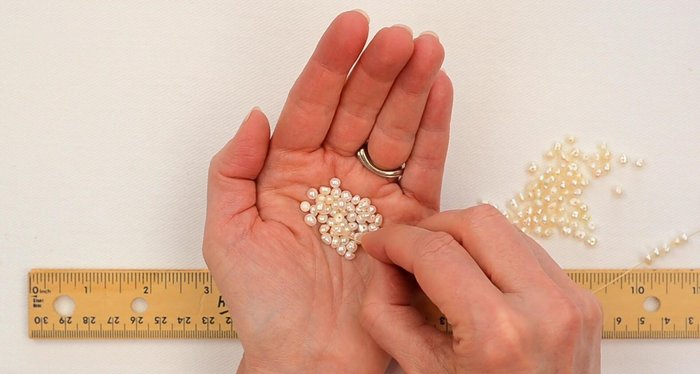
- String the pearls onto the wire, aiming for an 8-inch section. Add the pendant, ensuring it sits between pearls.
- Continue stringing pearls until you have a total of 16 inches.
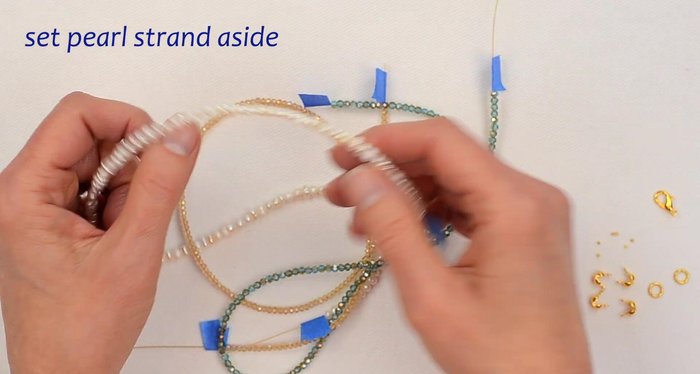
Create the Pearl Strand Create the Crystal Strands
- Repeat steps 2 & 3 for the aqua crystal beads and light topaz crystal rondelles strands.
Create the Crystal Strands Finish Crystal Strand Ends
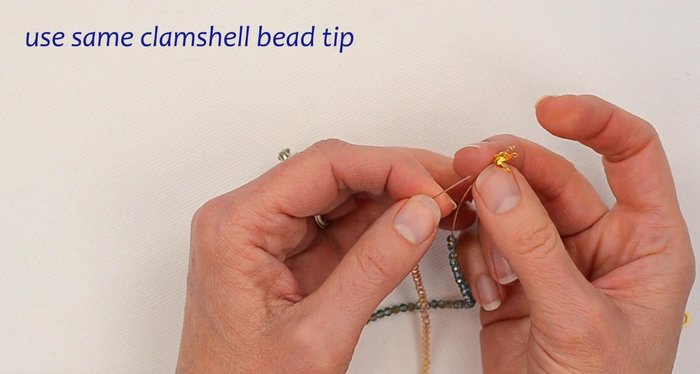
- Attach a clamshell bead tip, add a crimp bead, flatten it, trim excess wire, and press the clamshell closed.
- Repeat step 5 for the other ends of the crystal strands, using the same clamshell tip for both.
Finish Crystal Strand Ends Finish Pearl Strand Ends
- Finish the pearl strand ends using the same technique as in step 5.
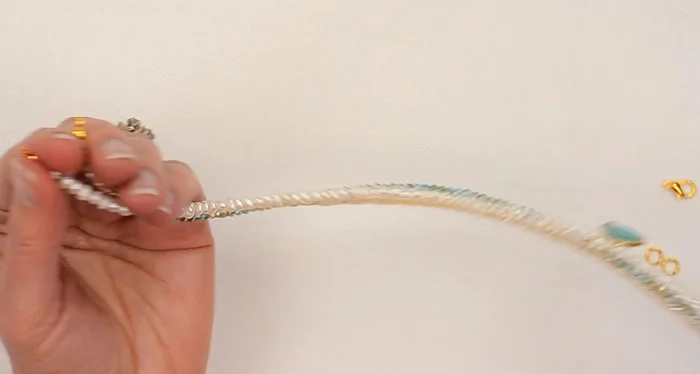
Finish Pearl Strand Ends Assemble the Necklace
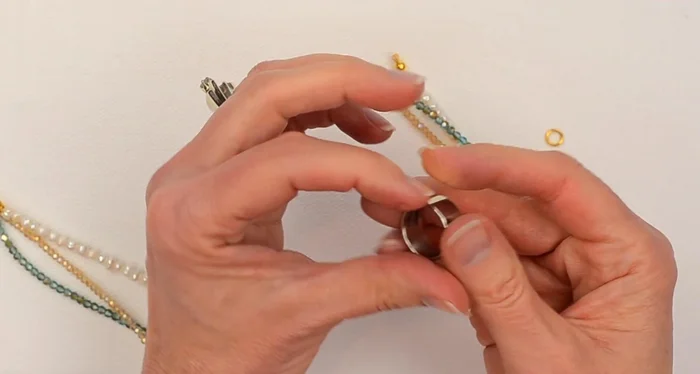
- Open a jump ring, attach all three strands and the lobster clasp, then close the jump ring.
- Repeat step 8 for the other end of the necklace.
Assemble the Necklace


Read more: Elegant Russian Spiral Necklace Tutorial: A Step-by-Step Guide
Tips
- Use a bead scoop to quickly gather beads.
- Test your beading wire to ensure it fits through the holes of your pearls.
- Measure your desired necklace length before beading.
- Use a jump ring opener to maintain the round shape of your jump rings when opening them.
- Crimp beads inside the clamshell tips for a secure and neat finish.