Have you ever longed to add a touch of whimsical elegance to your attire? This tutorial will guide you through the enchanting process of creating your very own charming resting moth brooch, a delicate piece of wearable art perfect for adding a unique flair to jackets, sweaters, or even bags. Imagine the intricate details, the subtle shimmer of beads catching the light, the captivating stillness of the embroidered moth wings – a tiny masterpiece crafted entirely by your own hands. This isn't just a brooch; it's a statement of creativity and a testament to your crafting skills.
We'll be using embroidery and beading techniques to bring this delightful design to life, resulting in a truly captivating accessory. From choosing the right fabrics and threads to mastering the delicate embroidery stitches and secure bead placement, we’ll cover every step of the way. Let’s begin our journey into the world of textile artistry by diving into the step-by-step instructions below.
Preparation and Safety Guidelines
- Wool blend felt (or craft felt)
- Embroidery floss (6 strands, 3 colors)
- Embroidery scissors
- Sewing needle
- Beading needle
- Teal Gutermann thread
- Tila beads
- Size 11 seed beads
- Various sequins (sizes 3, 5, 8, 10)
- Size 15 green Iris seed beads
- Gold wire
- Buckram
- Bent pins
- Use sharp embroidery needles and exercise caution to avoid pricking yourself. Always point needles away from your body when not actively stitching.
- Handle beads carefully to prevent them from rolling away and causing a choking hazard, particularly if working with small children nearby.
- When working with metallic threads or wires, be mindful of sharp edges and avoid pulling them too tightly, as this could cause breakage or injury.
Step-by-Step Instructions
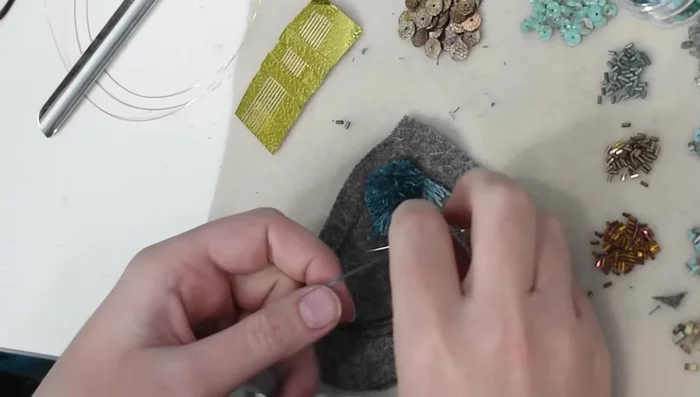
Moth Body Preparation
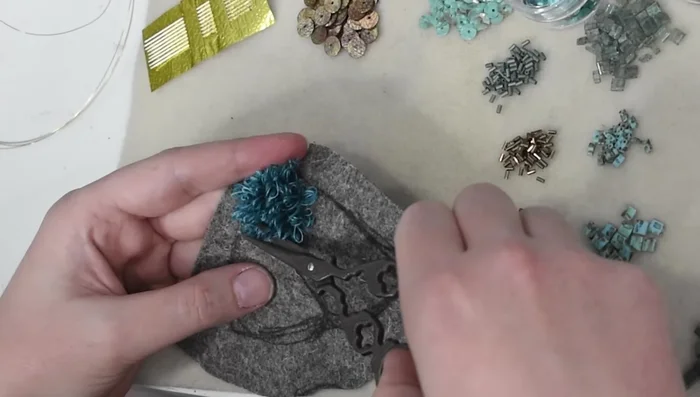
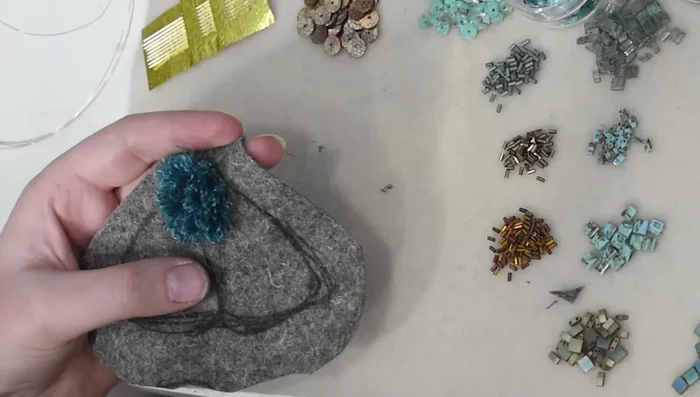
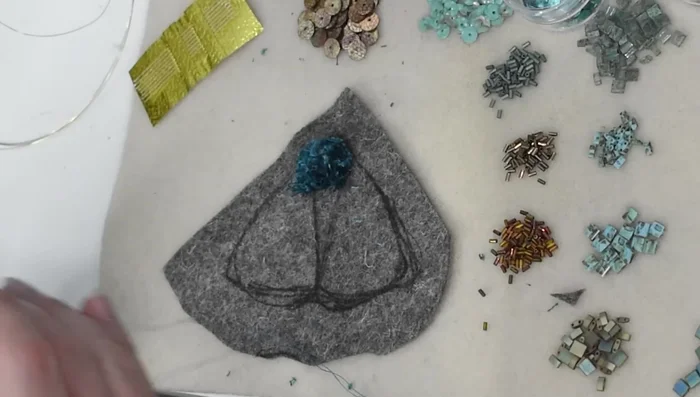
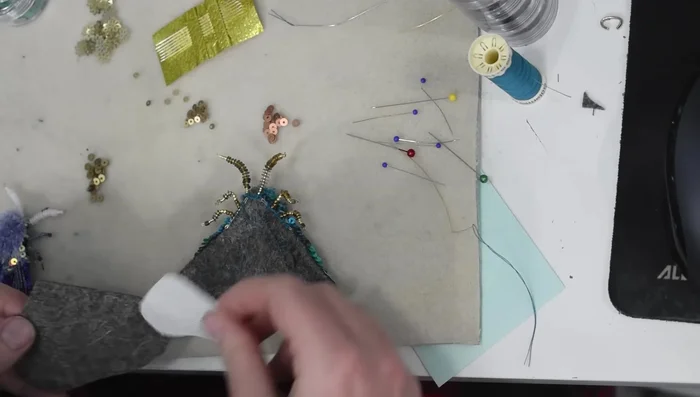
- Sketch moth shape onto felt.
- Embroider head and body with Turkish/rug stitch using variegated floss. Create loops approx 1cm long and secure with a small stitch over the loop beginnings.
- Cut the loops to create a fuzzy texture.
- Trim the fuzzy texture to create a dome shape.

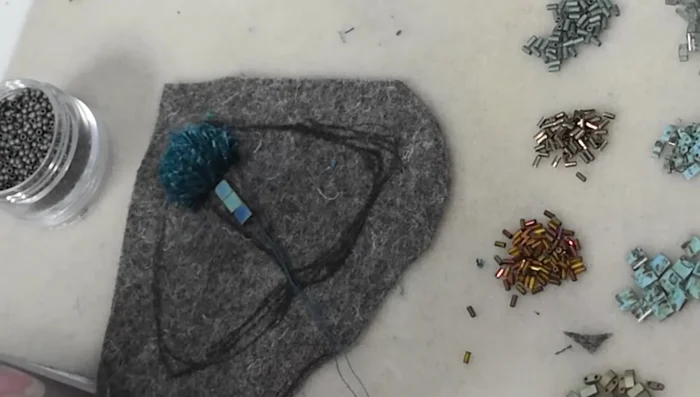
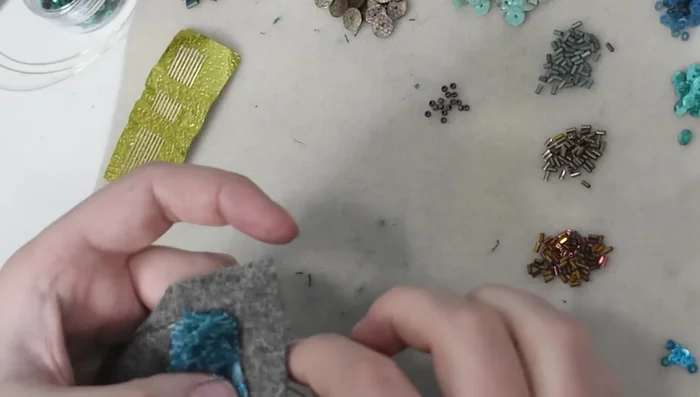
Moth Body Preparation Embroidering and Beading the Body
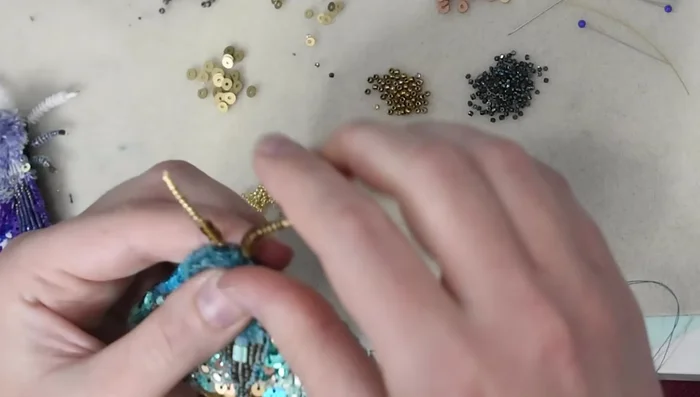
- Embroider body with Tila beads using a beading needle and teal thread.
- Add seed beads to fill the body using couching technique (stitching over the thread holding the beads).
- Outline the beaded body section with French knots.
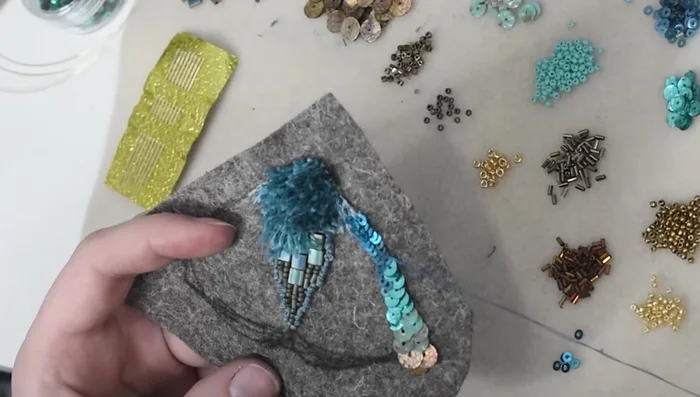
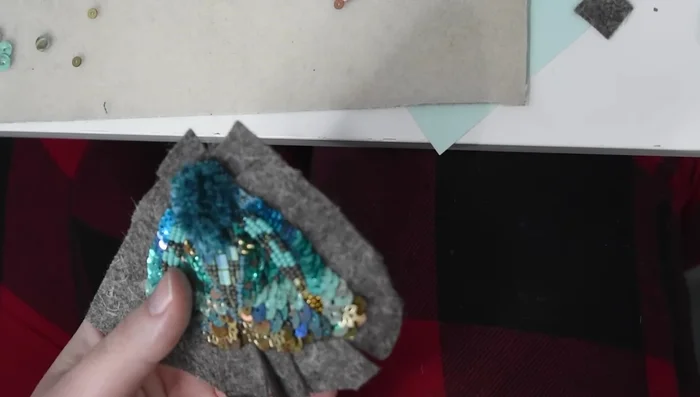
Embroidering and Beading the Body Wing Embroidery and Decoration
- Embroider top wings with split stitch using variegated floss.
- Embellish wings with sequins, grading size and color from top to bottom. Use couching to secure sequins.
- Add rows of beads to create spotted accents, using couching to secure.
Wing Embroidery and Decoration Securing and Backing
- Cut tabs around the felt edge, fold them to the underside and secure with stitches.
- Attach buckram to the back for extra support.
- Add a final felt backing, cutting slits for pin, and securing edges with blanket stitch.
Securing and Backing Finishing Touches
- Attach pin backing with stitches.
- Add antennae and legs using gold wire, seed beads and sequins.
- Arrange the moth's features and secure with stitches.
Finishing Touches


Read more: DIY Wonky House Brooches: The Fastest & Easiest Method
Tips
- Mix embroidery floss colors for a variegated effect.
- Use couching to efficiently secure beads and sequins.
- Grade sequin sizes and colors for a dimensional look.
- Use blanket stitch for neat and secure fastening of felt layers.