Vintage-inspired jewelry always adds a touch of timeless elegance to any outfit, and lavalier necklaces are a particularly charming choice. Their delicate design and close-to-the-neck placement offer a subtle yet sophisticated statement. Creating your own vintage-style lavalier necklace is easier than you might think, allowing you to personalize your jewelry and enjoy the satisfaction of a handmade piece. Forget expensive boutiques and mass-produced designs; with just a few readily available materials and a little creativity, you can craft a unique necklace that reflects your personal style.
This tutorial provides a clear and concise step-by-step guide to crafting your very own DIY vintage lavalier necklace. From selecting the perfect chain and pendant to adding those final touches of vintage charm, we'll walk you through the entire process, ensuring you achieve a stunning result. Let's dive in and start creating your beautiful, bespoke necklace!
Preparation and Safety Guidelines
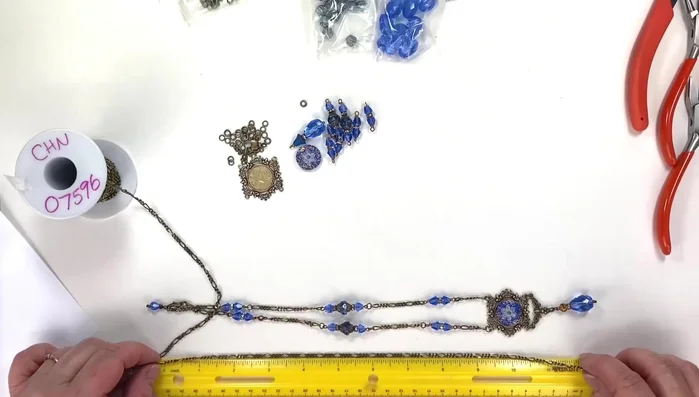
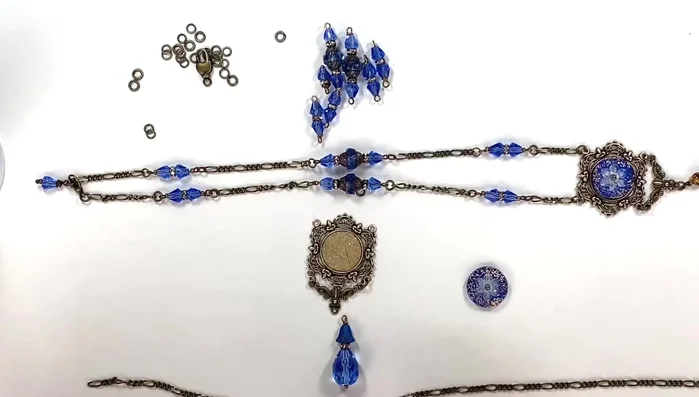
- Figaro chain
- Brass ox jump rings
- Sapphire blue stones (or stones of your choice)
- Czech glass fire polish pear stones
- Jump rings
- E6000 glue
- Toothpick
- Ruler
- Wire cutters
- Clasp (Lobster claw or swivel clasp)
- Jump ring pliers (optional)
- Always use pliers appropriate for the wire gauge you are working with to avoid bending or breaking the wire. Improper tools can lead to injury.
- Be mindful of sharp components, such as wire ends or jump rings. Use a protective surface and handle components carefully to prevent cuts or scratches.
- If using vintage components, check for any loose stones or unstable elements before handling. Secure any loose components to prevent loss or injury.
Step-by-Step Instructions
Prepare Materials
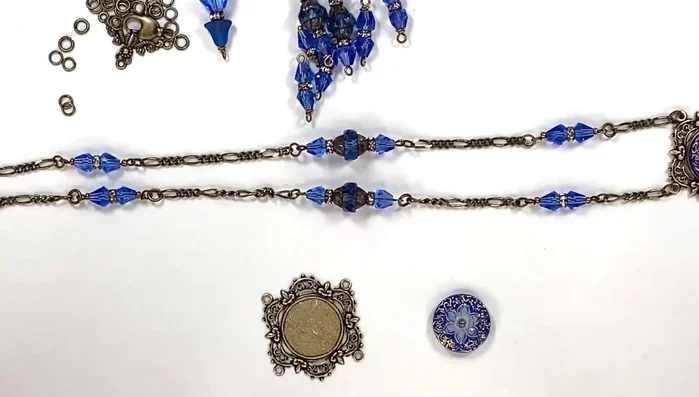
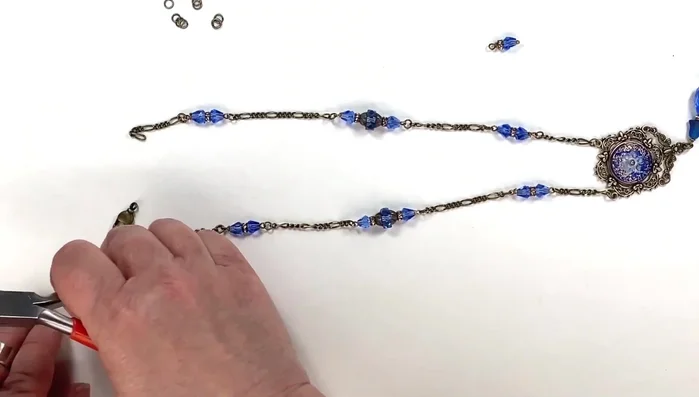
- Measure and cut the Figaro chain to the desired length (around 18-20 inches). Cut additional pieces of chain for the side accents (approximately 1.5 inches each, but adjust according to your preference).

Prepare Materials Prepare Centerpiece
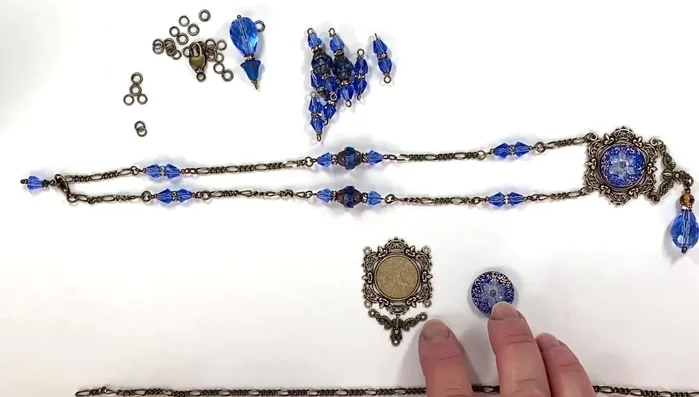
- Secure the 18mm stone (or your chosen stone) into a setting (Brock's 038). Ensure the stone is mounted vertically.
- Attach the prepared hanger (CHM04485) to the back of the center stone setting.
Prepare Centerpiece Attach Centerpiece & Glue
- Apply E6000 glue to the back of the center stone setting and carefully attach it to the main chain.
Prepare Side Accents
- Cut the chain pieces to create 3 loops for each side accent. The tutorial uses a combination of longer and shorter pieces.
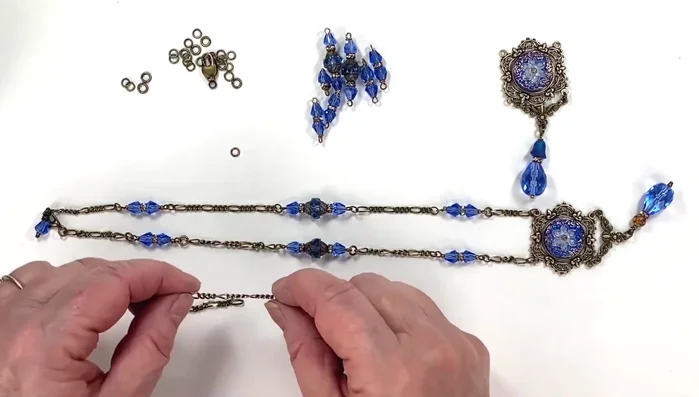
Assemble Side Sections
- Attach the prepared side chain accents to the main chain, using jump rings.
Assemble Side Sections Attach Pendant Drop
- Attach the Czech glass pear stone to create a pendant drop.
Attach Pendant Drop Attach Clasps
- Attach the lobster claw or swivel clasp to each end of the necklace using jump rings.
Attach Clasps
Read more: Elegant Russian Spiral Necklace Tutorial: A Step-by-Step Guide
Tips
- Chain length: Adjust the chain length to fit your neck comfortably. The tutorial recommends 18-20 inches.
- Stone choices: Use any flat-backed stone you prefer; the tutorial uses a specific type available on the website.
- Side accent variations: Experiment with the number of loops and chain lengths for the side accents to achieve your desired look.
- Jump ring technique: Use jump ring pliers for precise and efficient attachment of jump rings.
- Lavalier variations: Explore different pendant drop styles and methods for creating a vintage lavalier style necklace.