Have you ever wished you could transform your treasured vintage brooches into something both practical and stylish? Many of us possess beautiful antique or vintage brooches, tucked away in jewelry boxes, rarely seen. These charming pieces, often imbued with sentimental value or simply possessing exquisite craftsmanship, deserve more than a dusty existence. This is where the ingenious idea of repurposing them into unique and personalized bookmarks comes in. Imagine the delight of marking your place in your favorite novel with a stunning, one-of-a-kind piece of history.
Forget boring, mass-produced bookmarks – embrace the elegance and individuality of a DIY vintage brooch bookmark! This guide will walk you through a simple, yet effective process, perfect for crafters of all skill levels. Ready to turn your cherished brooches into beautiful, functional book companions? Let's dive into the step-by-step instructions.
Preparation and Safety Guidelines
- Rhinestone brooches
- Clip-on earrings
- Buttons
- Heart charms
- Tassels
- 9-inch ribbon (grosgrain recommended)
- Ribbon ends
- Crimp ends
- Fabric glue
- Metal filigrees
- Jump rings
- Chain nose pliers
- Round nose pliers
- Wire snips
- Always handle vintage brooches gently to avoid damage to the delicate enamel, stones, or metal. Avoid excessive force when attaching the brooch.
- Before gluing, thoroughly clean both the brooch and the bookmark to ensure a strong bond. Use a glue specifically designed for jewelry and book materials (e.g., archival-quality glue).
- If the brooch is particularly heavy or fragile, consider reinforcing the bookmark with additional support, such as a piece of sturdy cardstock or fabric, before attaching the brooch to prevent breakage or damage to the book pages.
Step-by-Step Instructions
Prepare Brooches and Buttons
- Remove pin backs from brooches and shanks from buttons using wire snips. Wear eye protection.

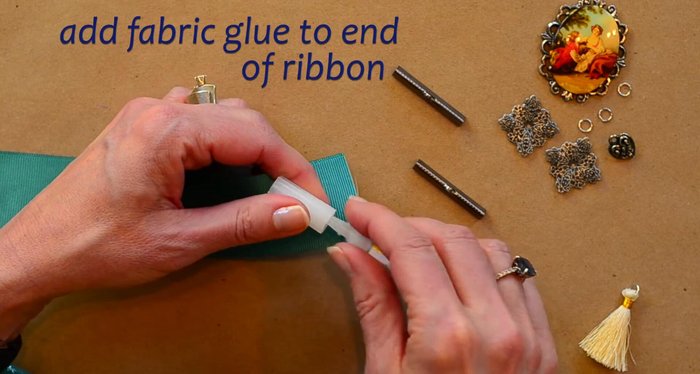
Prepare Brooches and Buttons Secure Ribbon Ends
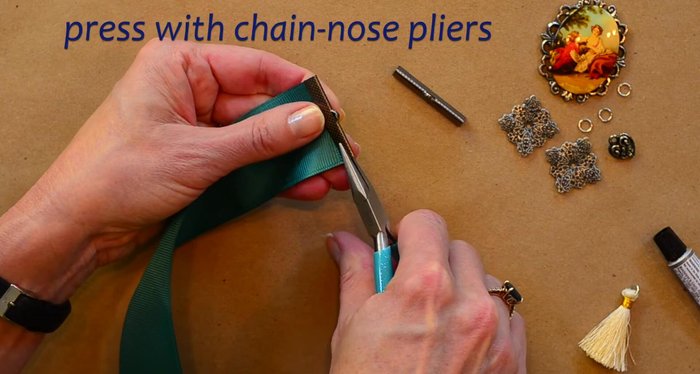
- Attach ribbon ends to the ribbon using fabric glue for extra security. Ensure the crimp ends are the same width as your ribbon.
- Secure the crimp ends onto the ribbon using flat nose pliers. Press firmly to compress the crimp end and secure it to the ribbon.
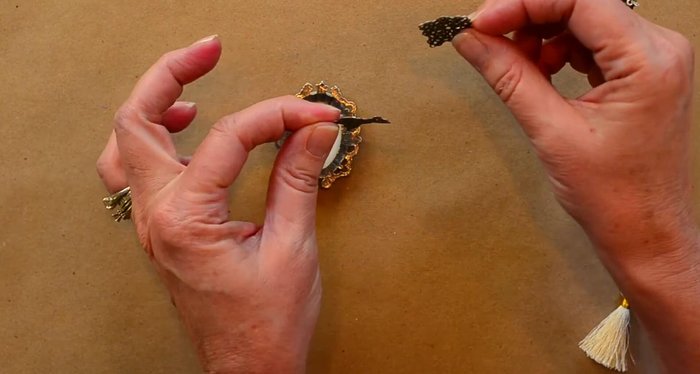
Secure Ribbon Ends Attach Filigrees and Prepare for Jump Rings
- Attach metal filigrees to the back of the brooch using glue to create loops for attaching jump rings. Allow glue to dry completely (15 minutes).
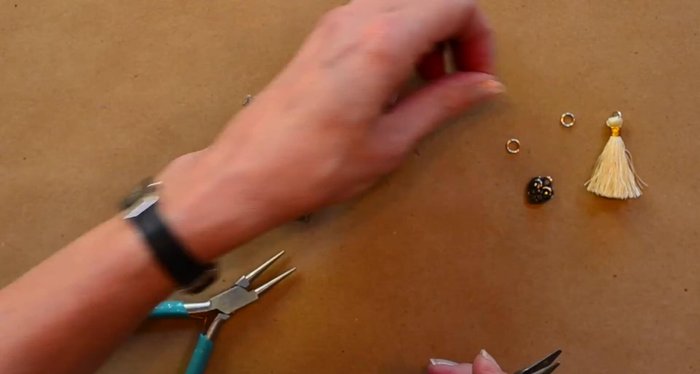
Attach Filigrees and Prepare for Jump Rings Attach Charm to Brooch
- Open jump rings using two pairs of pliers (one holding, one twisting). Attach one end of the jump ring to the lower filigree and the other end to a charm (heart, etc.). Close the jump ring.
Attach Charm to Brooch Attach Brooch to Ribbon
- Repeat step 5 to attach the top of the brooch assembly to the ribbon.
Attach Brooch to Ribbon Attach Tassel to Ribbon
- Attach a tassel to the other end of the ribbon using the same jump ring technique as steps 5 and 6.
Attach Tassel to Ribbon


Read more: DIY Wonky House Brooches: The Fastest & Easiest Method
Tips
- Use grosgrain ribbon for best results with crimp ends.
- Use smaller gunmetal jump rings for a more refined look, but larger rings make the process easier to see.
- Always open jump rings by twisting, not pulling apart. This prevents damage and keeps the ring circular.