Love the look of delicate, shimmering earrings but intimidated by complex jewelry-making techniques? Then you're in the right place! This tutorial will show you how to create stunning glass bead earrings in just five minutes, proving that beautiful accessories don't require hours of painstaking work. We'll use readily available materials and simple steps, making this project perfect for beginners and seasoned crafters alike who are short on time but big on style. Forget expensive boutique finds; you'll be surprised at how quickly and easily you can elevate your jewelry game with these charming earrings.
These easy-to-follow instructions will guide you through each stage of the process, from gathering your materials to proudly displaying your handmade creations. Get ready to unleash your inner artisan and discover the joy of crafting beautiful, personalized jewelry in a fraction of the time you might expect. Let's dive into the step-by-step guide to making your own 5-minute DIY glass bead earrings!
Preparation and Safety Guidelines
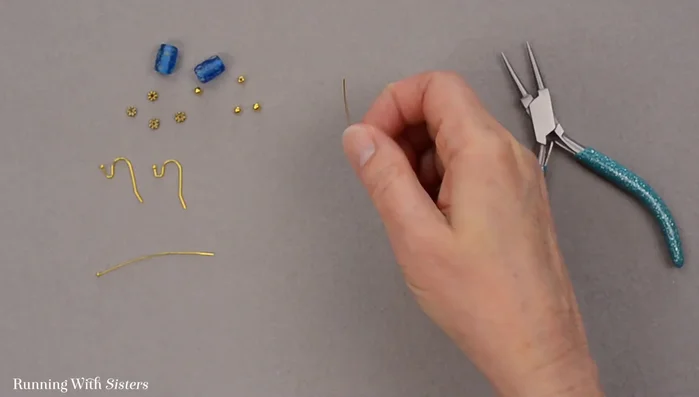
- Glass beads (7mm x 12mm cylinders)
- Gold daisy spacers (4mm)
- Gold round beads (3mm)
- Gold earring wires
- Gold head pins
- Wire cutters
- Round nose pliers
- Always supervise children during crafting. Small beads pose a choking hazard.
- Avoid wearing bead earrings during strenuous activities or sleep to prevent accidental damage or injury.
- If you have sensitive skin, test a small area before wearing the earrings to check for allergic reactions.
Step-by-Step Instructions
Prepare and Add Beads
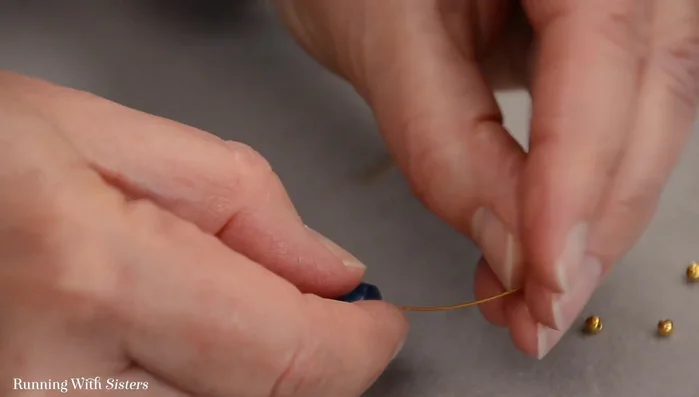
- Prepare head pin and add beads.
- Add one round gold bead, one daisy spacer, and one glass cylinder bead to the head pin.
- Repeat step 2 in reverse order (daisy spacer, round bead).

Prepare and Add Beads Create the Earring Loop
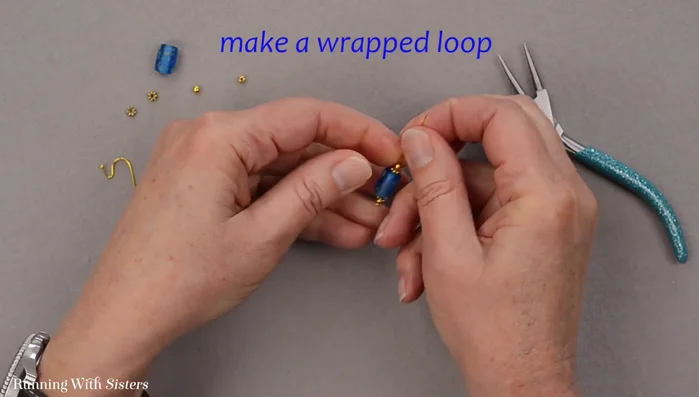
- Create a wrapped loop at the top of the head pin using round nose pliers.
- Pinch the wire above the last bead, bend it 90°, and wrap it around twice to secure the loop.
- Trim excess wire.
Create the Earring Loop Attach to Earring Wire
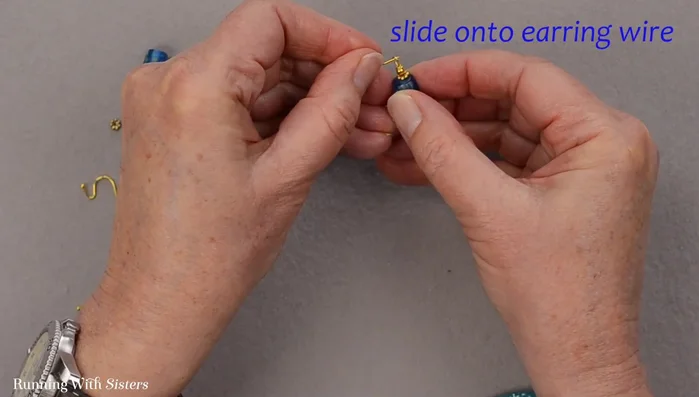
- Slide the earring onto the earring wire and close the loop.
Attach to Earring Wire Make the Second Earring
- Repeat steps 1-7 for the second earring.
Make the Second Earring

Read more: Twisted Wire Spiral Earrings: A Step-by-Step Guide
Tips
- Use matching beads for the center to create a symmetrical look.
- Simple earrings are versatile and can be worn with various outfits.