Geometric beaded earrings are a stylish and versatile accessory, perfect for adding a touch of modern elegance or playful whimsy to any outfit. Their seemingly intricate designs can be surprisingly simple to create, making them an ideal project for both beginners and experienced crafters. The beauty of these earrings lies in their customizable nature; experiment with different bead colors, sizes, and shapes to achieve a truly unique look that reflects your personal style. From delicate minimalist designs to bold statement pieces, the possibilities are endless.
This guide will walk you through two straightforward methods for crafting your own stunning geometric beaded earrings, requiring minimal materials and tools. Whether you prefer a simple, quick technique or a slightly more involved approach, we've got you covered. Get ready to unleash your creativity and let's dive into the step-by-step instructions below.
Preparation and Safety Guidelines
- 18 or 20 gauge wire
- Earring hooks
- Variety of beads (4-6-8mm)
- Flat pliers
- Round pliers
- Always supervise children when working with small beads and wires to prevent choking hazards or accidental ingestion.
- Use sharp scissors or wire cutters to avoid injuring yourself when cutting wire. Be mindful of where your fingers are placed.
- If using jewelry wire, be cautious of sharp ends and wear gloves if you have sensitive skin to avoid cuts or irritation.
Step-by-Step Instructions
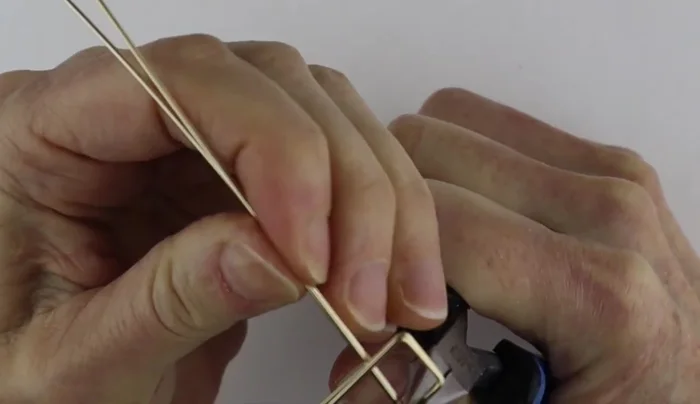
Prepare the Wire
- Cut two pieces of wire long enough for the earring height plus the loop.
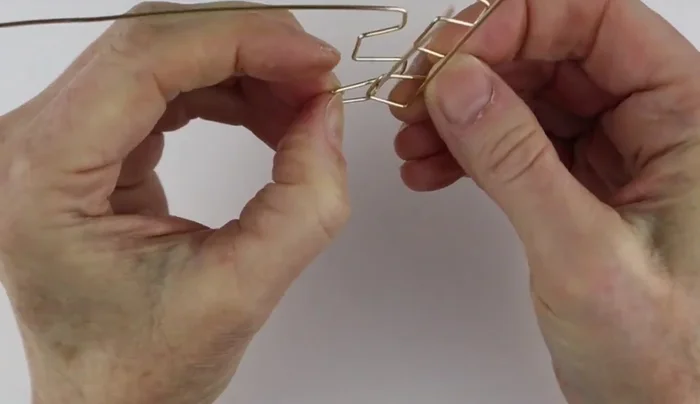
Create the Geometric Shape
- Hold the wires together and bend them at a right angle using flat pliers. Ensure a sharp bend.
- Continue bending the wires at right angles, keeping the ends snugly together. Adjust the lengths between bends to create the desired geometric shape.
- Separate the wires and adjust the bends to ensure symmetry and evenness.

Create the Geometric Shape Add and Secure Beads
- Slide beads onto each wire according to your chosen pattern.
- Position the beads and carefully bend the wire to secure them in place. Use pliers to help guide the wire and prevent slipping.
Add and Secure Beads Complete the Earring
- Create a loop at the top of each earring using round pliers. Ensure the loop is secure.
- Attach the earring hooks to the loops.
Complete the Earring


Read more: Elegant Russian Spiral Necklace Tutorial: A Step-by-Step Guide
Tips
- For a sharper bend, firmly press the wire with pliers.
- Use a template (graph paper) to plan the earring's shape if you have trouble with measurements or symmetry.
- Consider using a jig (pins in sponge or nails in wood) to help create consistent bends and angles, especially if you're using aluminum wire.
- When using a jig, allow some space beyond the pin/nail for a cleaner bend.
- Firmly hold the wire to keep the beads in position while securing them.