Accessorizing can be a fantastic way to express your personal style, and what better way to do so than with a unique, handcrafted piece? Forget generic store-bought jewelry; this tutorial will guide you through the simple yet rewarding process of creating your own stunning fabric brooch. Whether you're a seasoned crafter or a complete beginner, this project is perfect for unleashing your creativity and adding a touch of handmade charm to your wardrobe. You'll discover how easy it is to transform scraps of fabric into beautiful, wearable art, perfect for adding a pop of color or a personalized touch to your outfits.
This DIY project allows you to experiment with different fabrics, patterns, and embellishments, resulting in a truly one-of-a-kind accessory. From choosing your fabric to adding the finishing touches, we'll cover every step in detail. So, grab your sewing supplies and let's get started with the step-by-step instructions below!
Preparation and Safety Guidelines
- 10 centimeters of fabric (rule)
- Hand sewing kit (needle, thread, scissors)
- Brooch back
- Always use sharp scissors and handle them with care to avoid cuts. Keep them away from children.
- If using a hot glue gun, exercise extreme caution to prevent burns. Ensure adequate ventilation and keep away from flammable materials.
- When working with pins or needles, always use a pincushion and handle them carefully to prevent accidental pricks or injuries.
Step-by-Step Instructions
Prepare the Fabric
- Cut the fabric in half.
- Cut off the selvage (machined edge).

Prepare the Fabric Create the Fringe
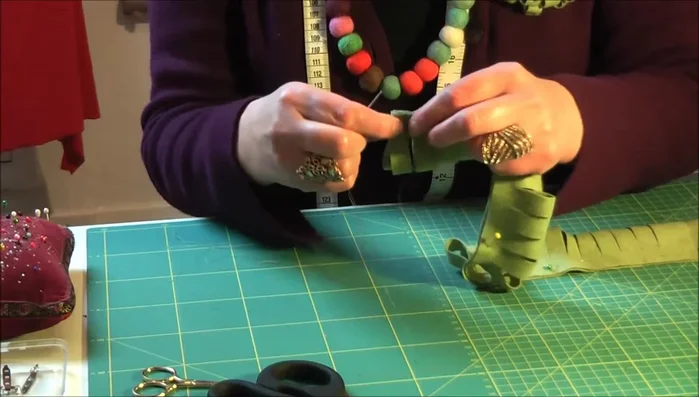
- Fold the fabric in half lengthwise and pin it along the long edge.
- Snip into the fabric to create a fringe, about a centimeter apart, leaving a small piece at the end to keep it together.
Secure the Fringe
- Stitch together the end of the fringed fabric with three or four stitches for strength and stability.
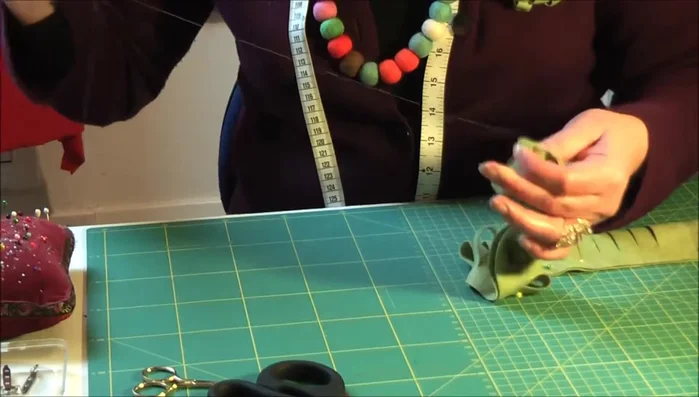
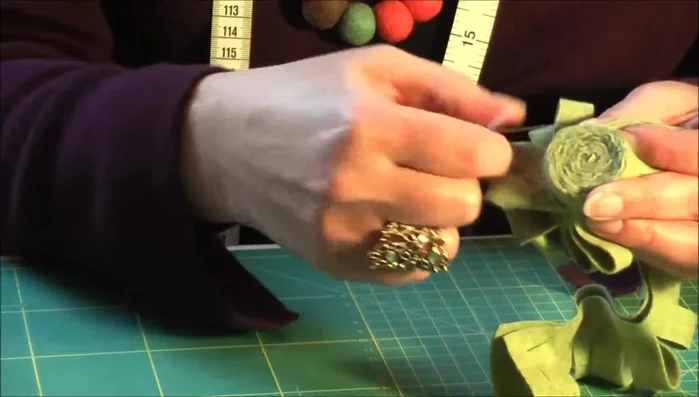
Secure the Fringe Roll and Stitch the Fabric
- Curl the fabric tightly around itself, taking stitches through the center to secure each layer.
- Continue curling and stitching until you reach the end. Use additional thread as needed.
- Secure the final stitches with several back stitches.
Roll and Stitch the Fabric Attach the Brooch Back
- Attach the brooch back by stitching through the sides and top of the fabric, securing it with several stitches.


Read more: DIY Wonky House Brooches: The Fastest & Easiest Method
Tips
- Use a fabric that doesn't fray too much.
- The thickness of the fabric will affect the size of the brooch.
- Keep a tight tension on the fabric as you stitch.
- Use multiple lengths of thread if necessary; it's unlikely one piece will be enough for the entire project.
- When attaching the brooch back, ensure you grab a substantial piece of fabric to prevent pulling.