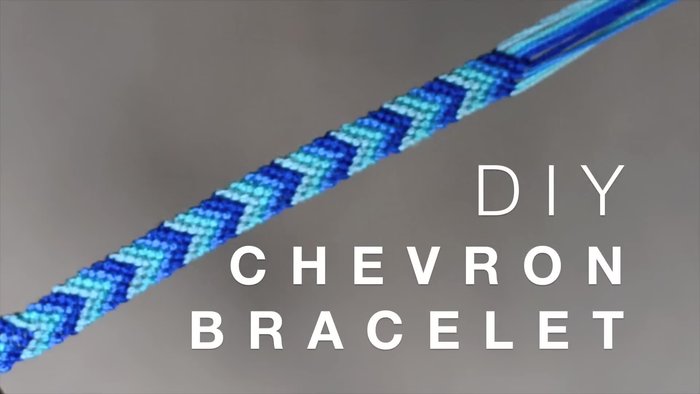
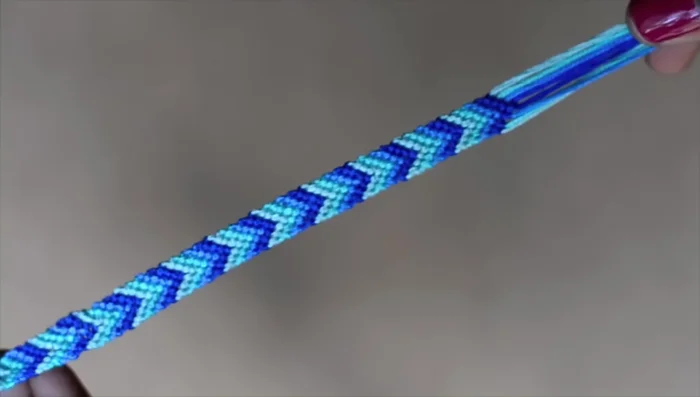
Chevron patterns, with their bold zig-zag design, add a touch of modern sophistication to any accessory. And what better way to express your personal style than by crafting your own stunning chevron bracelet? This simple DIY project requires minimal materials and utilizes a straightforward knotting technique, perfect for beginners and experienced crafters alike. Forget expensive jewelry stores – you can create a unique, eye-catching piece in just a short amount of time using readily available supplies.
This tutorial provides a comprehensive guide to making a beautiful chevron bracelet using a simple and effective knotting method. We'll walk you through each step, from gathering your supplies to finishing your stylish new accessory. Ready to get started and create your very own statement piece? Let's dive into the step-by-step instructions below!
Preparation and Safety Guidelines
- Embroidery floss
- Tape (or clipboard)
- Button
- Always use sharp scissors to cut the cord. Dull scissors can cause the cord to fray or break unexpectedly, leading to injury.
- Avoid pulling the knots too tightly, especially when starting. This can make it difficult to adjust the bracelet's size and create uneven tension.
- If working with small beads or components, ensure they are not a choking hazard. Supervise children if they are involved in this project.
Step-by-Step Instructions
Prepare Materials
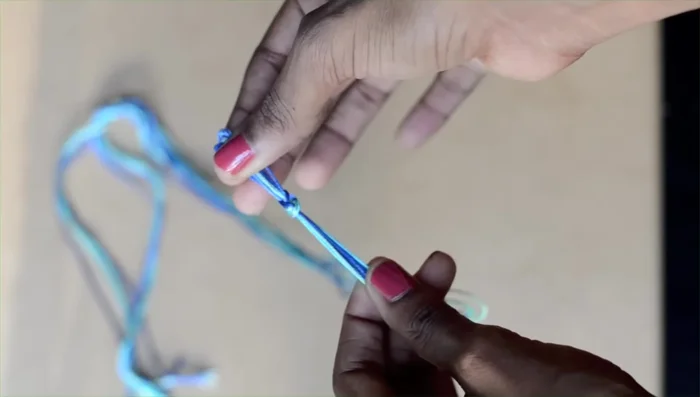
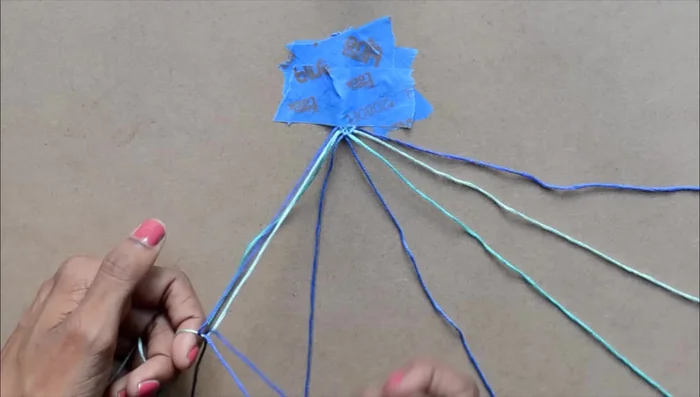
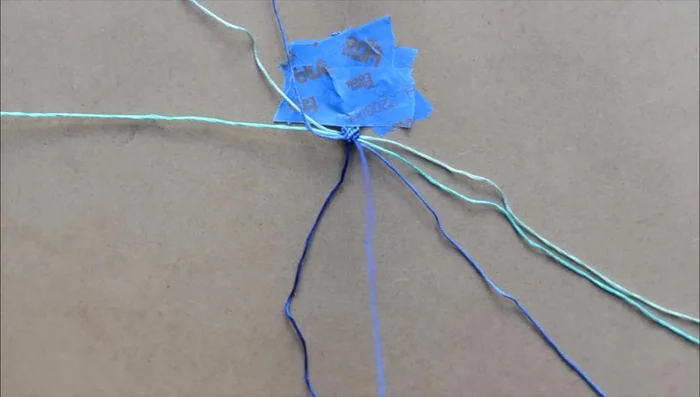
- Cut several strands (4 in this example), fold them in half, and create a loop at the top by knotting them together.

Prepare Materials Secure the Work
- Use tape or a clipboard to keep the bracelet secure while working.
Secure the Work Arrange Strands
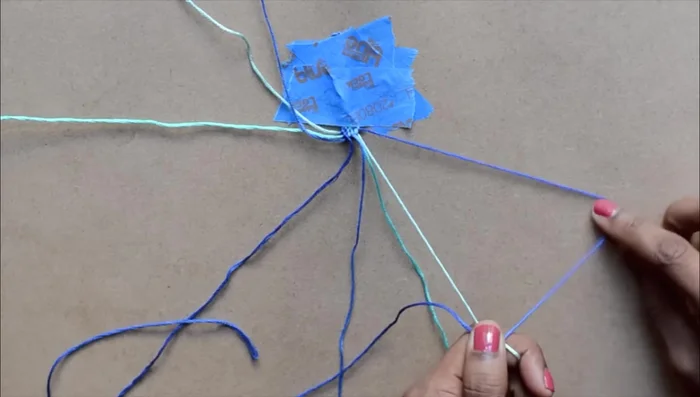
- Spread the strands out and match up the colors so that each side is a mirror image.
Arrange Strands Forward Knotting
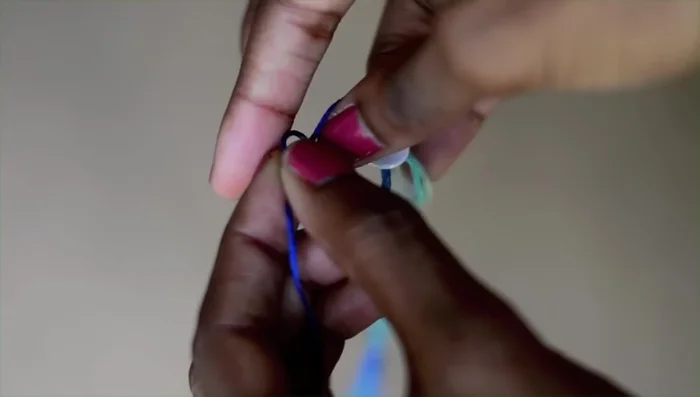
- Starting with the leftmost strand, make a knot by forming a four over the second strand, pulling it under and through the hole, and tightening. Repeat once more. Repeat this process, moving from left to right, forming two knots over each strand until you reach the center.
Forward Knotting Reverse Knotting
- Switch to the same colored strand on the right. This time, form a backward four over the adjacent strand. Create two knots and move to the next strand, working your way inward until you reach the center.
Reverse Knotting Continue Chevron Pattern
- When the two strands meet in the middle, take the right strand and do the backward four over the left strand twice. After this, switch left and right strands and keep forming knots from the outside strands into the center to create more rows.
Continue Chevron Pattern Finish Bracelet
- Continue forming knots until the bracelet reaches the desired length. Finish with a knot.
Finish Bracelet Attach Button
- Add a button by picking any two strands, threading them through the holes of the button, and tying them to secure it. Cut off any excess thread.
Attach Button

Read more: DIY Crystal Bracelet: Easy Square Knot Tutorial
Tips
- Starting with a loop makes it easy to add a button closure.
- Using matching colors on each side creates a symmetrical chevron pattern.
- If using different colors without matching, the colors will alternate as the strands switch places in the center.