Beaded necklaces are a timeless accessory, offering endless possibilities for personal expression and style. From delicate and minimalist designs to bold and vibrant statements, a beaded necklace can elevate any outfit. This inherent versatility, coupled with the surprisingly simple techniques involved, makes beading a rewarding craft for both beginners and experienced crafters. Learning to create your own necklaces allows you to tailor the design, colors, and materials precisely to your liking, resulting in a truly unique piece of jewelry that reflects your individual personality.
Today, we'll explore a captivating technique: crafting a beaded necklace featuring beautifully wrapped loops. This method adds a touch of elegance and texture, transforming ordinary beads into a stunning focal point. Ready to transform your beads into a beautiful piece of jewelry? Let's dive into the step-by-step guide below.
Preparation and Safety Guidelines
- Strand of beads
- Assortment of beads
- Seed beads
- Craft wire
- Chain
- Lobster clasp
- Four jump rings
- Round nose pliers
- Wire cutters
- Two pairs of chain nose pliers
- Always supervise children when working with small beads to prevent choking hazards.
- Use sharp scissors and wire cutters carefully to avoid cuts. Keep them out of reach of children.
- If using wire, be mindful of sharp ends and ensure they are properly secured to prevent accidental pricks.
Step-by-Step Instructions
Prepare Materials
- Arrange beads and prepare wire.

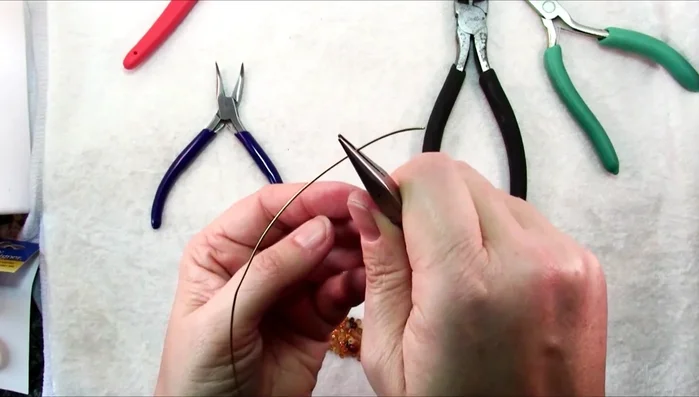
Prepare Materials Create the First Wrapped Loop
- Bend the wire at a 90-degree angle, then use round nose pliers to form a loop. Wrap the short end around the wire two to three times.
- Cut and secure the short wire end.
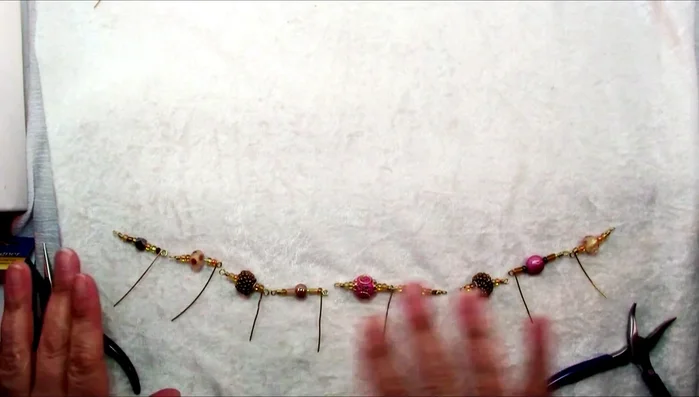
Create the First Wrapped Loop Create Multiple Links
- Add seed beads and a focal bead, then create another wrapped loop on the other end. Repeat to create multiple links, leaving the last one open.
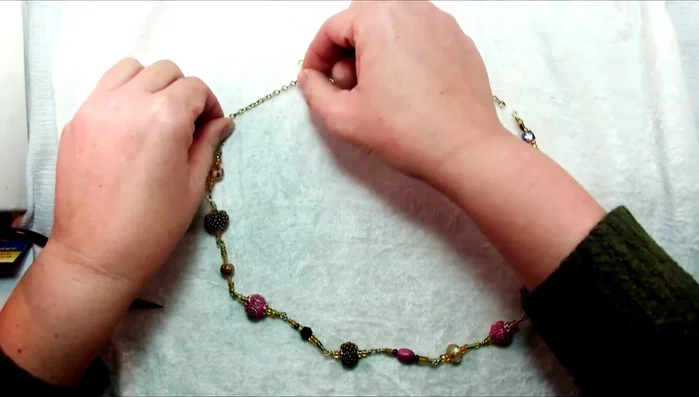
Assemble the Necklace
- Assemble the links. Arrange the links and connect them.
Assemble the Necklace Add Clasp and Finishing Touches
- Add chain, jump rings, and the lobster clasp. Open jump rings by pulling from side to side, not by spreading them.
Add Clasp and Finishing Touches

Read more: Elegant Russian Spiral Necklace Tutorial: A Step-by-Step Guide
Tips
- Practice with craft wire before using precious metals.
- Use flush cut pliers to neatly trim the wire ends.
- Open jump rings by pulling from side to side, not spreading them apart.