Earrings are the perfect accessory to elevate any outfit, adding a touch of sparkle and personality to your look. But buying designer earrings can be expensive, leaving many of us longing for that unique, handcrafted touch. Fortunately, creating stunning beaded and crystal earrings is easier than you think! With just a few simple materials and a bit of patience, you can craft exquisite pieces that reflect your individual style and become cherished additions to your jewelry collection. Forget expensive boutiques; you'll be amazed at the beautiful designs you can achieve yourself.
This tutorial provides a straightforward, step-by-step guide to making your own dazzling beaded and crystal earrings. We'll walk you through the process from selecting your materials to finishing those sparkling creations, ensuring even beginners can confidently achieve professional-looking results. Ready to unleash your inner artisan? Let's get started!
Preparation and Safety Guidelines
- 1 mm (18 gauge) copper wire
- 0.4 mm (26 gauge) copper wire
- Flush Cutters
- Chain nose pliers
- 6-step bail making pliers
- Ruler
- Size 11 miyuki seed beads
- 4.5 mm crystal rondelles
- Avoid using sharp tools near your eyes. Always work in a well-lit area to prevent accidental pricks or scratches.
- Small beads and crystals pose a choking hazard. Keep them away from children and pets.
- If you experience any irritation from the jewelry materials, discontinue use immediately and consult a doctor if necessary.
Step-by-Step Instructions
Create the earring base
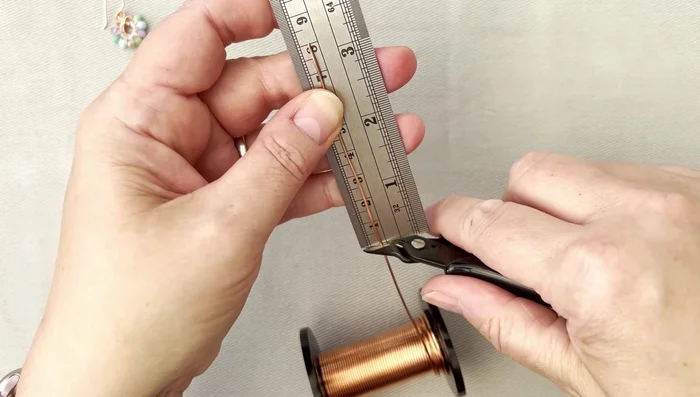
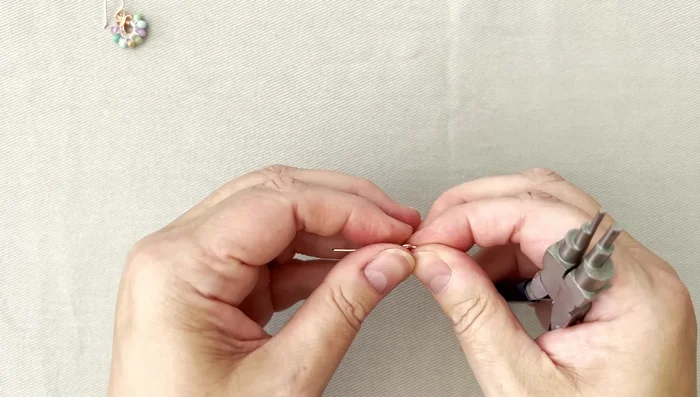
- Measure and cut approximately 7-8cm (3 inches) of 1 mm copper wire. Create a loop at one end using the pliers.
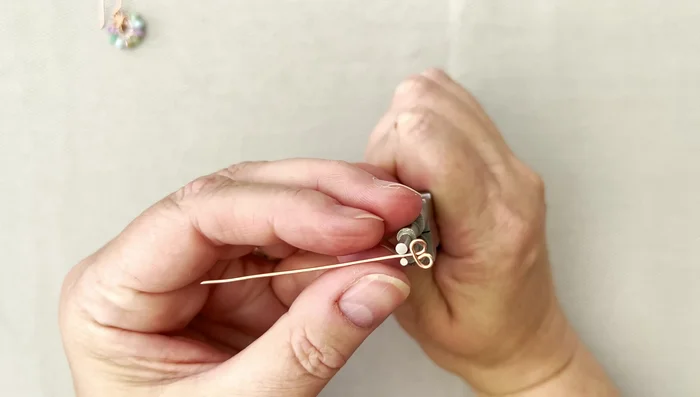
- Using the first step of your 6-step bail making pliers, bend the wire 2-3mm from the loop, creating a smaller loop.
- Rotate the pliers and bend the wire again 2-3mm from the loop, this time creating a larger loop that overlaps the smaller loop, forming a troil shape.
- Using the first step of the pliers, create a small kink in the wire to prepare for the next loop.

Create the earring base - Use the third step of the pliers to create a larger loop, bending the wire around and underneath.
- Adjust the shape as needed. Gently squish the wire to secure the shape.
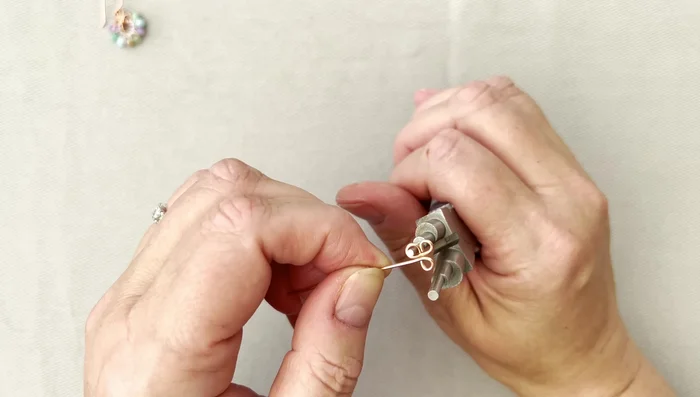
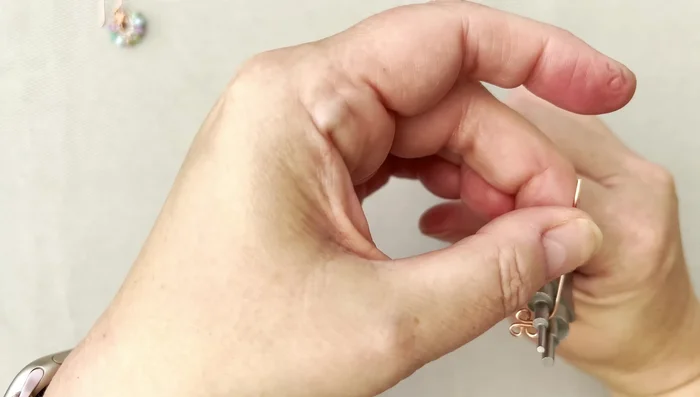
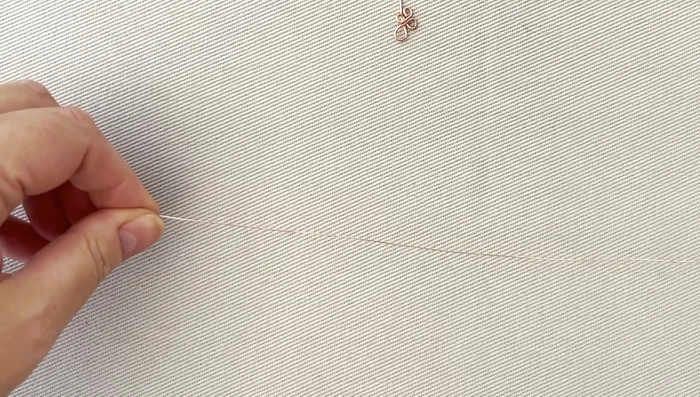
Create the earring base Attach and secure the smaller loop
- Take a 30-40cm length of 0.4mm wire and thread it through the smaller loop. Wrap the wire around the connecting point of the two loops four times, then twice around the smaller loop only, securing it.
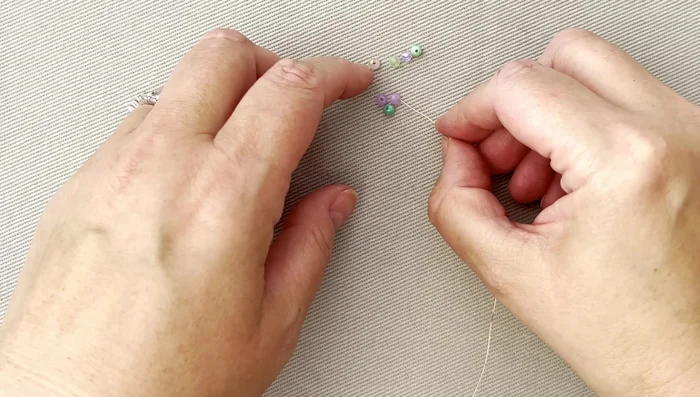
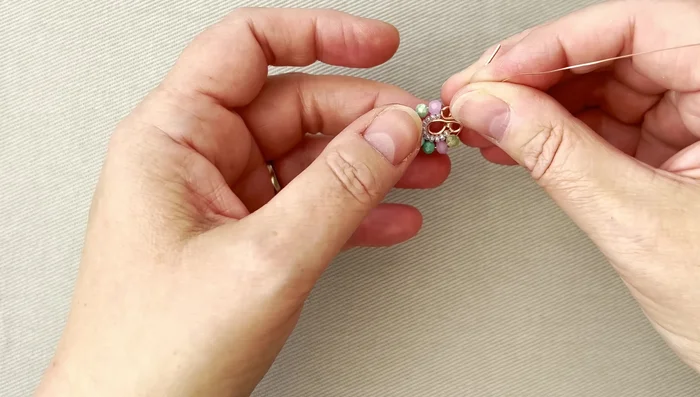
Attach and secure the smaller loop Add and secure the seed beads
- String 11 seed beads onto the wire and loop them around the larger frame, ensuring they are not too tight against the frame.
- Secure the seed beads by wrapping the wire around the larger loop twice.
Add and secure the seed beads Add and secure the crystals
- Add 8 crystal rondelles in a desired pattern.
- Wrap the wire around the crystals several times, ensuring not to pull too tightly. Gently adjust placement with your fingers.
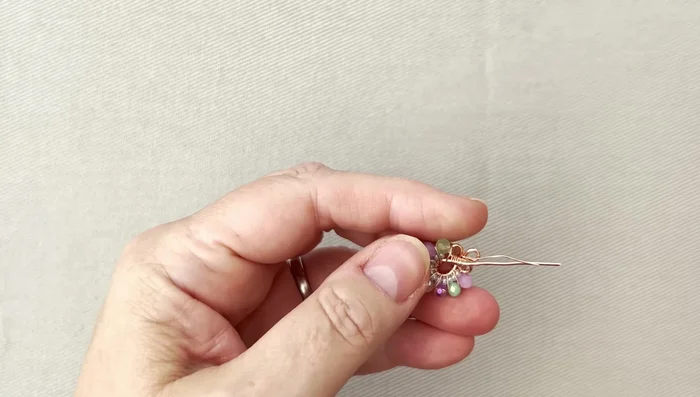
Add and secure the crystals Finish and attach ear wire
- Cut excess wire and neaten the ends. Add an ear wire to complete the earring. Repeat steps for the second earring.
Finish and attach ear wire

Read more: Twisted Wire Spiral Earrings: A Step-by-Step Guide
Tips
- Don't pull too tight when wrapping around the crystals; this can create an uneven look.
- Ensure there's enough space between the beads and crystals for comfortable wrapping.