Leather necklaces offer a timeless and versatile accessory, effortlessly elevating any outfit. But the price tag on designer leather necklaces can be surprisingly steep. This tutorial demonstrates how to craft your own adjustable leather necklace, a project perfect for beginners looking to explore the world of DIY jewelry making. Forget expensive boutiques; you'll be amazed at how easy it is to create a stylish and personalized piece using readily available materials. Learning this simple technique opens the door to countless creative possibilities, allowing you to experiment with different leather colors, textures, and embellishments to match your unique style.
This easy-to-follow guide provides a step-by-step process, perfect for even the most novice crafters. With just a few basic tools and materials, you’ll be surprised at how quickly you can assemble a stunning, adjustable leather necklace that’s sure to become a cherished part of your jewelry collection. Let's get started!
Preparation and Safety Guidelines
- Leather cord (at least 3 feet)
- Pliers
- Scissors
- Pendant (optional)
- Beads (optional)
- Always supervise children around small parts like jump rings and clasps to prevent choking hazards.
- Use sharp tools like cutters and pliers carefully to avoid cuts and injuries. Consider wearing safety gloves.
- Be mindful of the leather's strength. Avoid over-tightening or applying excessive force to the cord, as it could break or snap.
Step-by-Step Instructions
Prepare the Leather Cord
- Cut at least three feet of leather cord. Longer is better if you're a beginner.
Create the First Sliding Knot
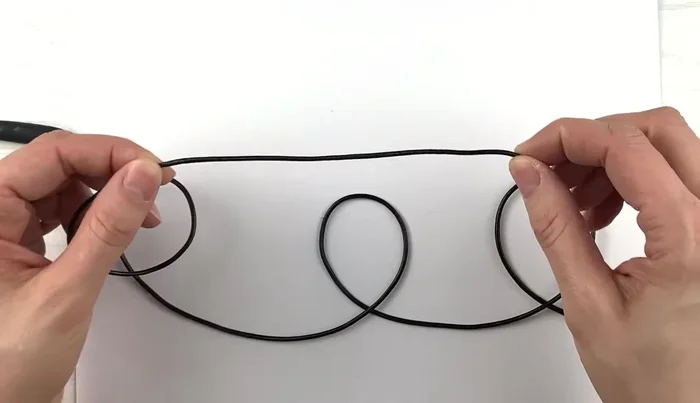
- Take one end of the cord and measure about eight inches. Fold this in half.
- Take the other end of the cord and place it underneath the folded section, creating three strands.
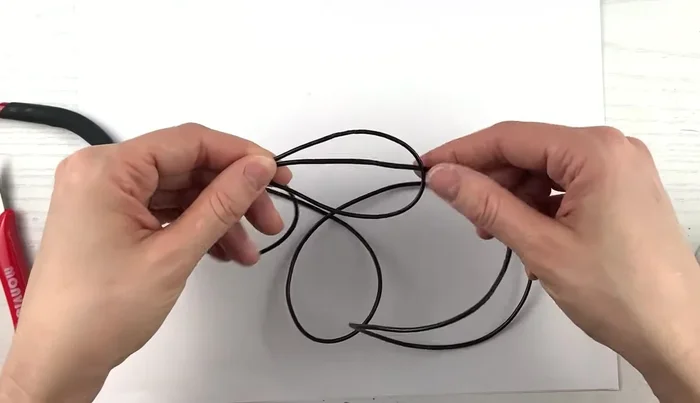
- Loop the three strands three times, ensuring the loops are not twisted. Make sure you loop towards the hand holding the cord, not away from it.
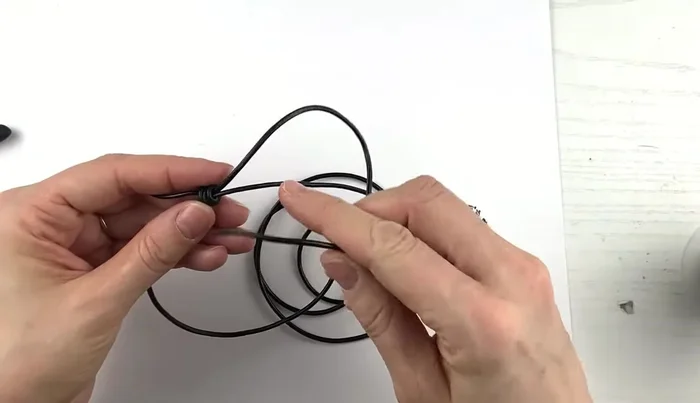
- After the three loops, bring the cord down through the main loop, creating a slip knot.

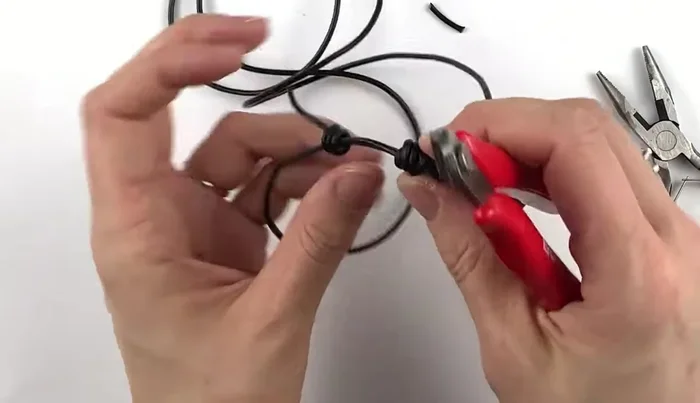
Create the First Sliding Knot - Tighten the knot by pulling and twisting the loops. Use pliers if needed. Ensure the knot is tight enough to hold, but loose enough for the cord to slide through easily.
Create the Second Sliding Knot
- Repeat steps 2-6 on the other end of the cord.
Create the Second Sliding Knot Finish the Necklace
- Trim the excess cord. Do not glue the knots.
Finish the Necklace

Read more: Elegant Russian Spiral Necklace Tutorial: A Step-by-Step Guide
Tips
- Cut extra cord – it’s better to have too much than not enough!
- Add any pendants or beads before tying the knots.
- Keep the loops untwisted for a clean finish.
- Don't overtighten the knots, making sure the cord can slide easily.
- If the knot is too tight, you can undo and retry - it's easy to fix!