Bohemian style, with its vibrant colours, eclectic mix of textures, and carefree spirit, has captivated fashion enthusiasts for decades. This free-spirited aesthetic translates beautifully into jewellery, particularly bracelets, offering a fantastic outlet for creativity and self-expression. From delicate beaded strands to chunky statement pieces, the possibilities are endless, allowing you to craft unique accessories perfectly reflecting your individual style. Bohemian bracelets are surprisingly easy to make, even for beginners.
This article will guide you through two simple yet effective techniques for creating stunning Bohemian bracelets, perfect for adding a touch of wanderlust to your wardrobe or creating thoughtful, handmade gifts. Whether you prefer a simple, elegant design or a more flamboyant, layered look, you'll find a technique here to inspire you. Get ready to delve into the step-by-step instructions and unleash your inner artisan!
Preparation and Safety Guidelines
- Chain
- Cording
- Jump rings
- Head pins
- Beads
- Needle
- Bracelet station (optional)
- Glue
- Clasp
- Always supervise children when using sharp tools like wire cutters or scissors.
- Be mindful of potential allergies. Some beads and wires may cause skin irritation. Consider using hypoallergenic materials.
- Avoid wearing bracelets while participating in activities that could snag or damage them (e.g., strenuous exercise, sleeping).
Step-by-Step Instructions
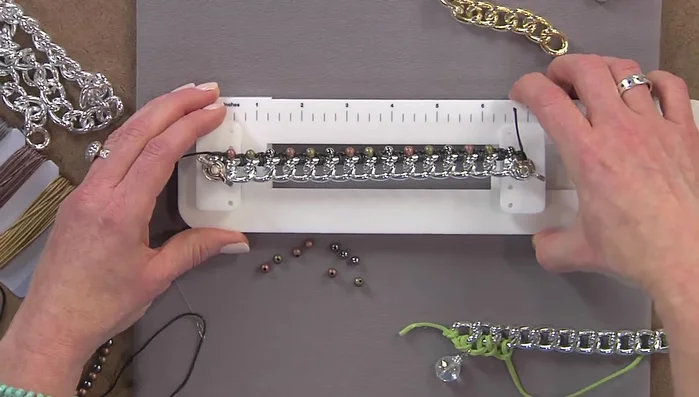
Prepare and Secure the Chain
- For smaller scale projects, use a bracelet station to hold your chain securely, preventing twisting.

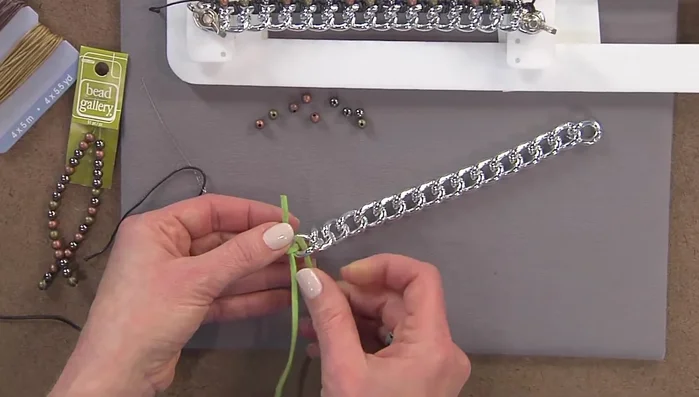
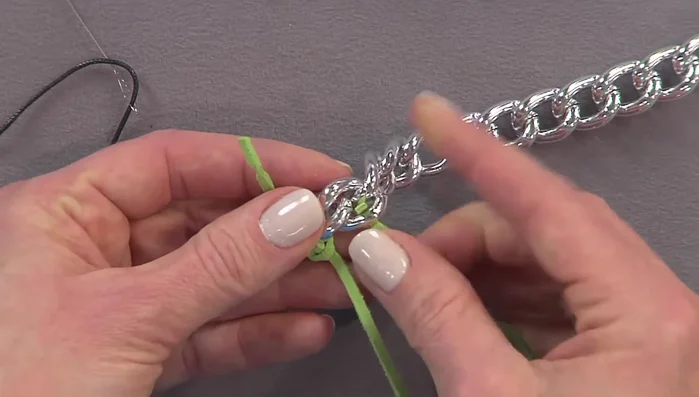
Prepare and Secure the Chain Attaching the Cord: Larks Head Knot
- Tie a simple knot to attach the cording to the chain.
- Pass the cording through the back of the chain link and then down through the middle.
- Repeat the knot by coming up through the back of the chain link again and down through the middle. This forms the entire stitch.
- Continue this knotting process along the entire chain.
Attaching the Cord: Larks Head Knot Adding Dangles
- Add dangles using jump rings or head pins with beads. Attach them to the cord or between the chain links.
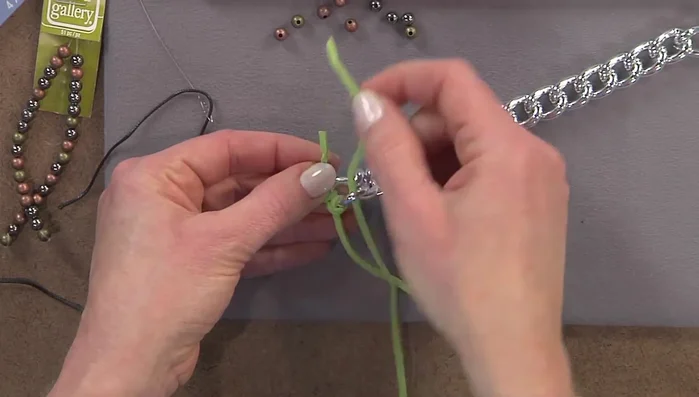
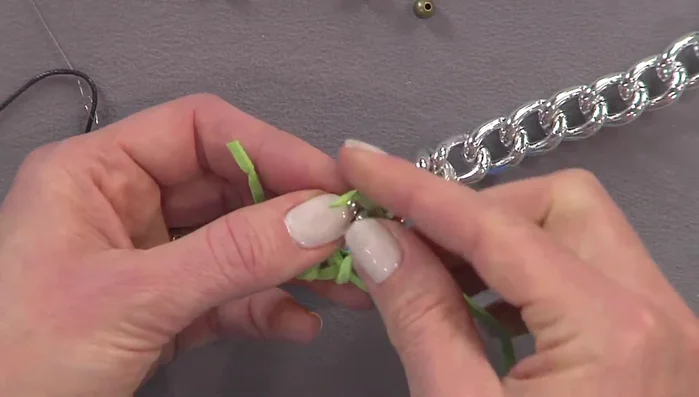
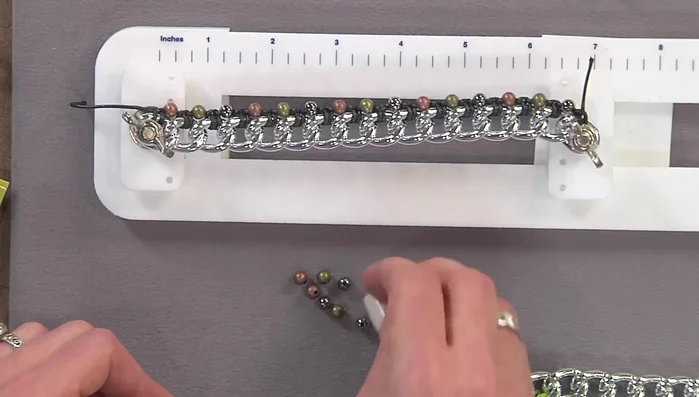
Adding Dangles Beading Technique: Preparing Materials
- Use thinner cording (cotton cord is suggested) for beading, ensuring it can pass through your chosen beads.
Beading Technique: Preparing Materials Beading Technique: Stringing and Knotting
- String beads onto the needle and pull them through, positioning them between chain links.
- Continue the same knotting technique as before, adding beads between each knot.
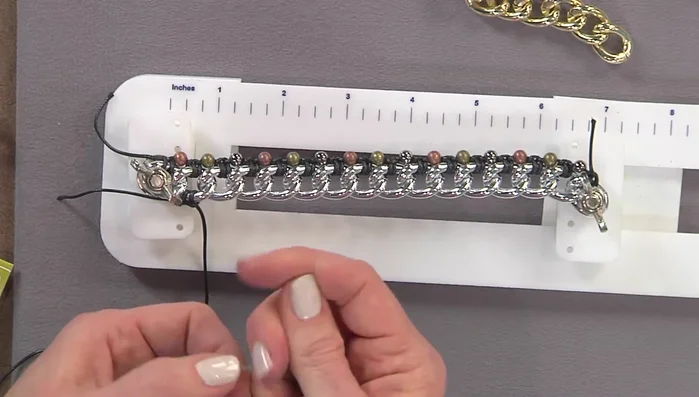
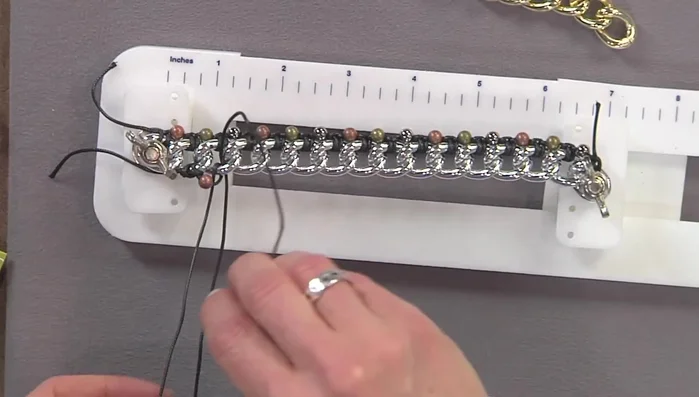
Beading Technique: Stringing and Knotting Finishing the Bracelet
- Once finished, tie a knot at the end, add glue for security, and attach a clasp.
Finishing the Bracelet

Read more: Elegant Russian Spiral Necklace Tutorial: A Step-by-Step Guide
Tips
- Use a large link chain and large cording for faster work on larger bracelets.
- Keep the chain from twisting, especially when using larger materials.
- Use a large-eye needle or collapsible eye needle that suits your beads' size.
- Keep a short tail of cording to ease the process of passing it through each bead.
- Position the cording between the chain links to keep the bracelet smooth and flat.